Side Dish

Egyptian Summer Mezze – Tomato & Cumin Chickpeas

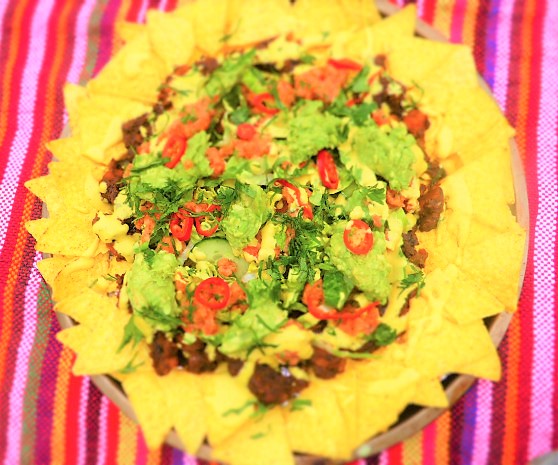
Egyptian Lunch on the terrace with Hulba (Fenugreek Dip), Roasted Cauliflower Wedges and Spicy Aubergines

Have you tried Egyptian food?  This is the ideal recipe to start.  Many people ask for quick and easy recipes that are tasty, nutritious and something that can be rustled up without fuss.  Here we are!

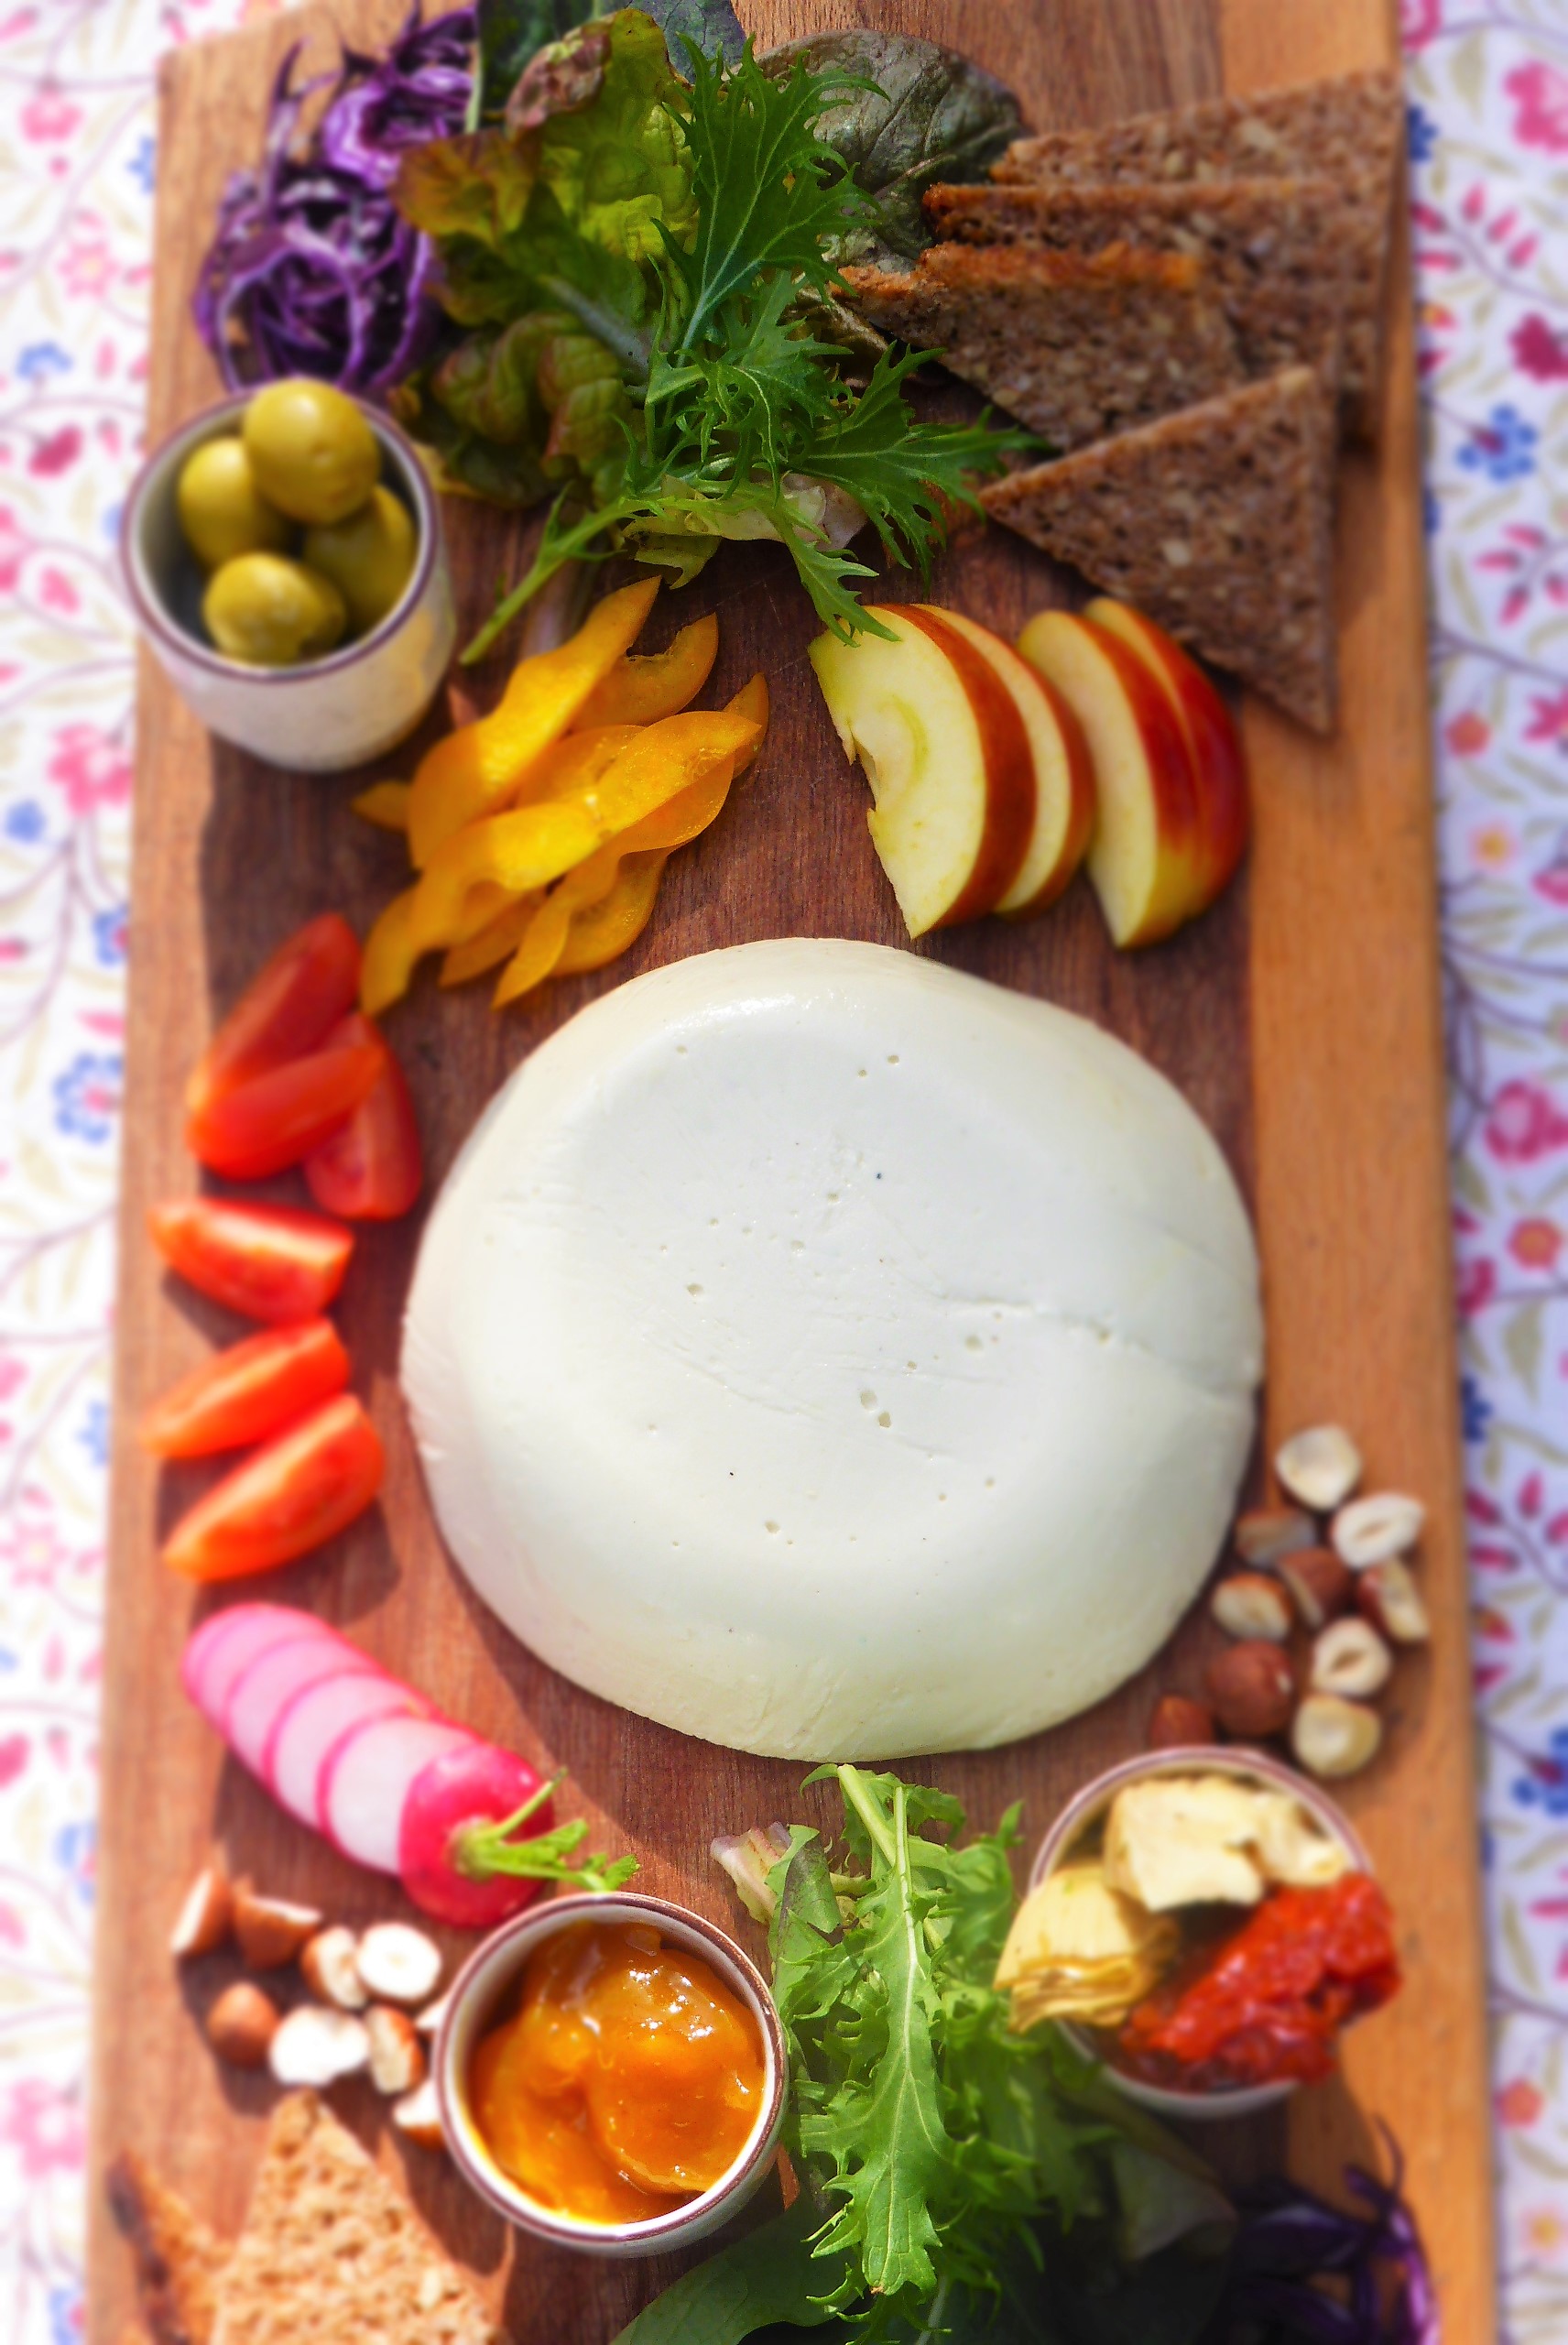
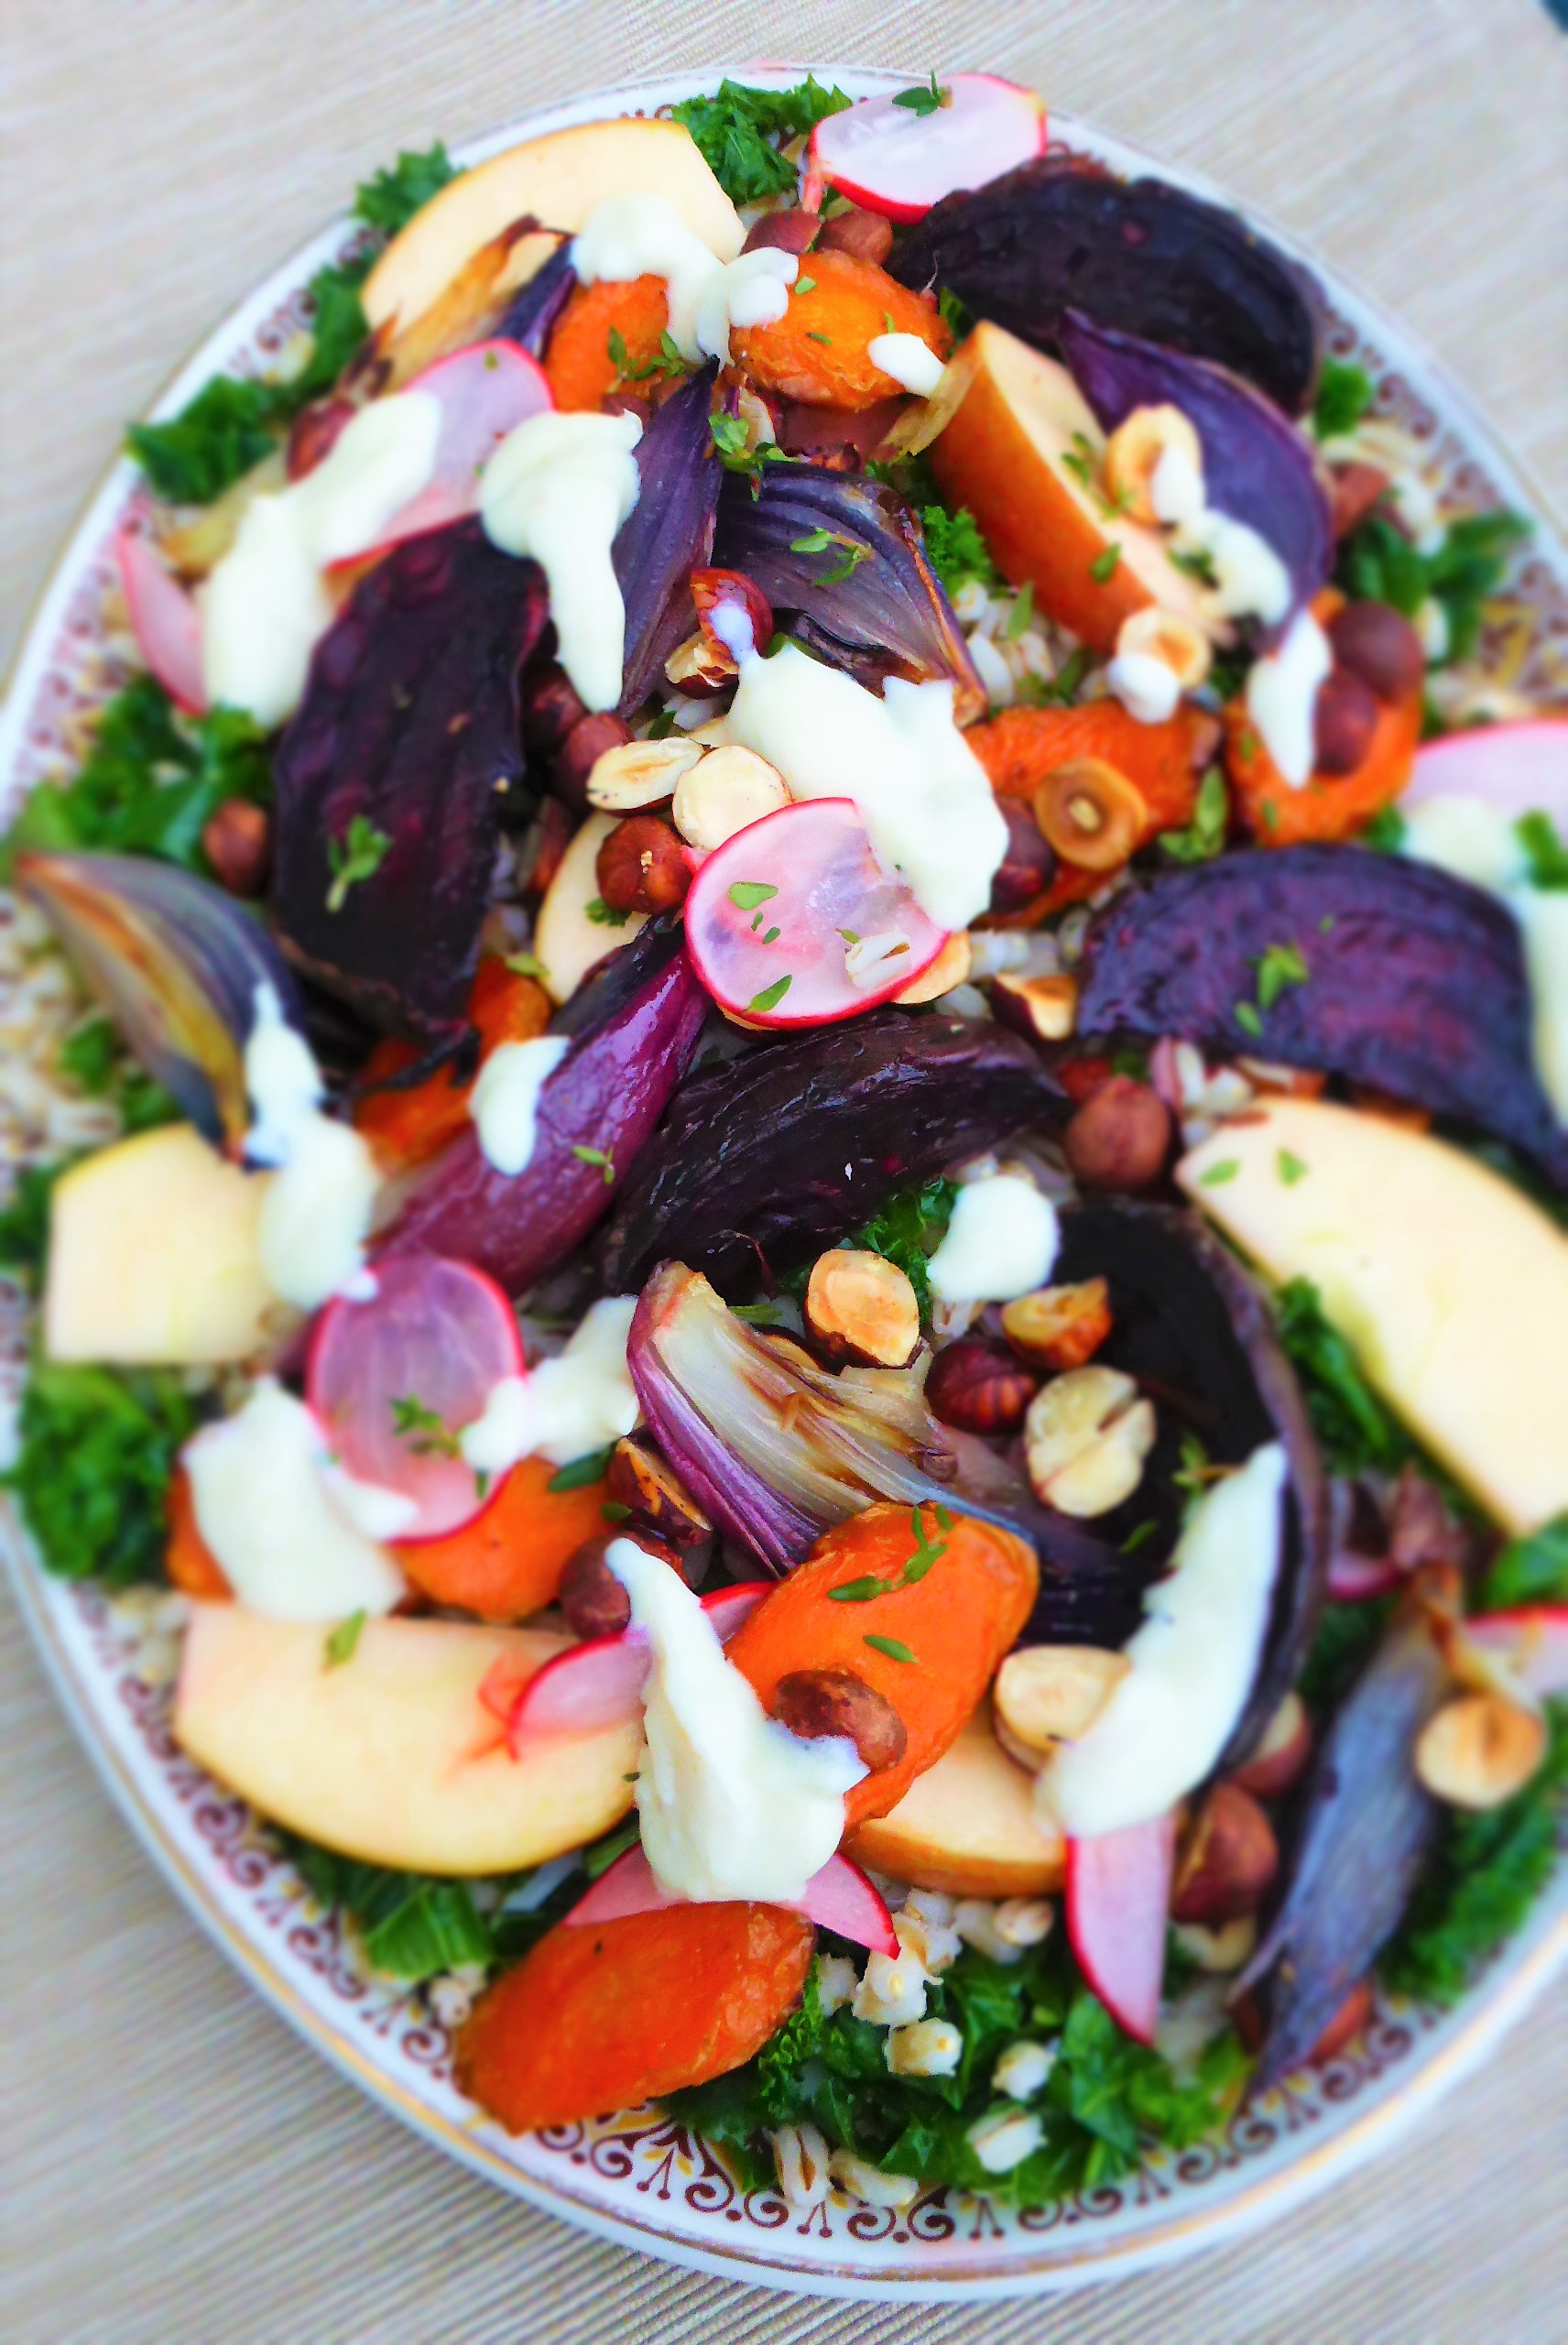
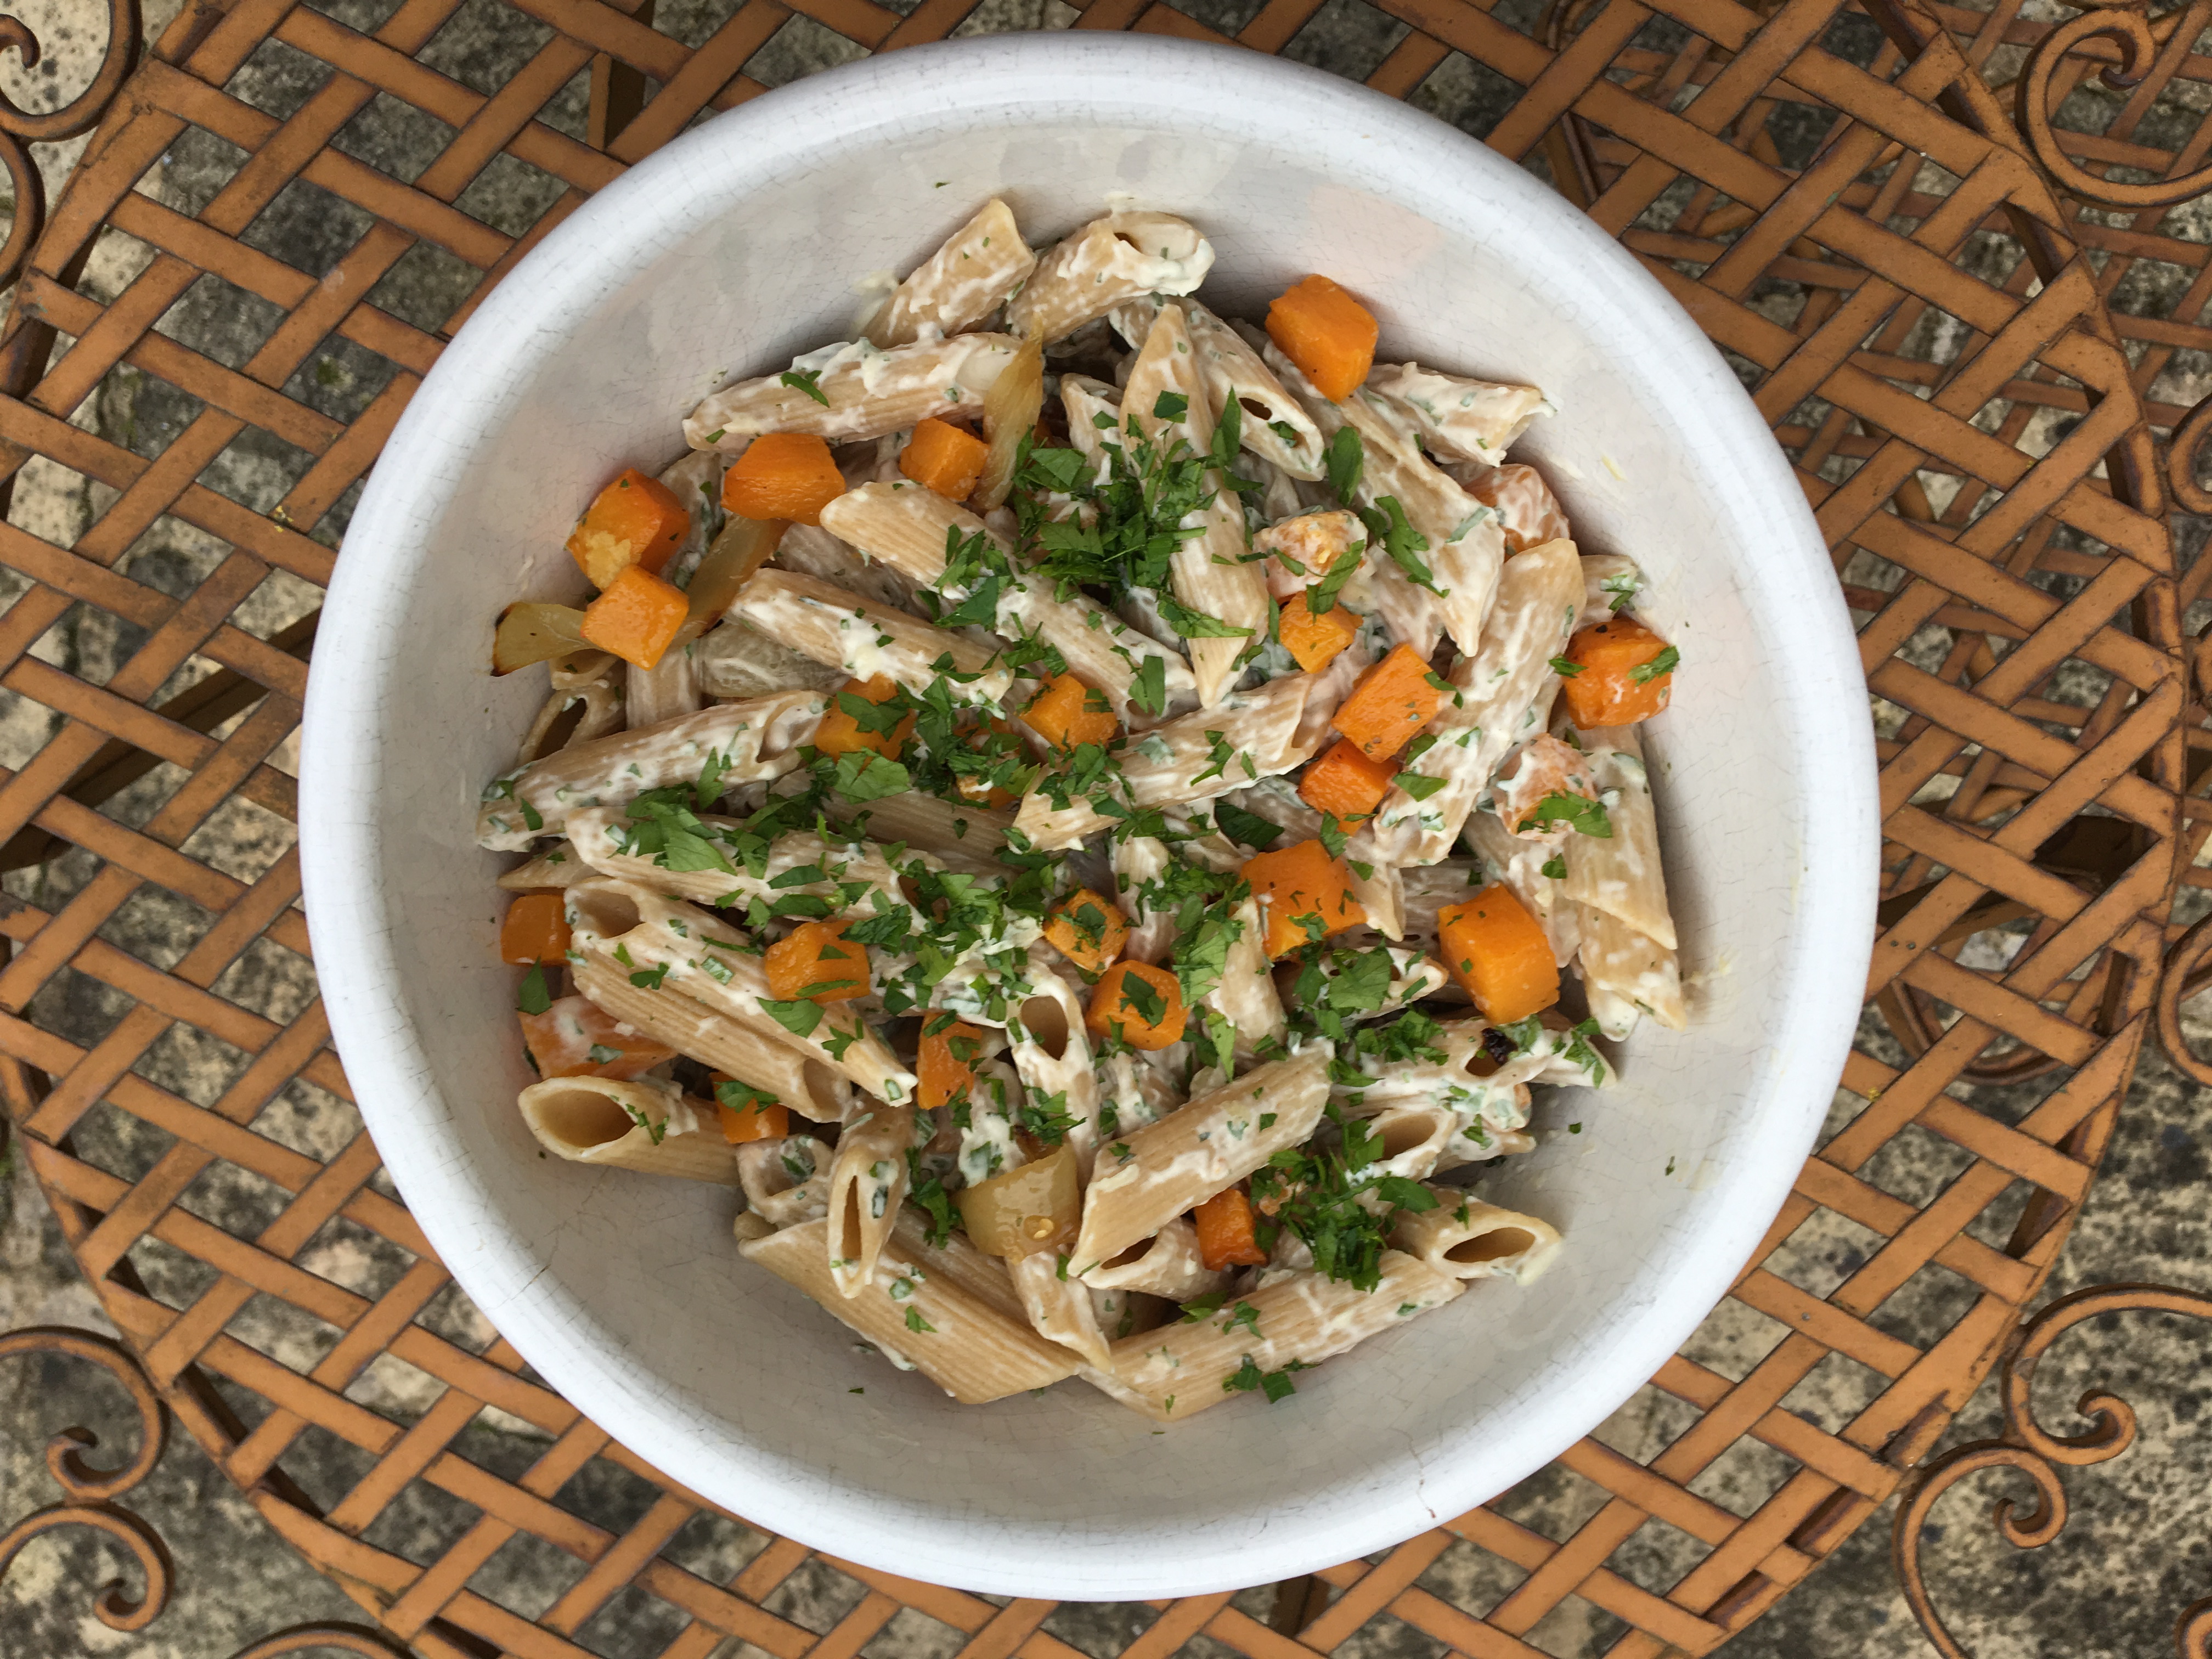
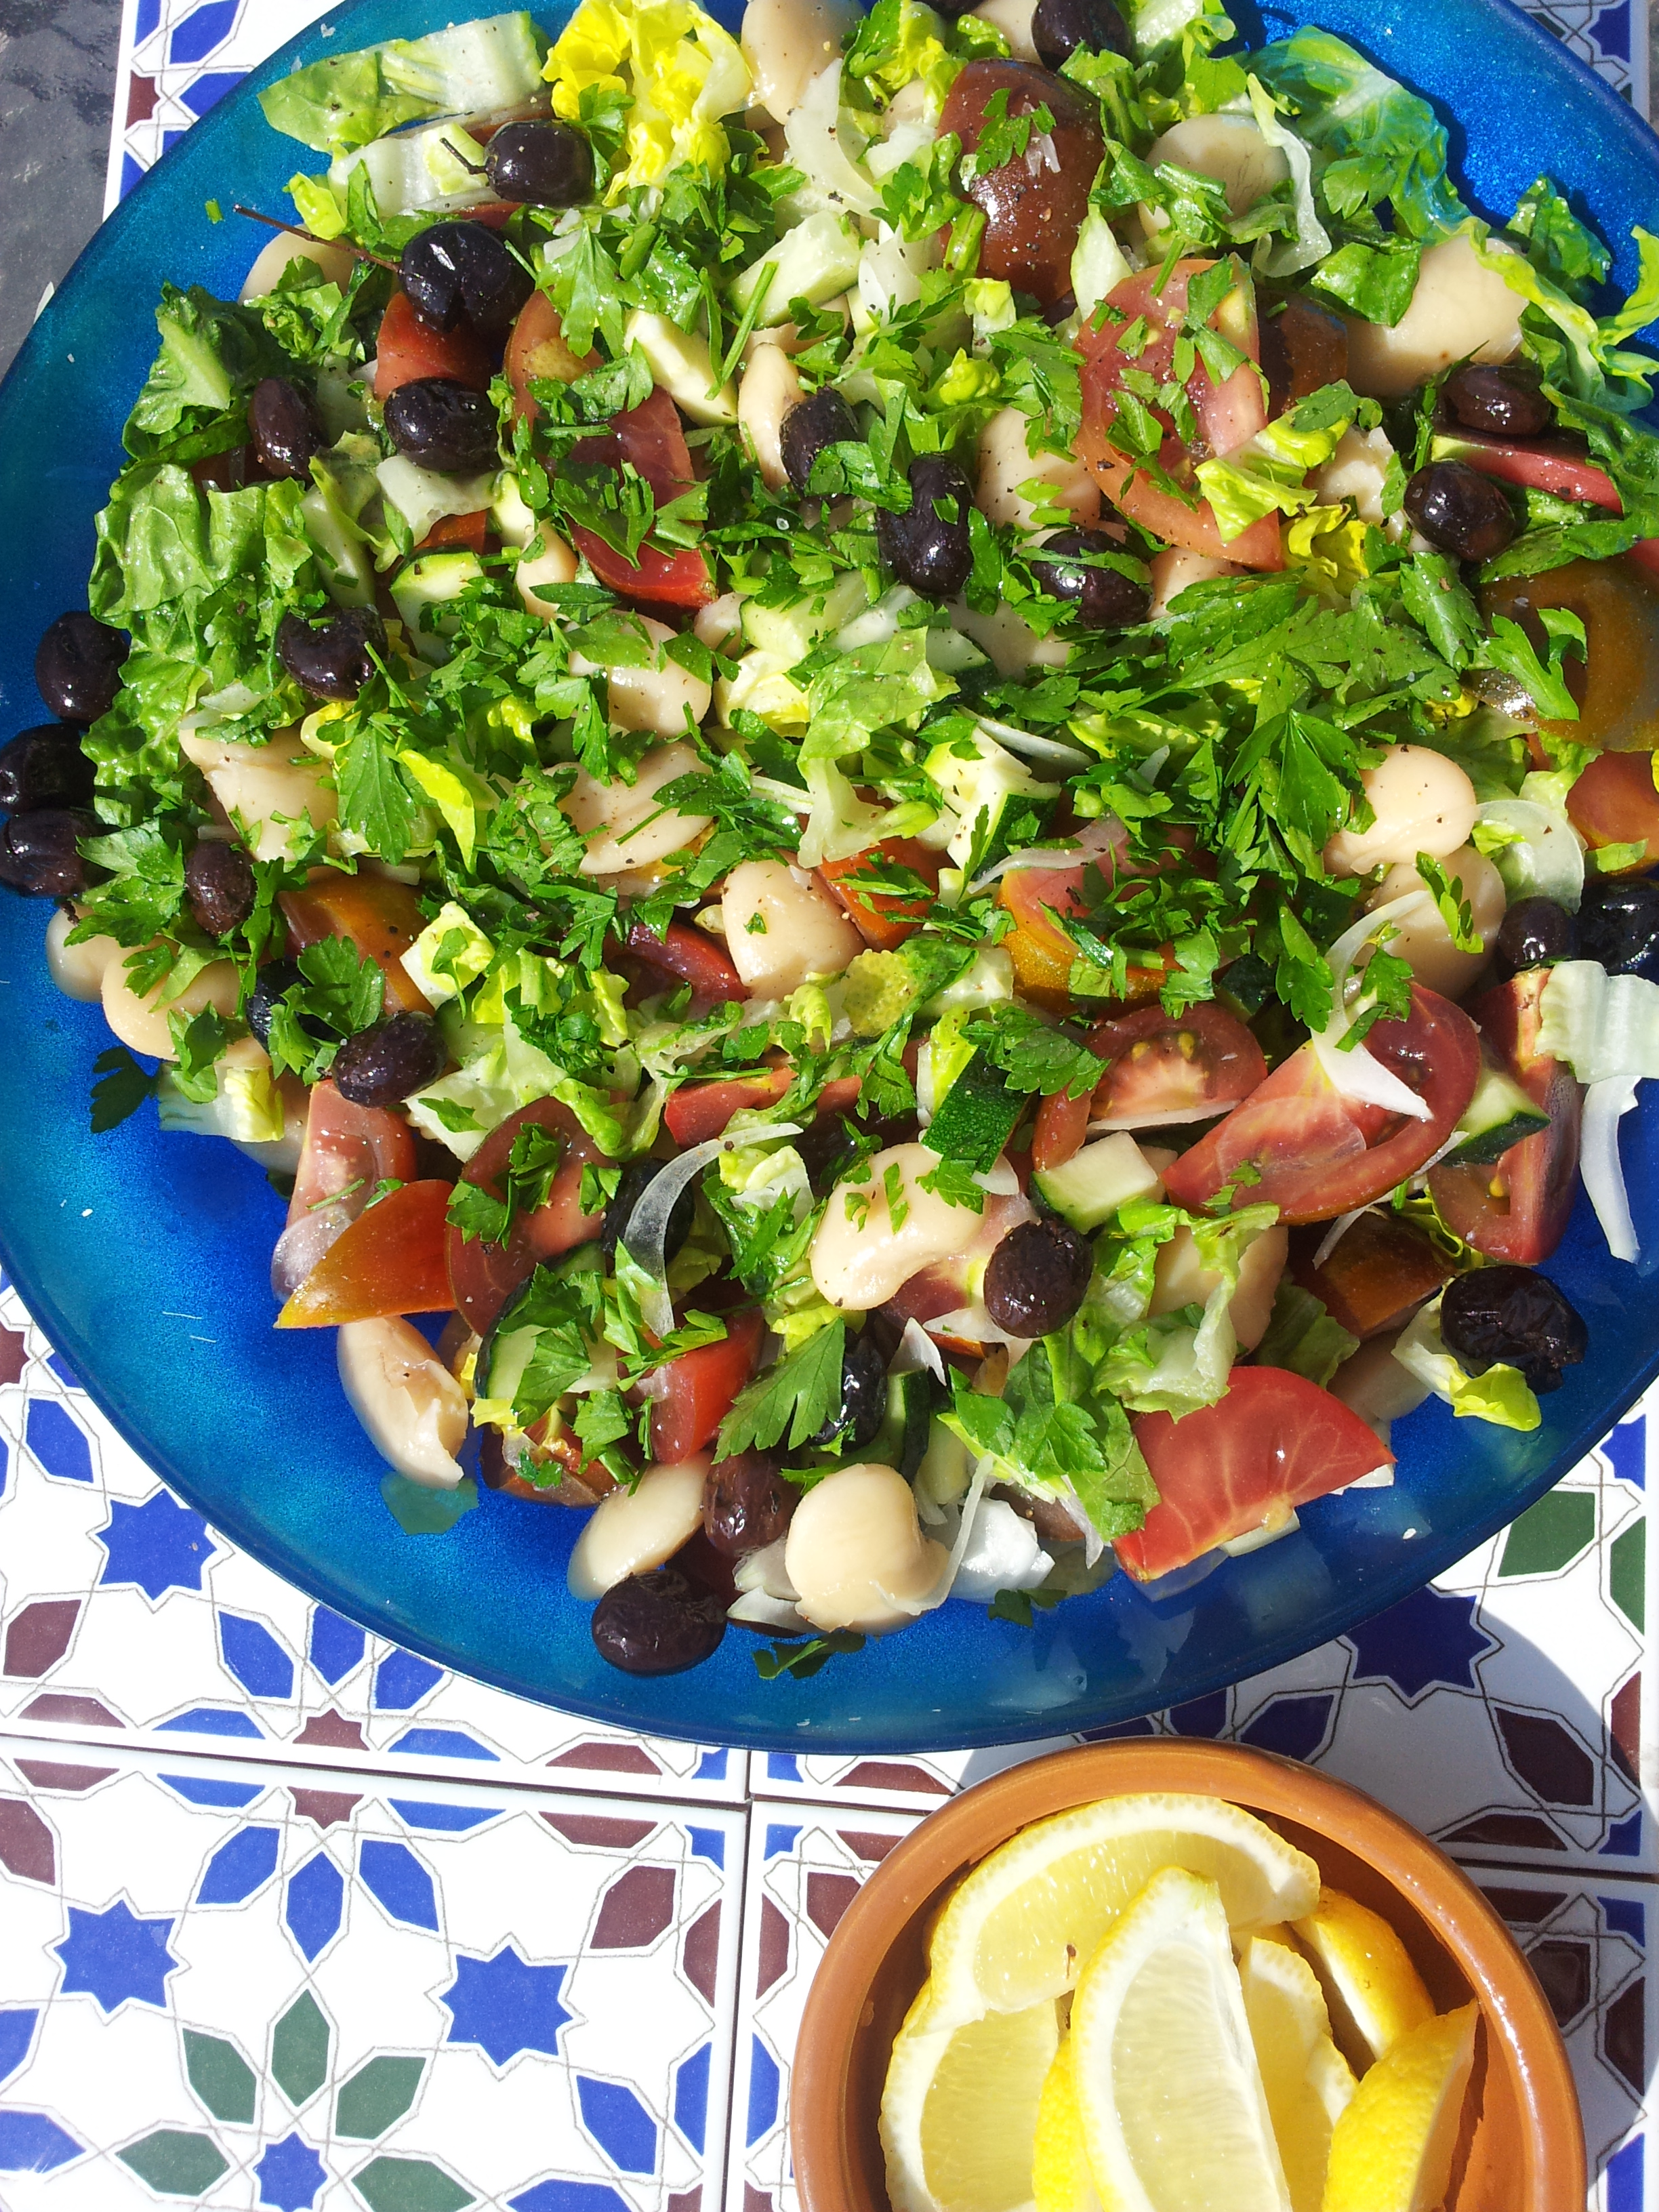
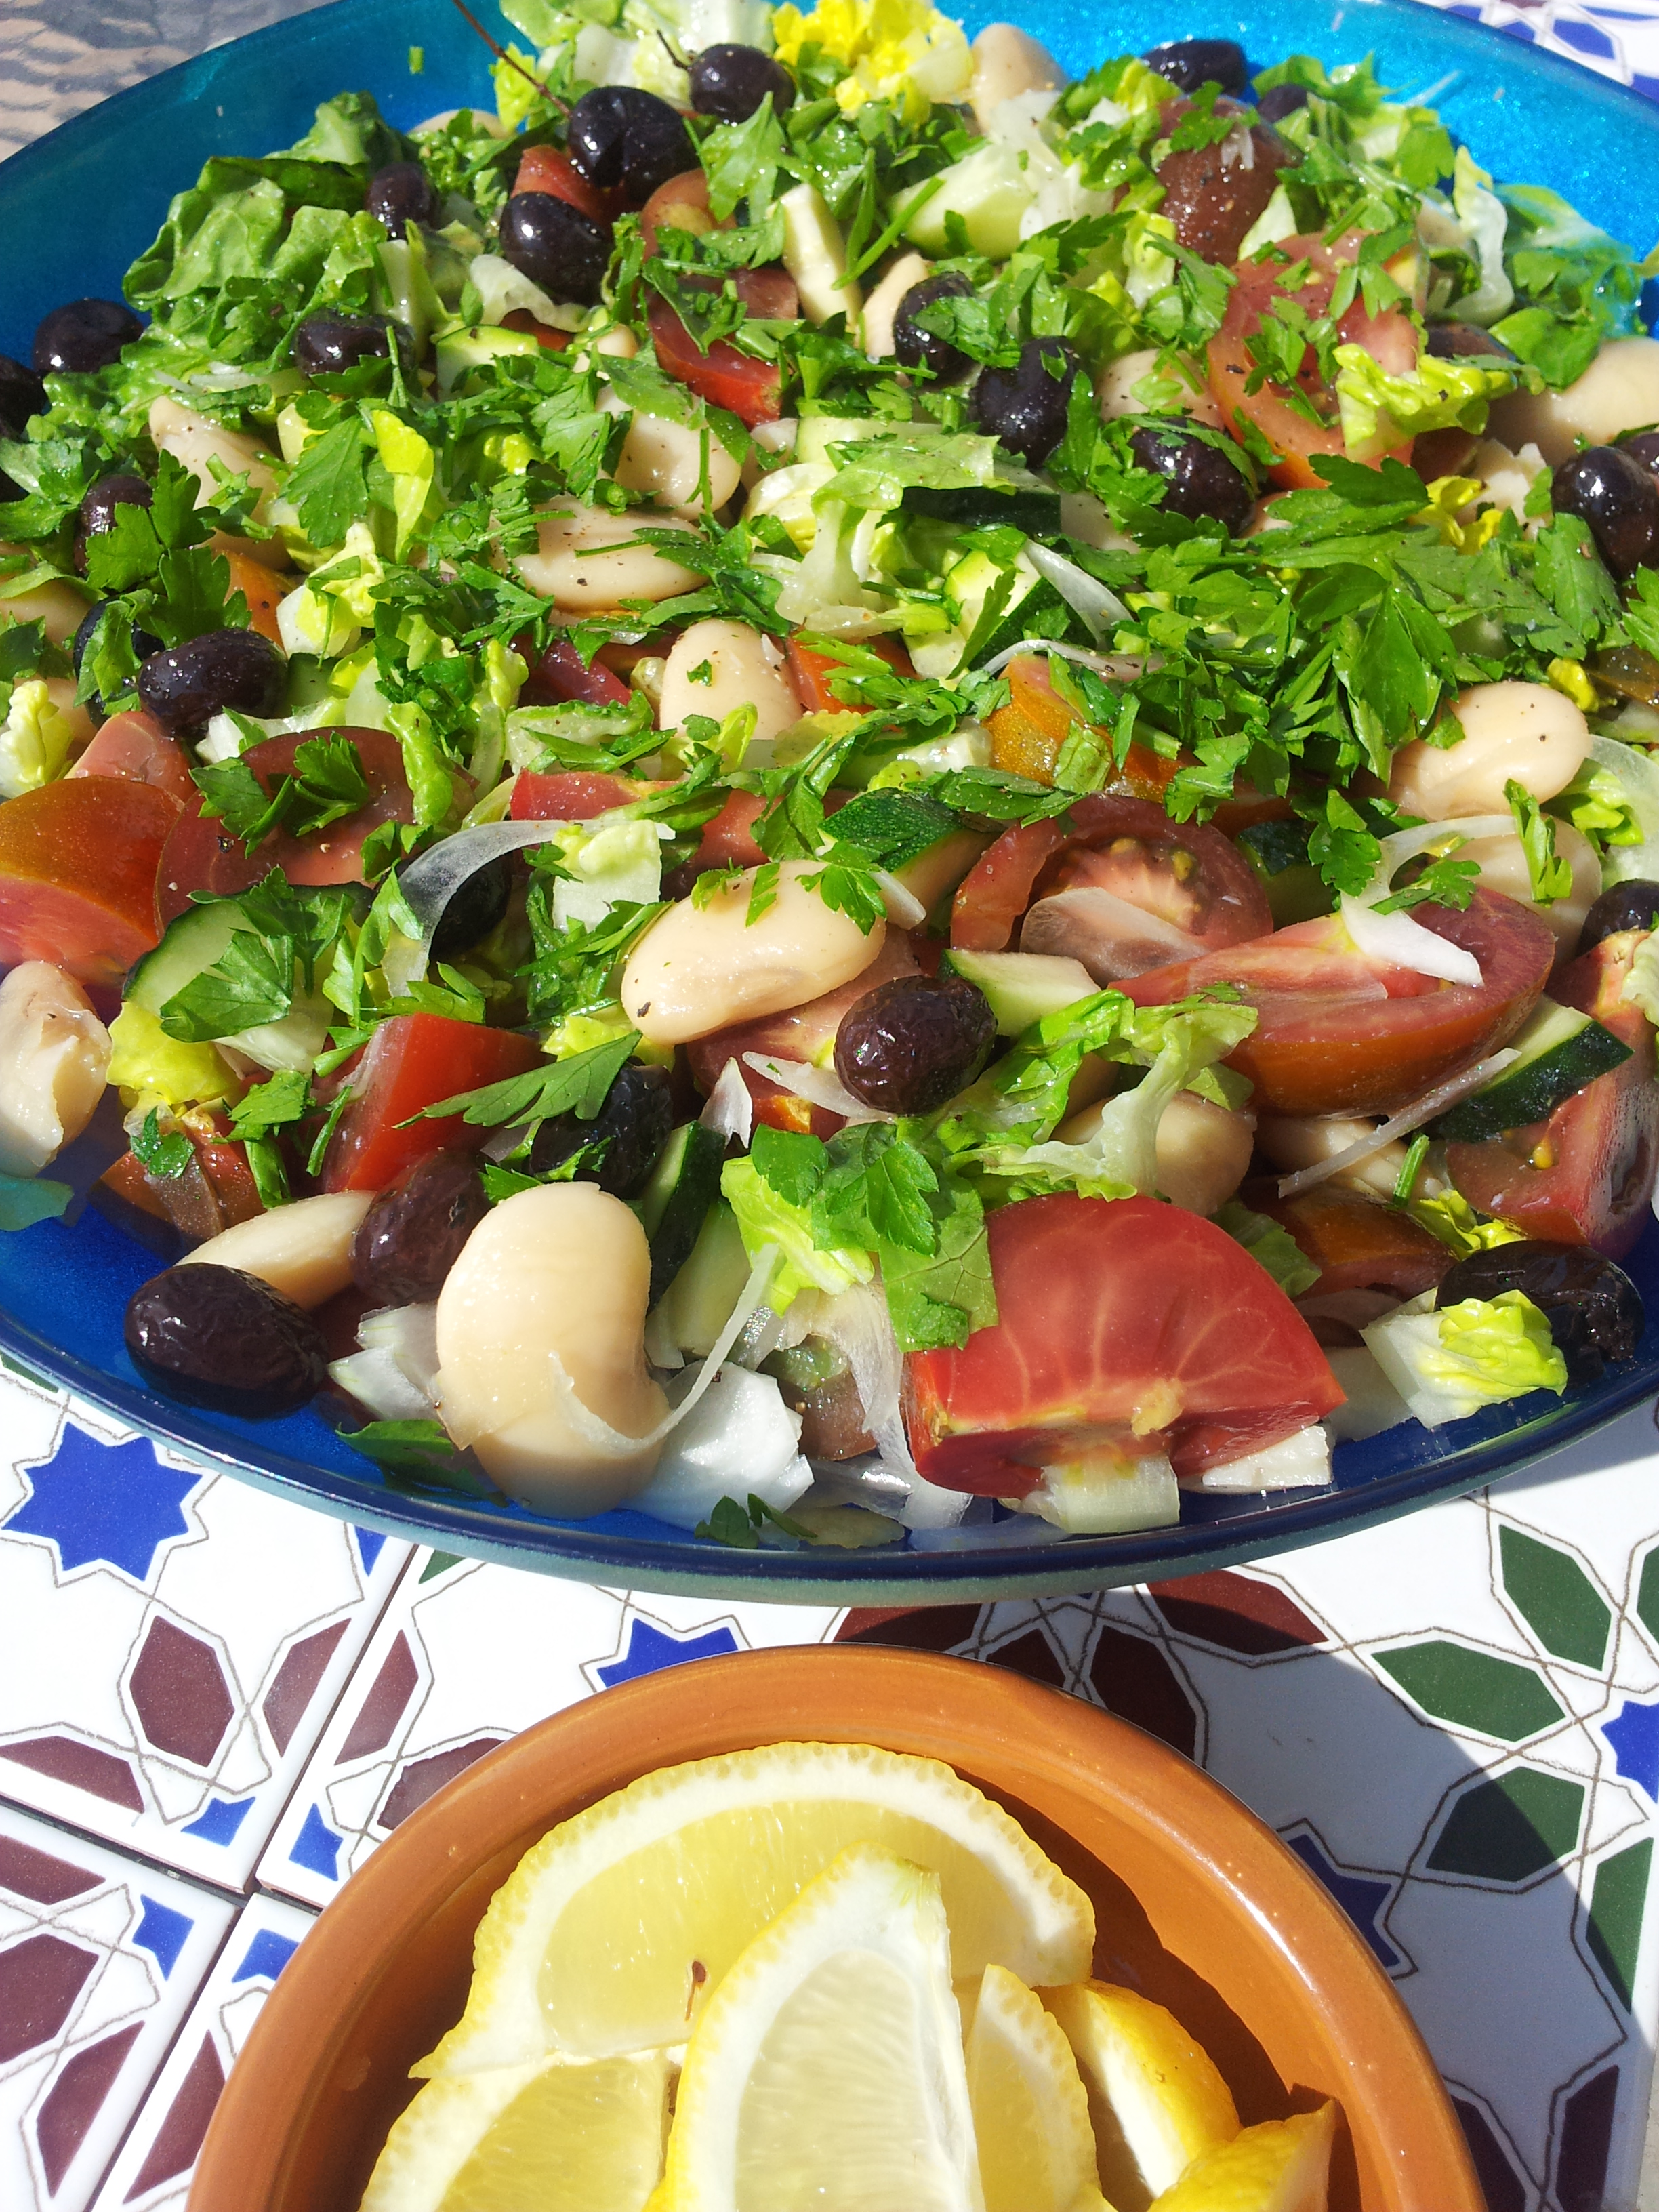
This an ideal summer dish, light and good to go for a picnic twist, it can be eaten hot or cold.  It seems with all the sunshine we’ve been getting in the UK, the tomatoes are here!  Great news indeed.  Using nice ripe tomatoes in this dish with make all the difference.

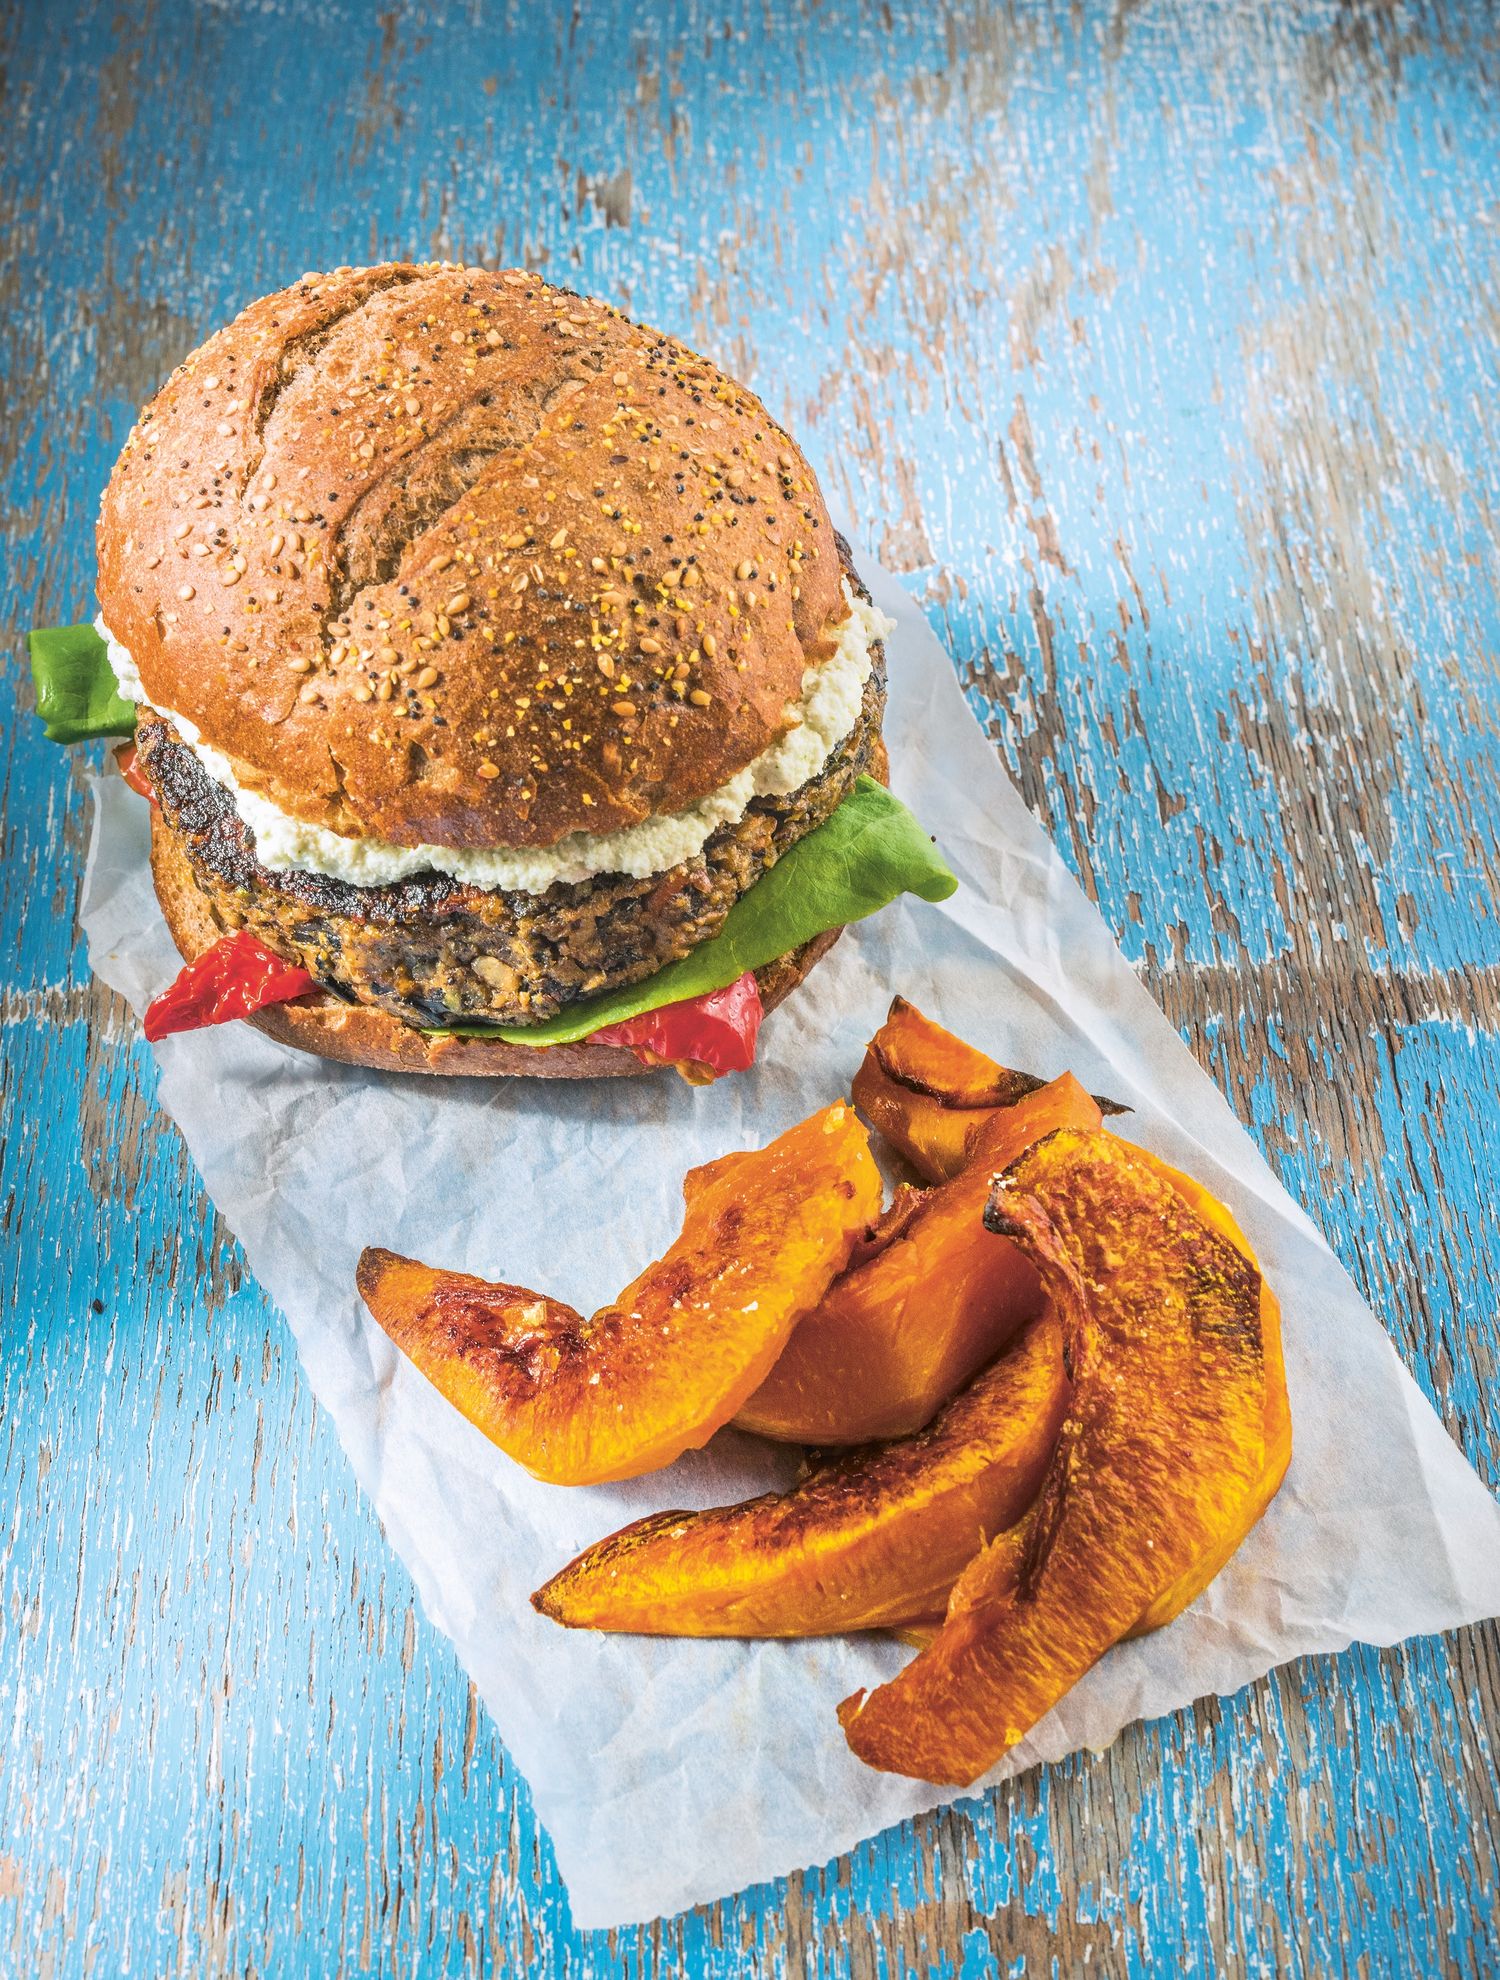
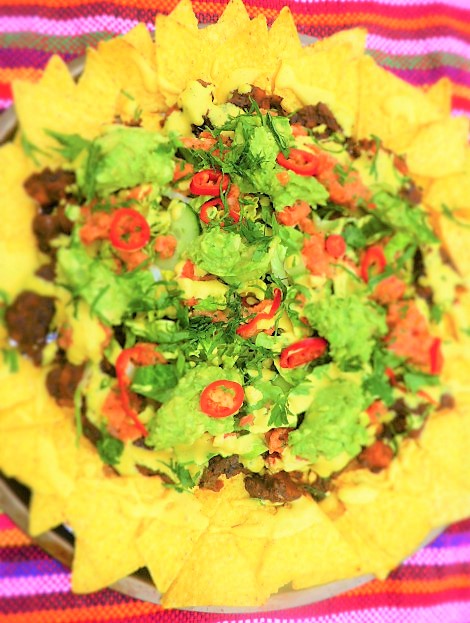
These chickpeas are perfect with the Hazlenut Dukkha recipe that I just posted, a nice fresh salad, chargrilled/ roasted vegetables and some flatbread.  Summer lunchtime sorted!

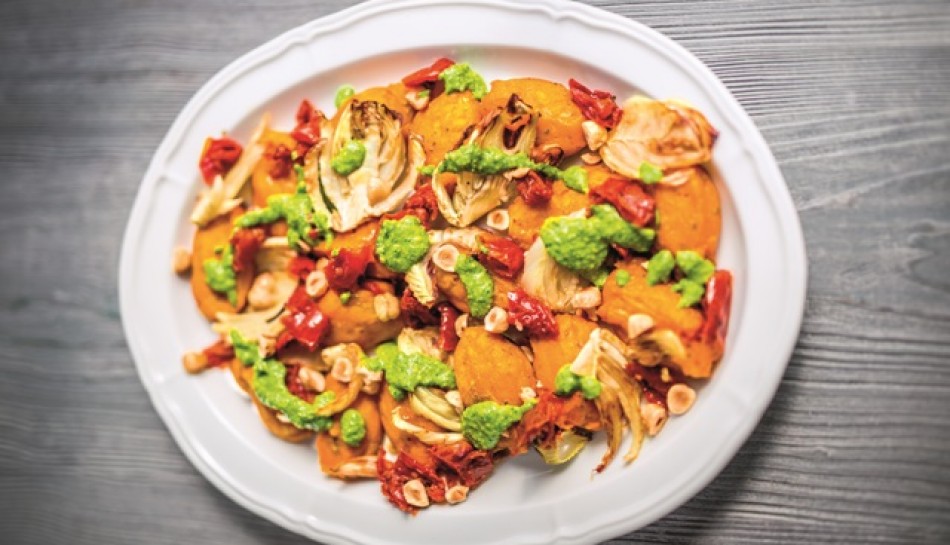
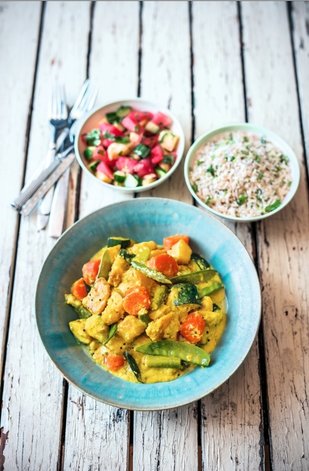
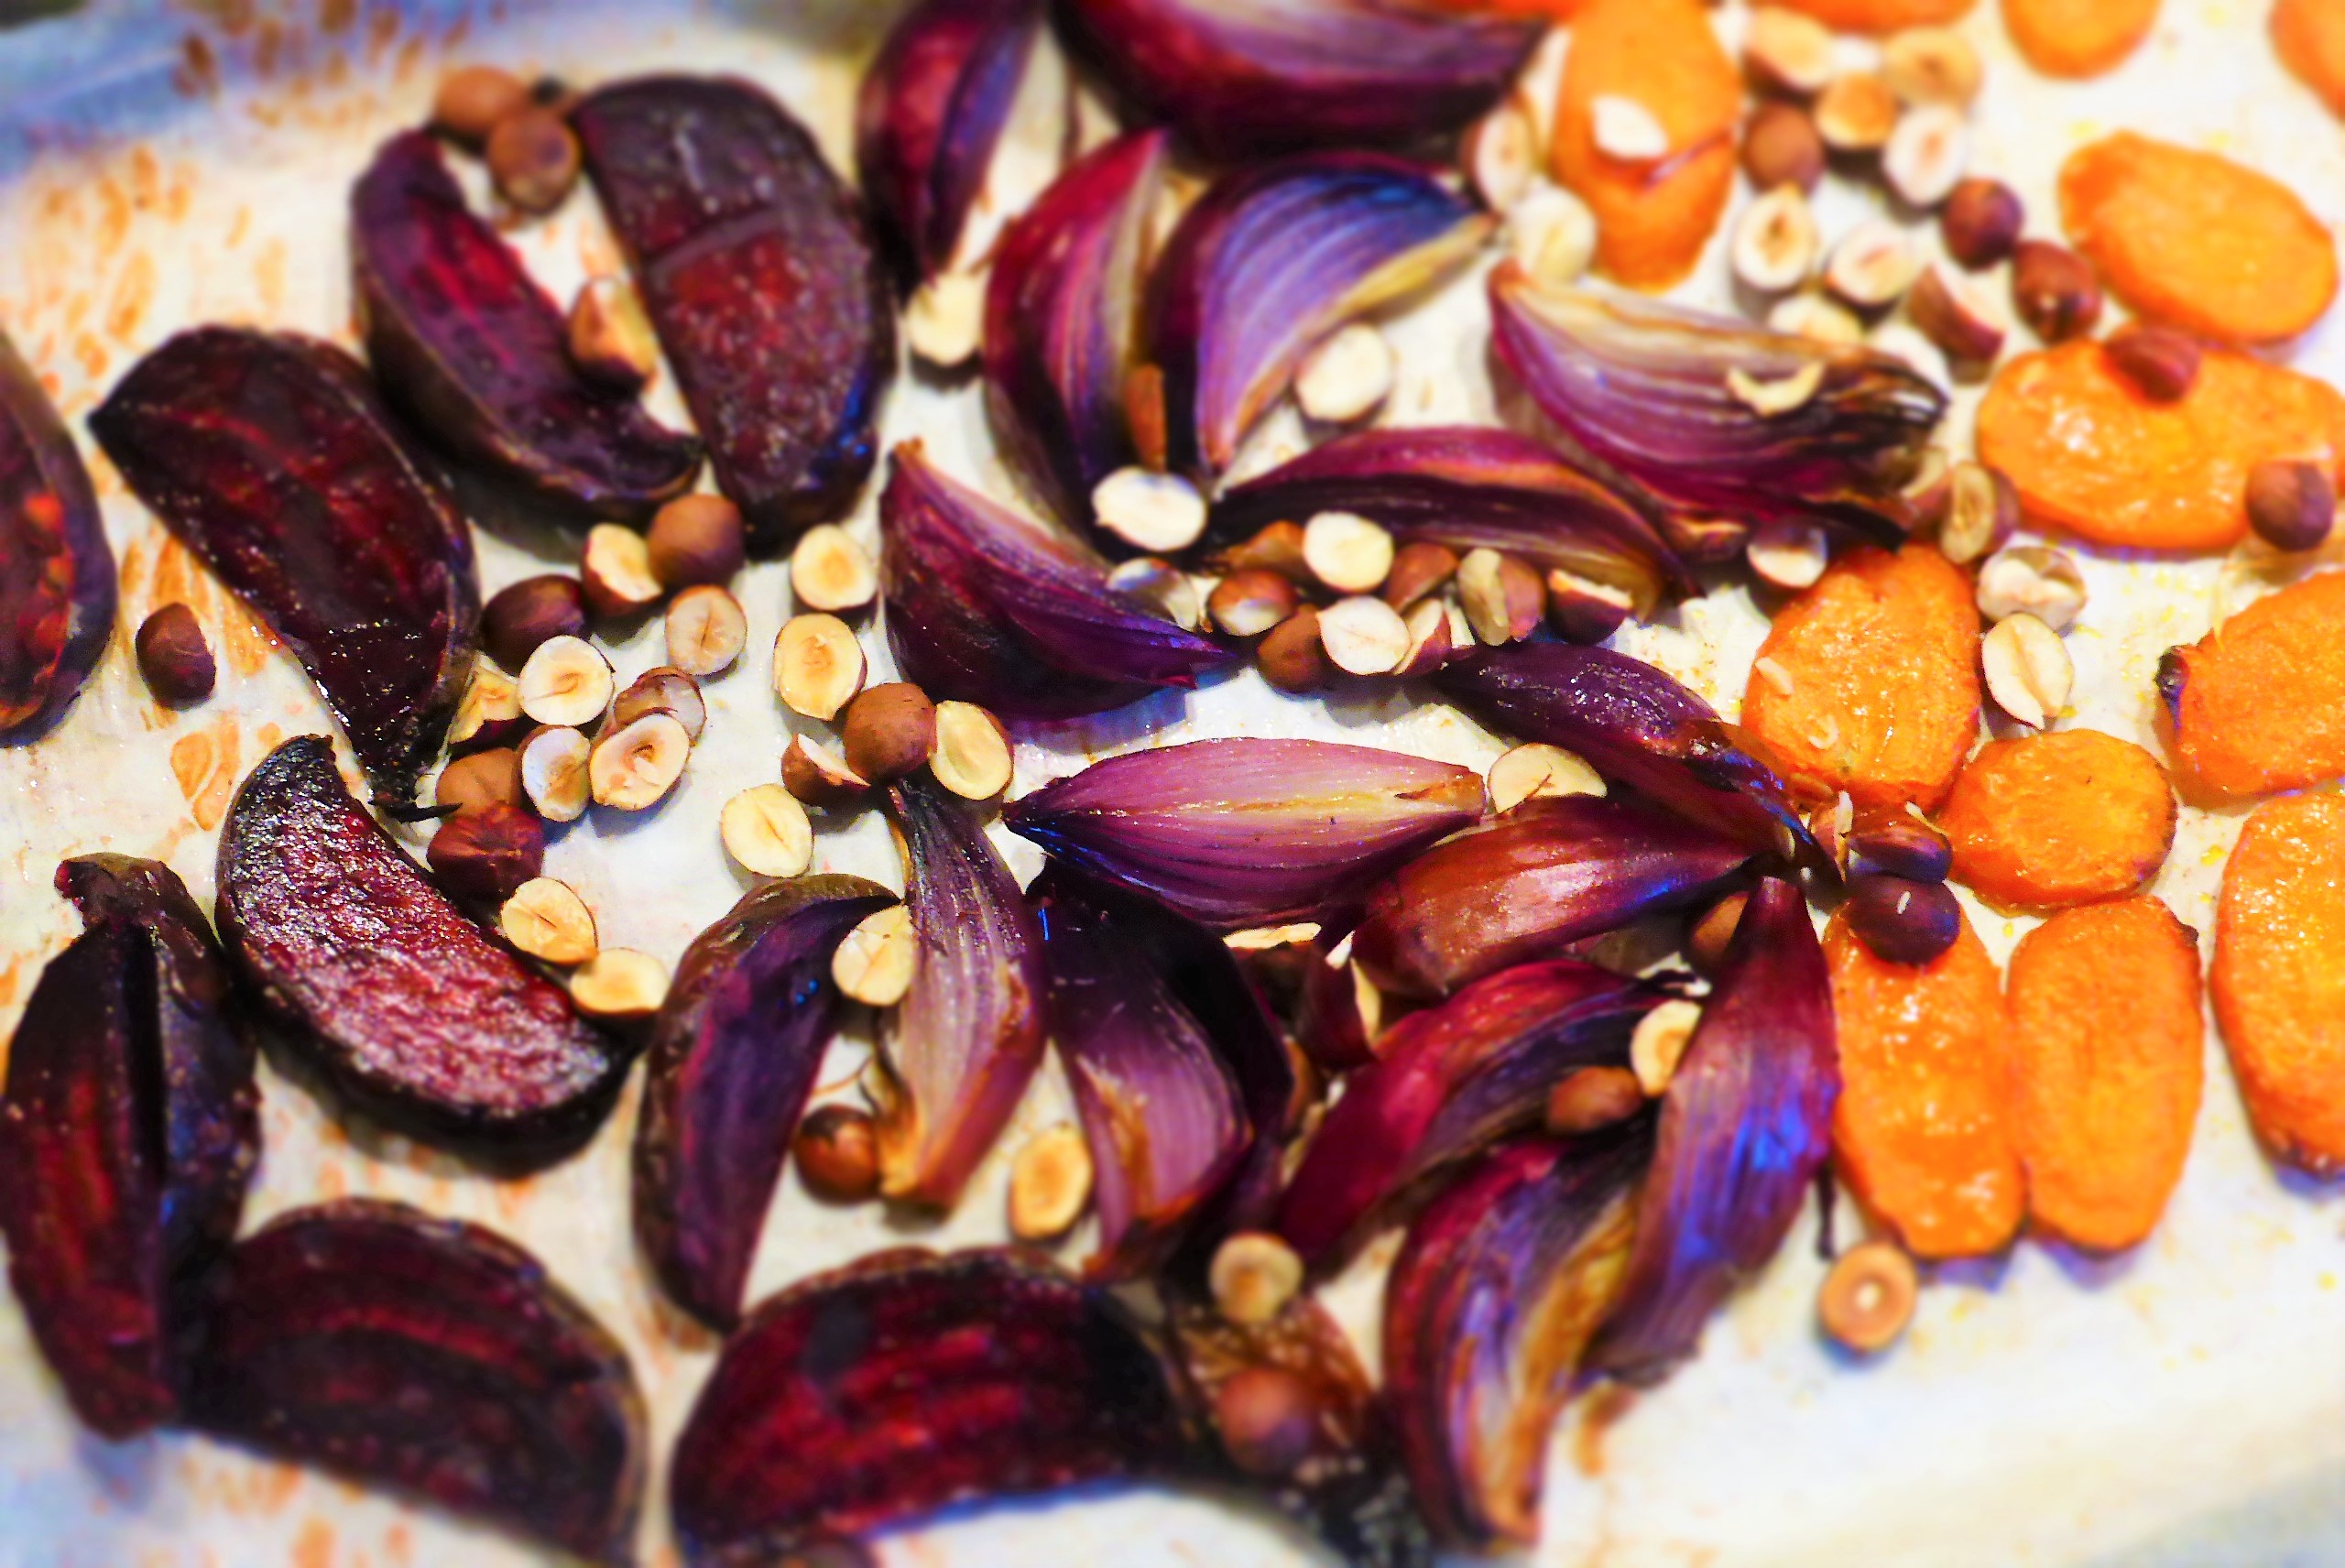
I also roasted some cauliflower in the oven, really simply with some oil and spices, you can use the Dukkha, or something like Bharat.  Or even Garam Masala will be fine.  Just add a little spice.  Roasted cauliflower is a staple in the BHK in the summertime, great on the BBQ too.

I added a couple more Egyptian Mezze’s, with a classic Warm Aubergine Salad and a Fenugreek ‘Hulba’ Dip, which does have a very strong flavour, the fenugreek is full power.  The consensus from those present was leave the recipe for now.  I like it, it’s a bit like mustard, a little goes a long way.  Next time, I may reduce the fenugreek a little, it can be powerful stuff!

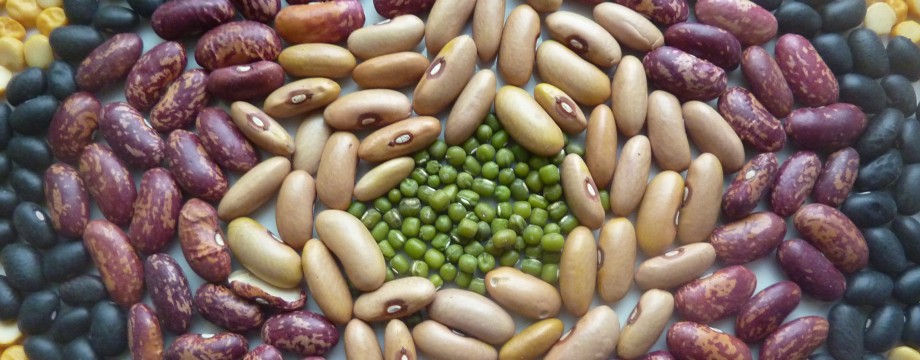
Other Egyptian Mezze ideas would be fava bean falafels, hummus, baba ganoush (ghanouj), fuul medames, tabouleh.  I love these rich, hearty, flavourful dishes.  All traditional.  All vegan!

Travelling Egypt

I love Egypt and the delicious buzz of eating out in Cairo, sipping some tea, taking a wander around Old Town, the little windy, ancient lanes and souks, more tea, then a nibble (repeat).  I may have been lost most of the time, but I never went hungry!

My last visit to Egypt was a good few years ago, but it left a big impression.  So much history (a massive understatement really) and people could not have been friendlier.  I just wandered around each day and invariably got myself invited to cafes or restaurants or weddings for sweet tea and meals and many happy memories.  I experienced incredible hospitality where ever I went.

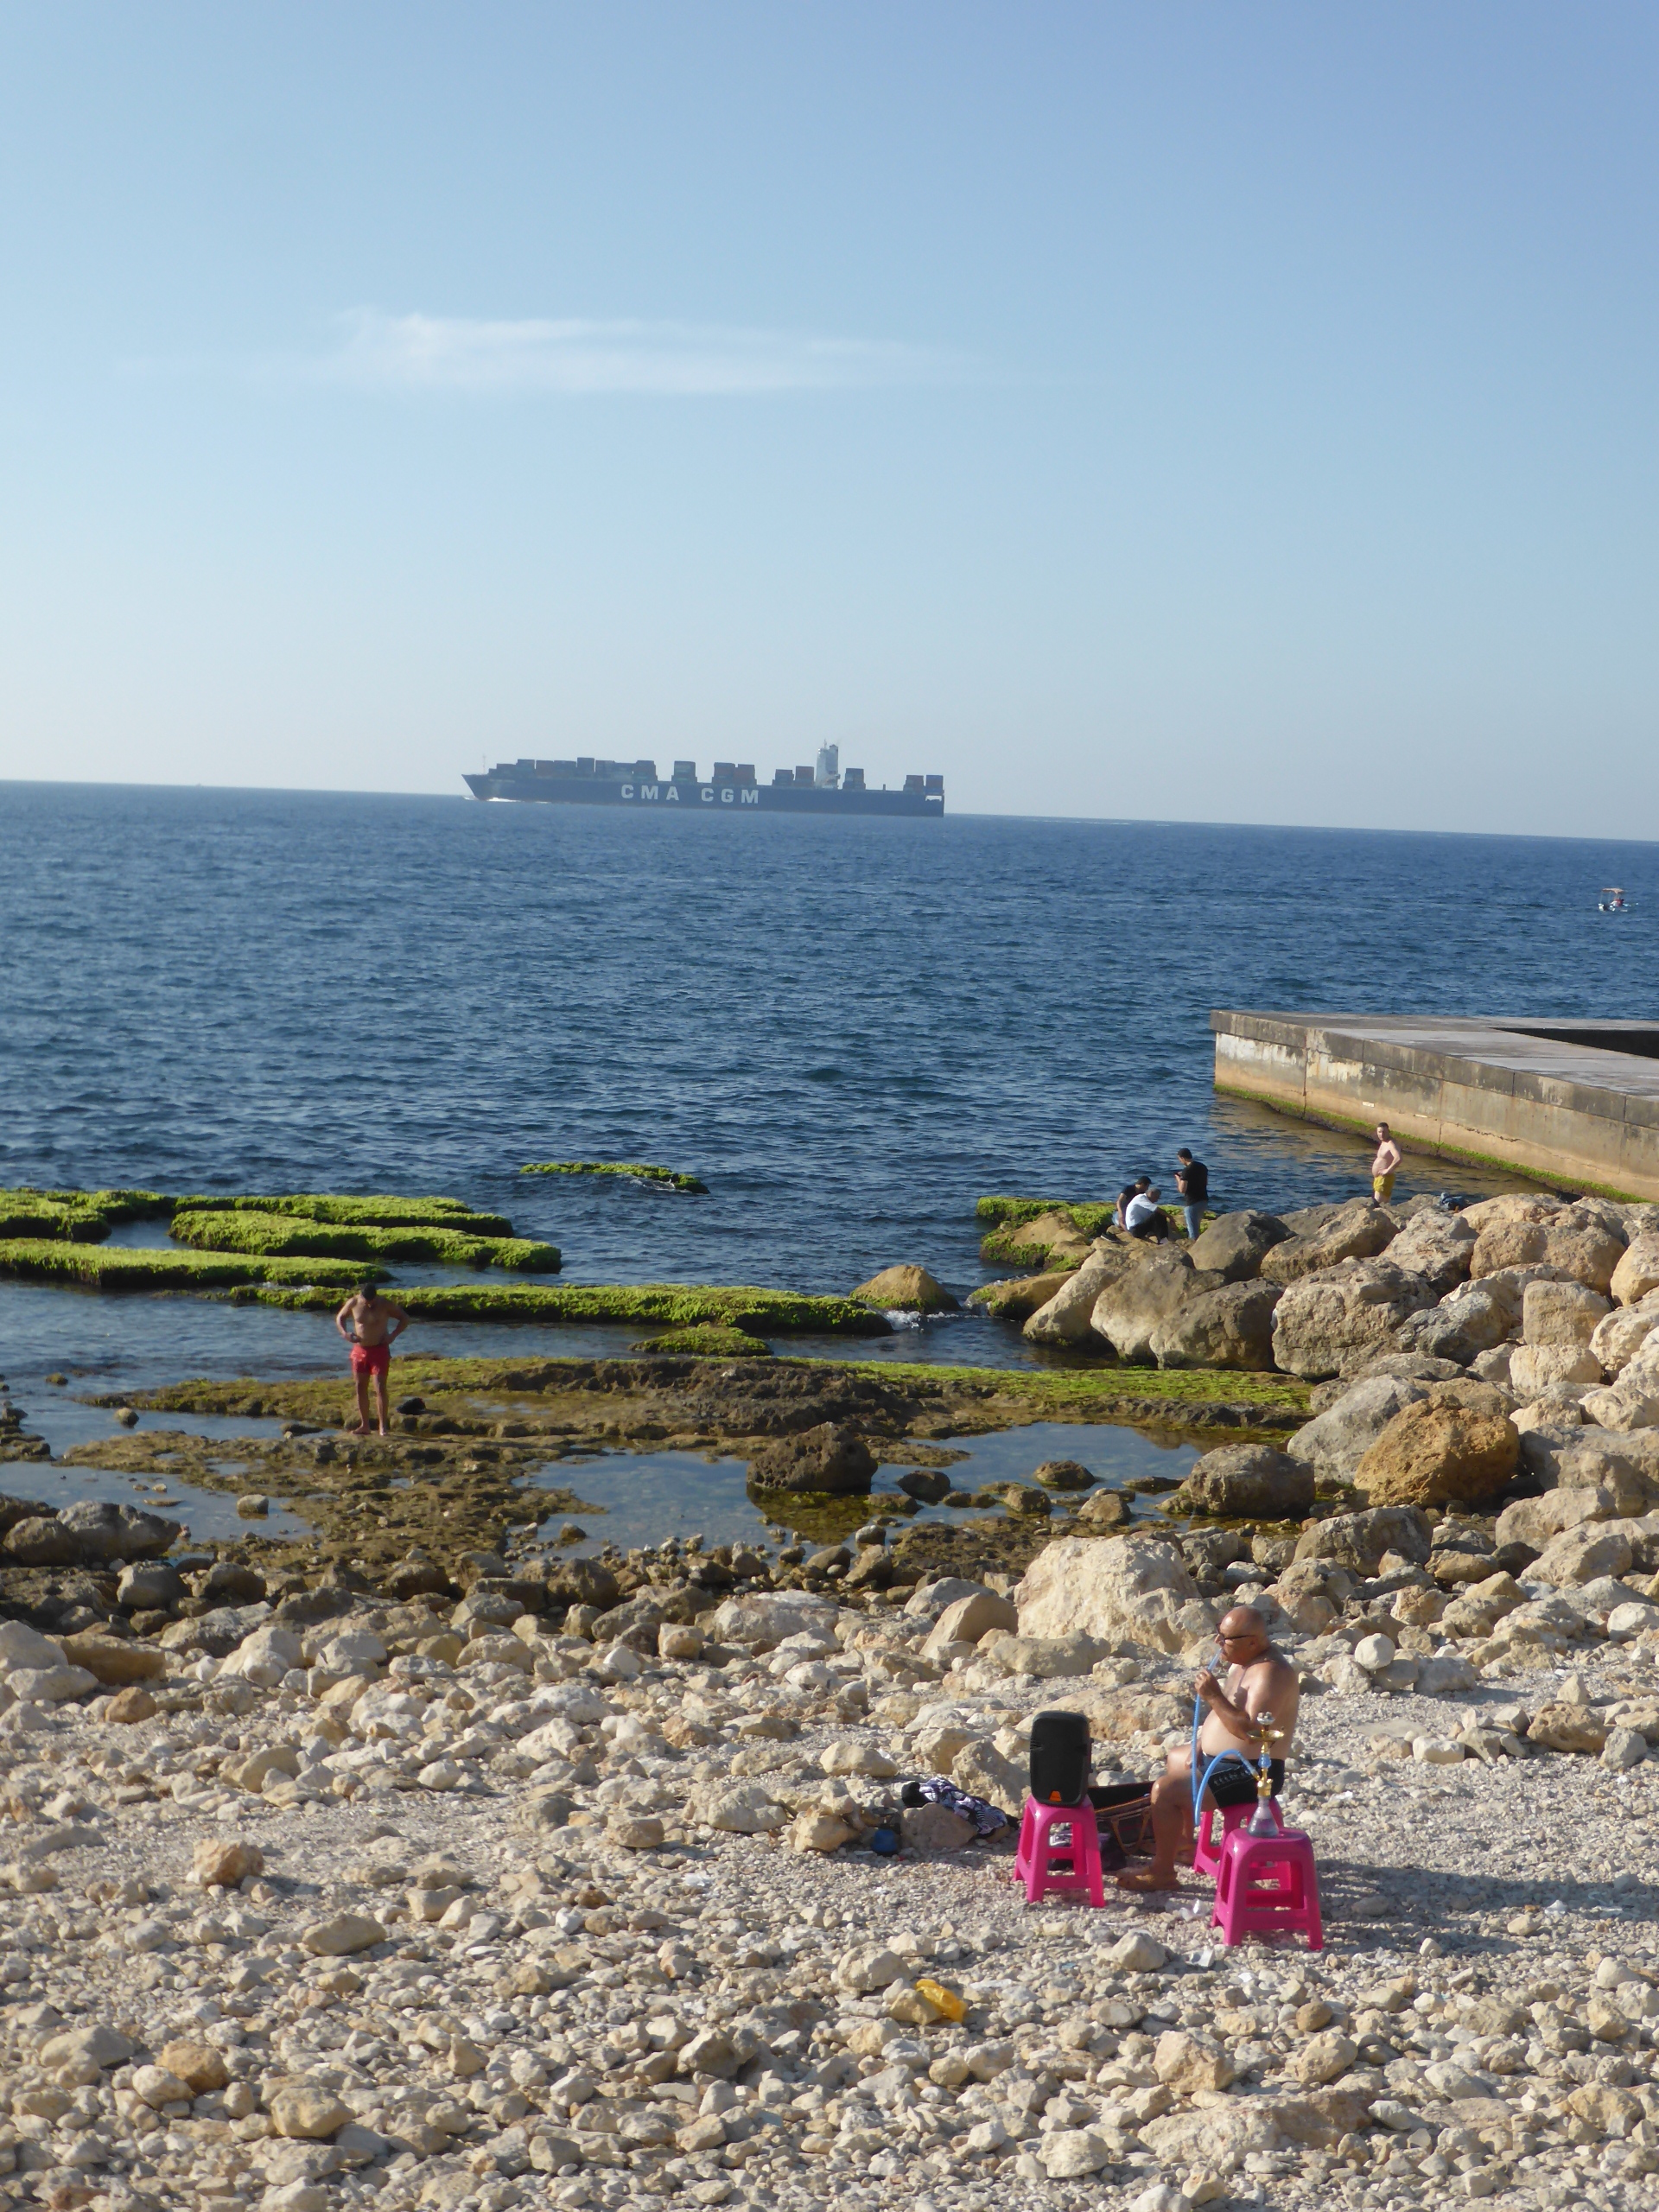
One of my favourite foodie times was when I was walking up the coast from Dhaba, I met a bedouin family who invited me to stay with them and have some dinner, over near the border with Jordan.  They were camped on an isolated beach facing the Red Sea and twinkling lights of Saudi Arabia.  They made veggie food especially for me, cooked out under the stars and eaten on a huge colourful rug.  These spiced chickpeas are similar to one of the dishes we had.  This is my version.  I love recreating global dishes back in Wales.  When I travel, I write all my favourite food moments and ideas down in notebooks.  The one I brought back from Egypt is packed full with many happy memories of tasty times.

Egyptian Food

For those who haven’t tried traditional Egyptian food, I’d say it has many similarities with much of the food in the Eastern Mediterranean, lots of delicious rice, bean and vegetable dishes, maybe the best hummus I’ve ever tried (at least well up there with Lebanese Hummus).  In Egypt, you never seem far from an awesome flat bread or bowl of ful medames or Kushari, a dish I had never tried before and found it loads of fun.  Rice, lentils, pasta, tomato sauce, garlic vinegar, fried onions, a good hit of cumin, it’s seems all over the place, but really works.  Especially after a long day getting lost in old town Cairo, I needed plenty of feeding up!

Cumin is one of my favourite spices, ubiquitous in so many cuisines around the world, from Mexico to the Mediterranean and India.  Cumin is warming and highly aromatic, that’s why toasting and grinding your own spices at home is such a joy.  Cumin has a sweet smell but can be bitter to taste, so it does need cooking through.  I normally add ground cumin to dishes at earlier stages of cooking.  It acts as a great base for other spices I find, but in this dish, it takes centre stage.  We normally get white cumin seeds in the UK, but in India especially, the smaller black cumin seeds are popular, along with Amber cumin seeds.

Recipe Notes

The best way to go, cumin-wise, is to toast and grind your own.  If you have a pestle and mortar handy, or a blender/ food processor, we’re good.  Toast 2 tbs cumin seeds in a preferably heavy-bottomed pan, for a minute, until the colour slightly changes to a darker shade of brown and you can smell the lovely toasty cumin aromas.   I know in some Indian dishes, cooks prefer to really toast the cumin until they’re almost black.  But generally, the oils (plentiful in cumin) which contain the lovely aromatic qualities are quite sensitive to heat, I prefer, in this dish especially, just a light toasting in the pan.

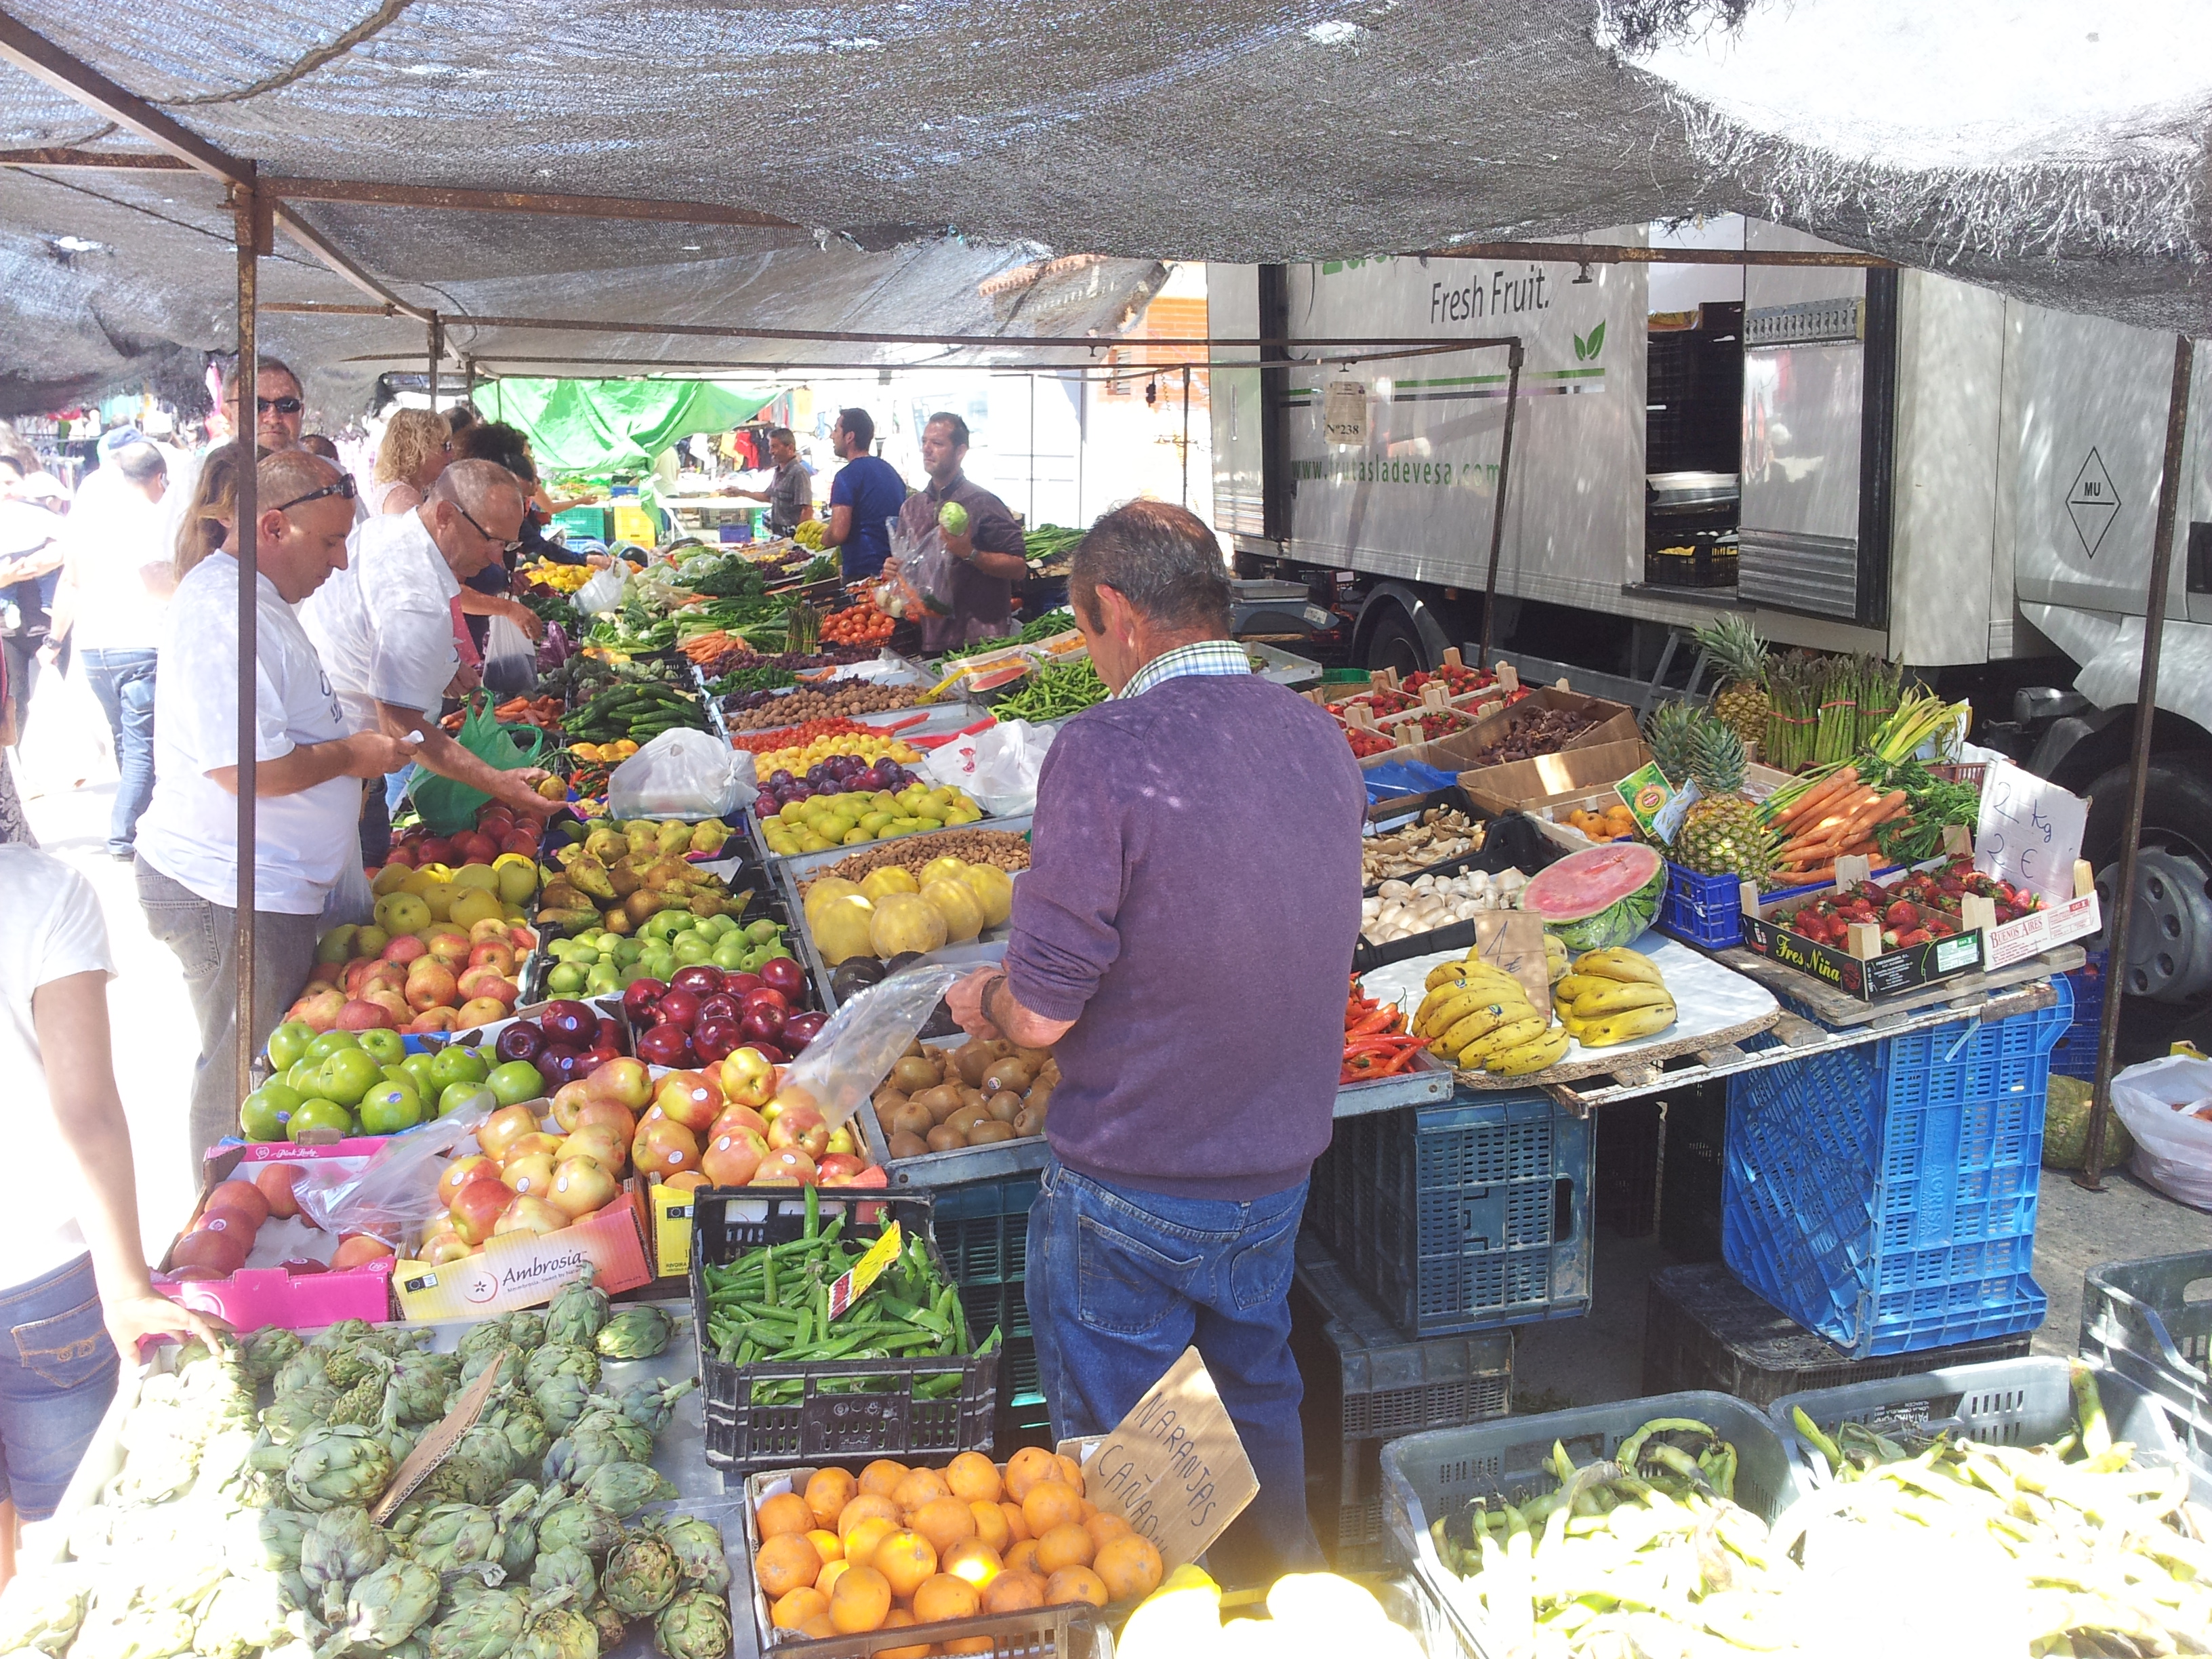
You can use tinned chickpeas, but soaking and cooking dried chickpeas is more economical and you get the benefit of a nice stock to use afterwards in soups, curries or stews.  This stock can also be used as aquafaba, genius bean broth, which can be used to make all kinds of things; vegan mayonnaise, macaroons. meringues or to replace eggs when baking cakes.

The Egyptian olive oil I’ve tried has been excellent.  Drizzling it over and stirring it in at the end can add richness and great flavour to these chickpeas.

You may like to blanch your tomatoes and removed the skins, but my tomatoes were so sweet and thin skinned, I didn’t here.

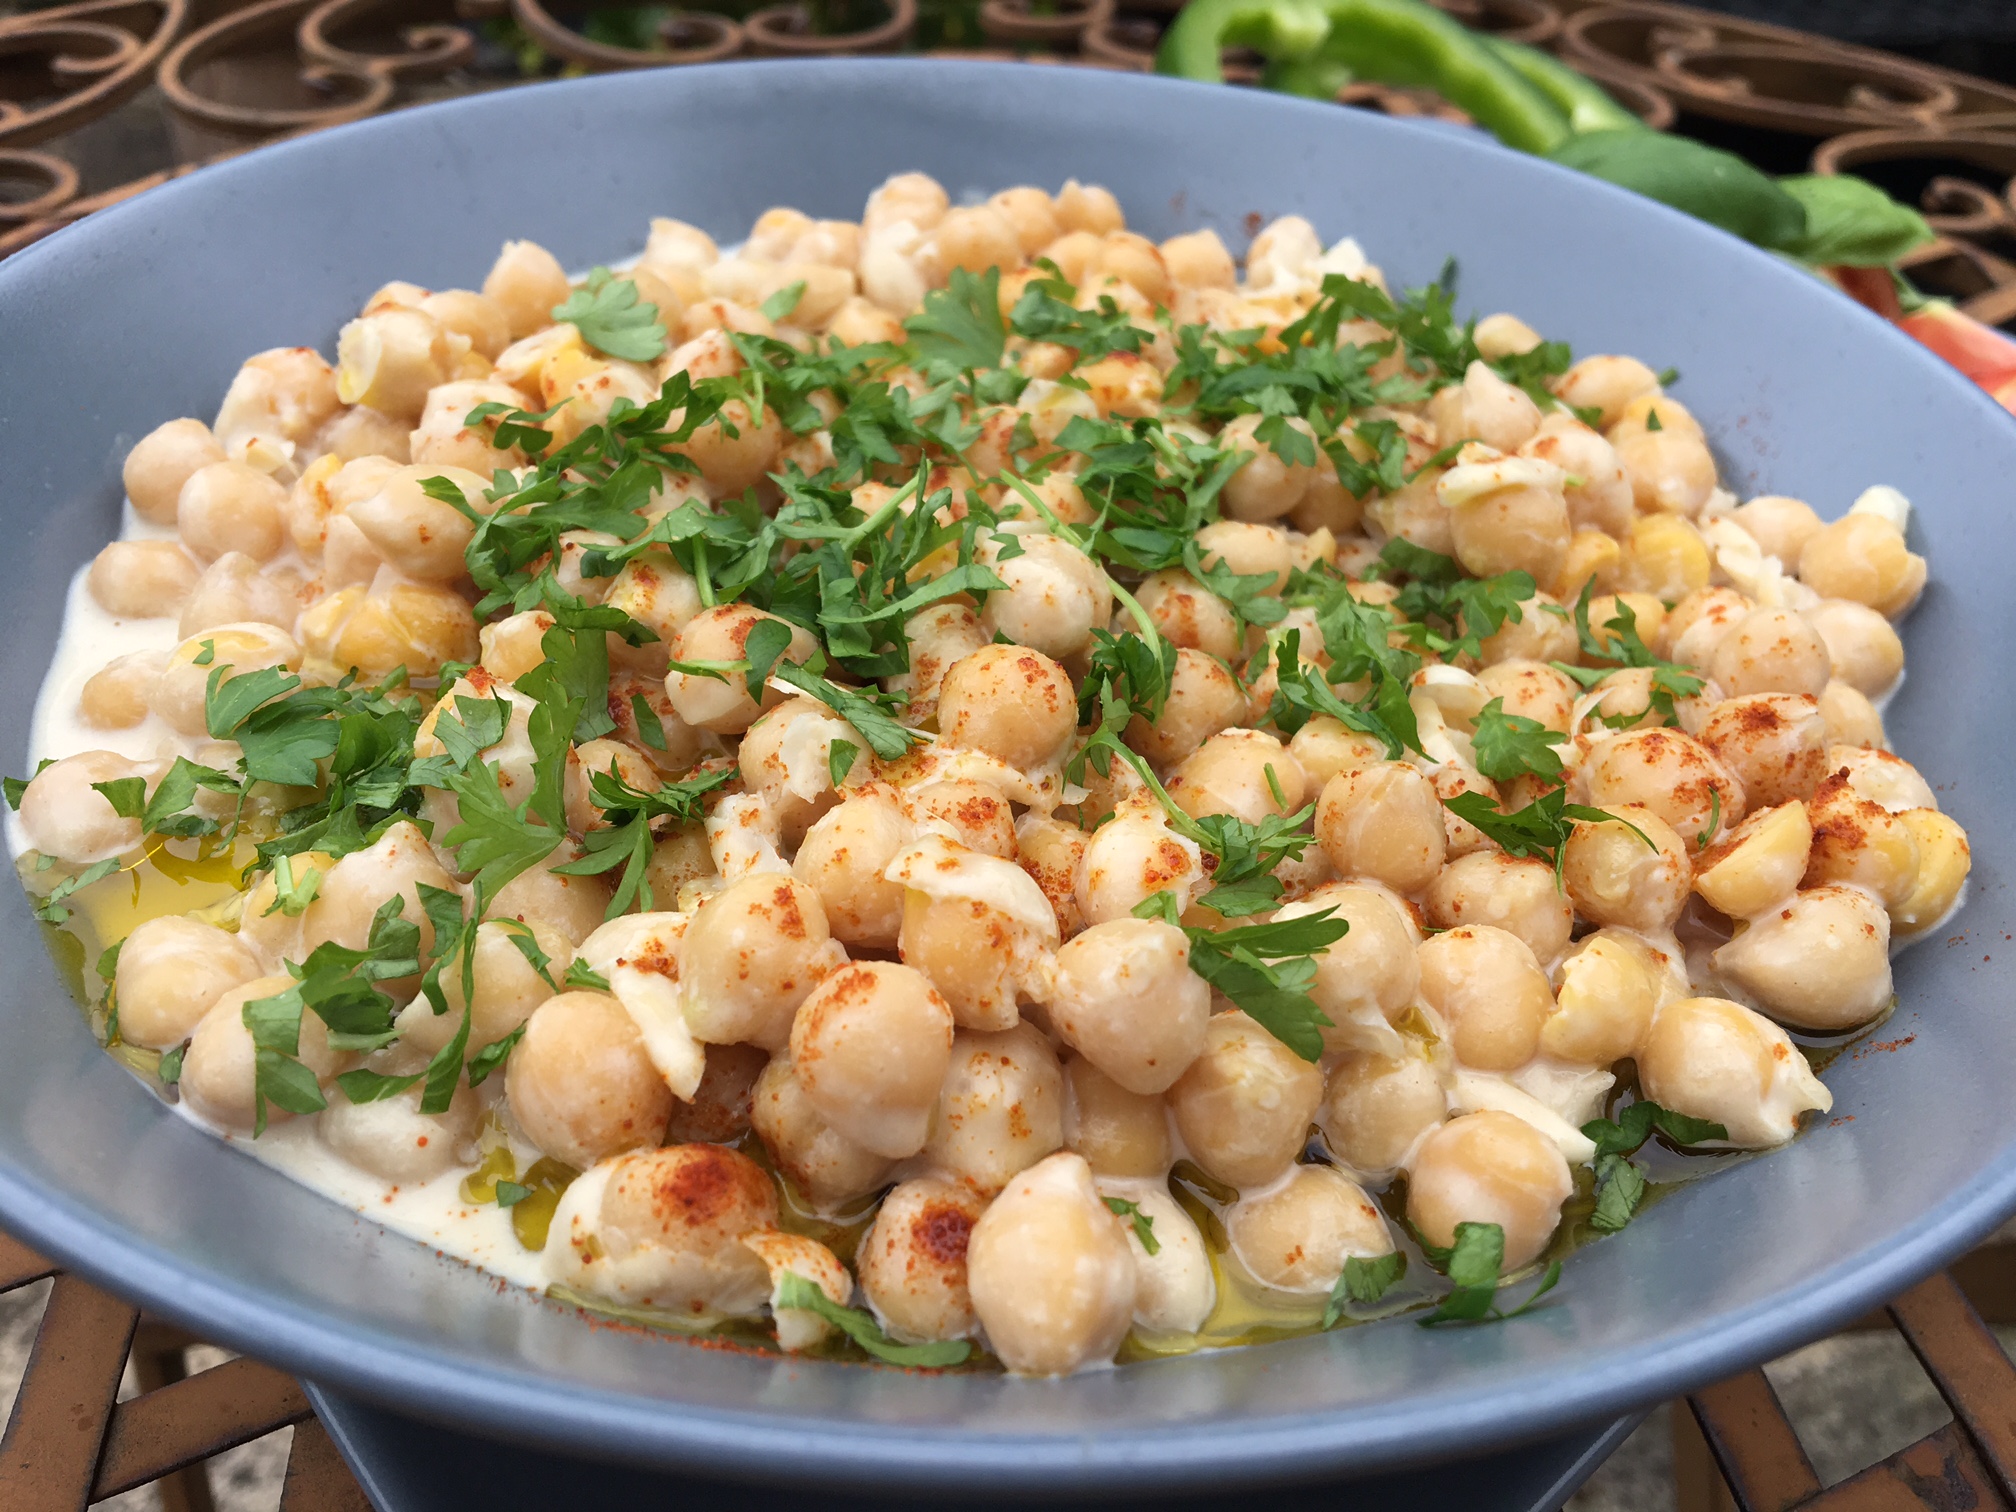
Egyptian Chickpeas with Tomato and Cumin – Sinai-style 

——————————-

Egyptian Mezze – Chickpeas with Tomato and Cumin 

The Bits – For 4-6 

500g cooked chickpeas (or 2 tins, drained and rinsed)

1 large onion (finely diced)

2 large cloves garlic (finely sliced)

1 tbs cumin seeds

2 teas ground cumin

100ml hot water

4 medium ripe tomatoes (chopped into small pieces)

1 tbs cooking oil – I use cold pressed rapeseed oil

Sea salt


1 handful fresh coriander (finely chopped)

4 lemon wedges

A drizzle of extra virgin olive oil (1-2 tbs)


Do It

In a large frying pan, warm on a medium high heat.  Then add 1 tbs cooking oil and the cumin seeds.  Let the sizzle for 30 seconds before adding the chopped onion and garlic, with 1 teas sea salt.  Fry for 6 minutes, until the onions are slightly caramelised, then add the ground cumin, hot water and tomatoes.  Pop a lid on and lower the heat a little, cook until tomatoes are soft, around 5 minutes.

Now add the chickpeas, pop the lid back on and warm through, cooking for a couple of minutes.

Stir in coriander and olive oil, check seasoning.

Serve with warm flatbreads, lemon wedges and hazelnut dukkha.


Foodie Fact – Cumin

Cumin seeds come from a plant in the same family as fennel and parsley, it’s been around for a while, mentioned in the bible on a number of occasions and the ancient Greeks loved it.  They kept it on the table as an everyday spice, like we use black pepper nowadays.  It was also a staple in Roman kitchens, but became less used in Europe in the Middle ages.

Cumin is rich in copper and iron, zinc, calcium and potassium.  One teaspoon of cumin contains around 1/4-1/3 of our daily iron needs.  Pretty good!

Cumin has also long been regarded as anti-inflammatory, has anti-oxidant properties, is anti-bacterial, helps with digestion (in India it’s used frequently in daals for example, to minimise windiness).  Cumin may also help with diabetes and boosts the immune system.  Cumin is not alone in this respect, most spices have beneficial health properties and its an awesome idea to add spices to dishes and your diet in general.

Cumin seeds can be kept in a sealed container in a cool and dark place, they will keep for around a year.  Ground cumin, well, freshly ground is best, but it will last for a few months, but loses it’s flavour gradually.

Categories: gluten-free, healthy, Healthy Eating, Lunch, Nutrition, plant-based, Recipes, Side Dish, Travel, Vegan | Tags: , , , | 4 Comments

Hazelnut Dukkha – Versatile, Nutty Spice Mix


Hazelnut Dukkha – Egyptian Condiment

Only a small thing, a condiment, but it really packs in some intense, earthy flavours and livens up almost anything.

I’ve finally got round to posting (and finding) some of the Egyptian recipes I cooked in the Spanish sunshine.  Having been on the road for a while, recipes can wander off for a while.  They normally come back in one piece though.

Spain was so hot, we wanted things simple, quick and of course, super tasty.

Dukkha is ideal in this respect, perfect sprinkled on your favourite salad, mixed into youghurt to make a delicious dip, or even just served with warm flatbreads and olive oil.  I also use dukkha on top of roasted or barbecued vegetables and even Middle Eastern stews.

Dukkha is basically a condiment that livens up most things, bringing lovely, deep, toasted flavours, nuttiness and spices.  Dukkha keeps well in a sealed container and is a versatile flavour boost to have around the kitchen.  You can also play around with the recipe, this is classic old school style, by adding your favourite spices to it.

There are many ways of making dukkha, but I’ve gone for the easiest here.  We simply roast all the ingredients in an oven and bash them together in a pestle and mortar.  It’s a highly fragrant task.  Prepare for your kitchen to be filled with the aromas of toasty nuts n’ spices.  It’s delicious.

Go Spicy

I’ve been roasting many of my spice mixes at the minute and feel that if you have the time, this is the way to go.  Fresh roasted spices, ground in a pestle and mortar, or even a blender, are so much better than shop bought.  You can’t even compare really.  If you love spices and spicy foods, making your own makes sense.  I’ll post my Garam Masala recipe soon.

Egyptian Fava Bean Falafels

Egypt travel 

But this is Egypt.  A country I love, whose food blew me away.  I really wasn’t expecting it at all, I had no preconceived this and that, I just landed and ate.  The hummus is well up there with the best in the world, of course we all know about the falalfels, here’s my version – Egyptian Fava Bean Falafels.

You won’t be too surprised that I traveled all over Egypt and even did some touristy things like try to climb one of the great pyramids, I had no idea this was illegal until a man with a big gun chased me a fair way up the pyramid of Cheops (the big one).  It was very early in the morning, I was half asleep (missed the sign) and obviously most of the guards were.  To be fair, it was a long climb anyway.

I chilled on Mount Sinai with a load of very happy Christians, clapping with hymns at dawn, staying in monastery.  I dove in the Red Sea, a technicolour world bursting with marine life, at night, sat around fires, we looked right into Saudi Arabia, just across the sea.  I’m not a big city person, but one of the highlights was Cairo, the old town especially, the call to prayer each morning at 5am was a wake up call in more ways than one.  Egypt was the first Muslim country I had traveled around and everything all seemed very exotic and fresh, charged with new flavours, sights and sounds.

I’d love to go back, I didn’t quite make it down to Luxor.  Food wise, no problem, I was a vegetarian/ vegan hybrid at the time and always found lots of options, as you do in other Middle Eastern countries.  I specifically remember one bowl of perfect hummus, in a restaurant on a busy road, it was packed with families and the mezze style dishes just piled up on my table and I was in some form of food-induced bliss.  I’d been walking lots around Cairo (aka getting lost), it’s an ideal walking city with loads of windy lanes and interesting architecture.  I needed to keep my energy up you see!  Bring on the falafels…..

Egyptian style Aubergines, simply pan fried with onion, a little spice and lemon juice.

Buddhist tangent – Dukkha is also the word for “suffering” or more accurately ‘unsatisfactoriness” in Pali, the ancient language of many early Buddhist texts.  It’s what we feel about life much of the time said Buddha.  When I first came across the Egyptian condiment, I couldn’t separate the two really.  Spicy suffering crumbs, toasty torment, I’ve been through them all.  The opposite of Dukkha is Sukha in Pali, meaning something like “happiness”.  I was thinking about coming up with a recipe for Sukha, the topping to sprinkle all over your Nirvana, but I’ve never could see past Dukkha.  Here in lies my inherent problem.  I just can’t get enough of that Dukkha!!

I hope you get to try this recipe out, please let us know in the comments below.  Have you been to Egypt how did you find the food?  Are you a fellow vegan traveler, seeking out the tastiest plates in the coolest places?

——————–

Hazelnut Dukkha

The Bits – Makes one small bowlful

50g sesame seeds
25g hazelnuts (very roughly chopped)
10g cumin seeds
8g coriander seeds
1g dried thyme
3/4 teas sea salt


Do It

Preheat a fan oven to 180oC.

Toss everything on a baking tray and place in the oven for 10-15 minutes, checking after 8 minutes.  Mix the dukkha up a little to ensure that everything is getting an equal amount of heat.

Once the sesame seeds and hazelnut have gone a darker shade, place the dukkha into a pestle and mortar.  You can do this in batches unless you have a giant pestle and mortar.  Grind it all down, I like a few who spices left in there for extra flavour explosions.


Foodie Fact

Nuts are just packed with nutrition.  Hazelnuts are good for the heart, containing good fats and plenty of fibre, magnesium, protein and Vitamin E.  You can read our previous Foodie Fact  about our tips for soaking nuts to maximise and transform the nutritional properties of nuts here.  It’s a little tip that can have a big effect on a healthier diet.

Categories: gluten-free, healthy, Healthy Eating, Nutrition, photography, plant-based, Recipes, Side Dish, Travel, Vegan | Tags: , , | 3 Comments

Simple Green Pea Hummus – Goodbye Chickpeas!


Green Pea Hummus – A delicious twist on chickpea hummus

Jane said,  “This is the best hummus you’ve ever made!”  So I had to share this recipe with you.  Jane is, after all, one of the leading hummus connoisseur in the North Wales area.

This hummus is creamy and rich and doesn’t taste overly pea-y, if that’s something that may concern you.  Cooking the split peas requires no soaking, so it’s quicker than making proper chickpea hummus, which I always make with dried chickpeas.  I think the flavour is better from dried pulses.

Not very green is it!  That’s because we’re using dried and split green beans.  I normally use them for soups and especially, delicious daals, there’s a green pea daal recipe in ‘Peace and Parsnips‘ – Matar Daal with Watercress, Braised Red Cabbage Sabji & Brown Rice Chapatti (pg 237;)

There was a rumour that the price of chickpeas was about to sky rocket.  I haven’t seen it yet, but the cost of food does seem to be going  up gradually and may continue.  These green split peas are grown in the UK and are a good, inexpensive option, plus they’re packed with nutrition.

My roots are in Durham, North East England, an area with lots of tasty traditional dishes.  Pease Pudding has to be one of my favourite.  Like Durham’s answer to hummus really.  Normally just cooked split peas, flavoured with meat, I love to make it flavoured with all kinds of cool herbs and spices, roasted veggies.  It’s normally served on stottie cake (big flat Durham buns) with pickled beetroot and ham. I can see this being veganize-able very easily.  Having said that and even though I am partisan to all things Durham, Pease Pudding doesn’t come close to this hummus.  Sorry Mum.

These lovely British organic split peas deserved a fitting topping, so I wanted to use local and seasonal veggies too.  You could opt for any topping, or none, but bar the chillies, the toppings reflect North Wales right now, just as Spring is getting into gear.  Toasted walnuts or hazelnuts would be a nice addition.

Maybe we won’t be saying goodbye to chickpeas for ever, but for the forseeable future, we’re all about split green peas in the Beach House.  Never thought I’d say that, but they make a fine hummus.


Thanks to Hodmedods for this very nice pea pic:)

Recipe Notes

Hummus can be eaten warm, why not!?  It’s lovely just don’t let the beans cool and blend and flavour as usual.  Makes a nice change.

This is the basic recipe, but we love adding blanched greens to the hummus and blending.  Also, spicing it up with a little ground cumin is very nice.

If you only have yellow split peas, they will be fine in this recipe.

I find hummus changes overnight.  The flavours mingle and come to life.  If you can resist, make it the day before and watch how those flavours shine.

A simple way to make homemade hummus, the split peas have a great texture and are really creamy


————–

Simple Green Pea Hummus

The Bits – For one medium bowlful, enough for 6 people as a dip

250g dried split green peas

1/2 lemon (juice)

5 tbs light tahini

5 tbs cold pressed rape seed oil – or olive oil

1 small clove garlic (peeled and crushed)

1/2-1 teas salt (to taste)


Topping

Red Cabbage (finely sliced)

Fresh thyme (picked leaves)

Radishes (finely sliced)

A dash of rapeseed oil

Green chillies (finely sliced)

Salt and pepper


Do It 

Cook your green peas, they won’t need soaking.  Give them a rinse, cover with plenty of water and bring to a boil, then cook on a low simmer for 30 – 45 minutes, until they’re nice and tender but not one big mush.  Add water as you need it.  Or alternatively, just follow the handy instructions on your packet.  Leave the peas to cool.

Add all the ingredients to a blender and blitz, checking the seasoning.  Blend for a while, until it’s really nice and smooth.  This is a thick hummus, you can add a drizzle of water if you like your hummus a little thinner and lighter.

Serve in a bowl, or spread it out over a plate, I prefer the latter.  Scatter over your toppings and serve as you love your hummus most.

A new dawn for hummus – green peas, no chickpeas


Foodie Fact

High in protein and low in fat, plus they are one of the highest sources of fibre.

Categories: gluten-free, healthy, Healthy Eating, Nutrition, photography, plant-based, Recipes, Side Dish, Snacks and Inbetweens, Vegan | Tags: , , | 6 Comments

Fully Loaded Nachos with Columbian Frijoles Rojos

Fully Loaded Nachos (Vegan, Gluten-free)

Easter’s here!  Any reason to celebrate and feast right!  These nachos are maybe how they’d celebrate in Bogota or Cartagena?  Let us know in the comments if you’re in Columbia!

This is a celebration on a plate!  These nachos are fully loaded with all the goodies we know and love and the Frijoles Rojos (Red Beans) are such a simple way to make a spicy, tasty bean dish.  Years ago, I lived beside a few Columbian restaurants in Brixton.  I’ve loved the food ever since.

Everyone enjoys this dish!  All those colours, flavours and textures.  It’s a winner!  The rich and spicy beans, the crunch of the nachos, the creamy smoky dip, avocado, coriander, maybe a twist of lime.  Come on!  That’s something pretty special.

Fully Loaded Nachoes will brighten up any Easter feast and generally go down very well in the BHK, whenever we make nachos, they last approx 3 1/2 minutes.  Woof.  Gone.  It’s a communal dish that I love, as a cook, I can think of few things better than sharing food.  This is best served warm on a large plate or platter.

Columbian Frijoles Rojo (Vegan, Gluten-free, Low Fat)

If you are looking for something a little different and healthier, just sub the nachos/ tortilla chips with toasted soft tortillas (tostadas), cut into little triangles.  This is also a lovely way of serving these beans and traditional too (although the tortillas may be fried).

Usually, you might find things like beef and dairy cheese in this dish, we’ve ditched those of course, replaced with mega beans and creamy cashew cheeze.  Nacho cheese is generally a day-glo orange brick, something like vulcanized rubber meets food, totally overly processed and flavour-less if my memory is right.  Much better with the creamy cashews, Chipotle & Cashew Queso Dip recipe here.

This is one of those dishes which skirts between meal and snack.  I think most of us would be quite happy to live on nachos!!  I think it’s great party dish, something that can fill the belly, tickle the tastebuds, but really, you don’t need a lot of it to feel satisfied.  Maybe thats down to the sheer volume of flavours and the beans and toppings are all really nutritious, maybe the belly is satisfied because this dish is so dang tasty!?

When I was traveling around Mexico and Central America, I didn’t have many nachos.  Is there anyone here from Columbia?  How do you feel about nachos?  It seems more of a Northern Mexican/ Tex Mex dish that has probably caught on in many countries because it’s just an amazing combo.  Wikipedia says that the dish was created by Ignacio “Nacho” Anaya in about 1943  in Northern Mexico.  There we are.   A very tasty piece of history.

Variations on the nacho theme, I’ve read that in America there are things called S’mores Nachos, graham crackers, chocolate and marshmallows.  I’ve had S’mores in the past, they were built up like some kind of ‘food for the Gods’. They weren’t my cup of tea.  In Hawaii, they put pineapple on nachos.  I am sure that surprises no one.  Sounds good though.

I like Hodemdod’s beans.  Most of their beans and bits are grown organically in the UK.  Their Red Haricot beans will be perfect for these Columbian Frijoles.  If you live on this here, fair island (Britain) check em out.  Plant based people thrive on good pulses!  They make all the difference.

Fully Loaded and ready to go!

Recipe Notes

Fully loaded is one thing, but just the nachos and beans makes for a lovely meal/ snack.  You can add what you like on top, pineapple (A Hawain twist), bbq or chilli sauce, guacamole, sour cream, more cheese, pickled jalapenos….

Corn Tortillas/ Nachos are what we use here, they’re normally gluten-free, but check the packet.

Not into tortilla chips, this dish can be made into a main course when served with rice, mashed sweet potato, roast potatoes (with a touch of cumin), a nice big, crispy salad.

Finish with a Quick Salsa and Chipotle & Cashew Queso Dip


—————

Columbian Frijoles Rojos – Vegan, Gluten-free, Low fat

The Bits – For 4-6

500g/ 2 tins cooked beans (red kidney, red haricot, pinto, rosecco/ borlotti)

1 medium onion (sliced)
1 pepper (sliced)
1 medium sweet potato (cut into cubes)
2 large mushrooms (sliced)
250g/ 1 jar or tin tomatoes

2 teas smoked paprika
2 teas ground cumin
2 teas dried oregano

1-3 teas chilli powder (to taste)
1.5 teas garlic powder
Good twist of black pepper

1 tbs cooking oil (I use cold pressed rapeseed oil)


Do It

In a large saucepan, add the cooking oil and fry the onion until soft, 5 minutes.  Add the other veggies fry for a minute then add the spices, garlic powder and oregano, fry for another minute, then add the tomatoes and beans.  Cover and simmer for 25 minutes, adding roughly 350ml water to form a nice, thick sauce.  Stir a few times.  Season with salt.

Chiptole & Cashew Queso Dip – My recipe here 


Quick Salsa

The Bits – For one small bowlful

8 ripe cherry tomatoes (finely chopped)

2 tbs onion (finely chopped)

2 tbs fresh coriander (finely chopped)

Lime juice (to taste)

Large pinch salt


Do It

Toss all together in a small bowl or blend together in a food processor, changes up the texture a little.


Fully Loaded Nachos 

The Bits – Serves 4-8 as a snack

Trimmings

300-400g corn nachos/ tortillas

1 avocado (smashed with a fork)
Chipotle paste (stir in or drizzle as needed)
Spring onions (chopped)
4 handfuls cos/ little gem lettuce (chopped)

Fresh Coriander (chopped)

Lime wedges

1 red chilli (finely sliced)

Do It

You can warm the nachos/ tortillas in the oven for 5-10 minutes.  This is nice.

Spread the nachos/ tortillas on a large plate/ platter, top with the beans, then scatter with salsa, queso and the rest of your toppings.

Normally I make enough for two plates, you’ll have enough beans for this.  One plate of nachos is never enough!!


Foodie Fact

Red kidney beans are originally from Central America/ Mexico and are quite an ingredient!  Not only do they have that lovely, deep flavour, they are one of the richest sources of plant-based protein.

They are filled with fibre, which helps the body detox and are high in carbs, good ones, slow-release, meaning they’re a great source of energy.  They’re also rich in folates, iron, copper, potassium and loads more vitamins and minerals.  They’re known to be a weight loss friendly food.  Not bad for a humble little bean!

Remember to soak, drain and wash your beans well before cooking, if using dried beans.


If you like this recipe subscribe to our newsletter or follow us on Facebook for more news and recipes from the Beach House Kitchen.

Feel free to share this recipe and let us know your feedback in the comments below.  We love to hear from you!   

Categories: gluten-free, healthy, Healthy Eating, Nutrition, photography, plant-based, Recipes, Side Dish, Snacks and Inbetweens, Vegan | Tags: , , | 4 Comments

Aubergine & Fava Bean Fatteh, Tahini Yoghurt & Pine Nuts – Lebanese Party Food!

Fatteh (Fette) – Lebanese Aubergine & Fava Beans, Tahini Yoghurt and Pine Nuts   

I love this dish!  This is party food really, or the best snack you’ve ever encountered.  I can see this on a big platter being tucked in by curious guests soon to be tongue tied in a good way.  There are so many flavours and textures layered up here and they all work perfectly together.  I was lucky to eat Fatteh loads on my recent Lebanon trip.

We could easily call this ‘Fatteh Al-Betenjane’ – Aubergine Fatteh.  Fatteh (or fette) is named after the bread really, crushed or crumbled underneath or on top, but the highlight is the flavourful beans and all the accompaniments.

It has been said that this dish is like a Levantine Nachos, it’s not far off really, but with the sheer combination of delightful flavours and pine nuts, one of my favourites, Fatteh is way ahead of nachos in the BHK.  Apologies Mexico.

Pine nuts, a real treat

I ate this dish quite a bit last year in my Lebanon trip.  More of that (with pics):

Seeking falafel perfection in Lebanon and making the dream falafel wrap

I Ate Lebanon! – My experience of vegan Lebanese cuisine

Msabaha – Lebanese Chickpeas (A new twist on hummus)

Fatteh is a classic dish in Lebanon and is especially popular in the Northern City of Tripoli, which was probably the best place I ate in Lebanon (but it was very close in many respects).  Lebanon is one of the best countries for plant-based wandering.  Have you been?

Tripoli Old Town Souks, some amazing produce, wonderful fruit and veg plus little eateries

Tripoli is a city little visited by tourists, but if you’re ever in the area, try the Fatteh.  It is a dish that changes from region to region, country to country, so you’ll never grow tired of your Fatteh, although most variations contain meat unfortunately.

In Egypt it is eaten as a feast during Ramadan or to celebrate a woman’s first pregnancy.  Like I said, its party food, a celebration on plate.  Sometimes fatteh is even eaten as a breakfast, lucky people.  Wow!

Party food just got better:)

Fava beans you’ll find mainly dried, especially in World/ Asian food shops.  If you’re lucky to live near a Middle Eastern shop, you’re sorted.  You should be able to track things like Za’atar, Sumac, Tahini and Pomegranate Molasses down in supermarkets etc.

Fava beans are very popular in Middle Eastern cooking and you may have tried Ful or Ful Medames, which is a real staple.  I love the flavour of fava beans cooked like this, rich, deep and full flavoured.  We love cooking with Fava Beans, we’ve used Hodemdod’s Split Fava Beans to make this Yellow Thai Curry with Squash and also used Hodmedod’s dried fava beans here.  This what they look like.  Hodmedods are all organic and grown in the UK so we love ’em!


Recipe Notes

If you can’t track down fava beans, you could use chickpeas or red kidney beans.  Black beans may also be nice.

No za’atar in the house?  Go for dried mint or thyme, of both mixed together.

Short of sumac?  A drizzle of pomegranate molasses or lemon zest would be nice.

You can serve this dish cold, but I much prefer the beans and pitta warm.

I used carrots here, but for an extra special touch, sprinkle over some pomegranate arils.

Gluten-free option, just go for gluten-free flatbreads/ pittas.

Vegan Fatteh – One of my favourite dishes from my travels around Lebanon

Aubergine & Fava Bean Fatteh, Tahini Yoghurt & Pine Nuts – Lebanese Party Food!

The Bits – For 2 main course/ 4 starters

1 small onion (finely diced)

4 cloves garlic (peeled and finely sliced)

1 medium aubergine (cut into small cubes)

1 1/2 tbs cooking oil

500g fava beans (cooked)

1 teas salt

Black pepper

2 1/2 teas ground cumin

2 teas paprika

1/2 teas cinnamon

300ml bean cooking juices/ light vegetable stock

2 tbs pomegranate molasses


Tahini yoghurt

150g soya yoghurt (unsweetened)

4 tbs tahini

1-2 tbs pomegranate molasses

Large pinch salt (to taste)


Topping

2-3 gluten-free pittas (cut into thin strips)

1/2 handful fresh mint (finely chopped)

1/2 handful grated carrot or pomegranate arils


3 tbs pine nuts (toasted)

Sprinkles of Sumac/ Za’atar

Do It 

Preheat an oven to 200oC, toss the pitta in a little oil, spread out onto a baking tray and pop in the oven for 10 minutes until they are crisp.  Set aside.  The pine nuts can also be cooked on the baking tray, in the oven, check them every 5 minutes, they will burn easily.

In a large frying pan, heat of medium high heat and add the oil.  Fry the onion for 1o minutes, until golden brown, add the aubergine and salt, cook for a further 8-10 minutes until the aubergine is slightly caramelised.

Add the garlic, fry for a minute before adding the spices, adding a good amount of black pepper, stir them in and let them cook for just 30 seconds.  Enjoy the spicy aroma!!  Now for the beans and bean cooking stock and pomegranate molasses, stir, cover and simmer gently for 15 minutes.  Check the seasoning.

For the yoghurt, mix all the bits together in a bowl.

Serve the beans on a small plate/ shallow bowl, top with tahini yoghurt, scatter with pine nuts and pitta slices, then fresh mint, grated carrot, topped with sprinkles of sumac and za’atar.


Foodie Fact

Fava beans are broad beans, normally bought dried.   They are low in fat and full of protein and fibre, with good levels of folate, thaimin and minerals like manganese, copper, phosphorous, iron and magnesium.


Categories: gluten-free, healthy, Nutrition, photography, plant-based, Recipes, Side Dish, Snacks and Inbetweens, Travel, Vegan | Tags: , , , | 12 Comments

Moroccan Bessara with Harissa Oil – Nourishing Fava Bean Soup/Dip


Bessara – Nourishing Moroccan Soup

We’re getting 2018 started with a simple and nourishing dish from Morocco, a country I love and where I first tried this delicious soup.  We’re not long back from Spain, where we sit on beaches looking towards North Africa.  A tenuous link, but its awesome to be back here and blogging!!  After our little break in the sun, we’re topped up with fresh ideas for 2018.

This comforting bowl is ideal for new year, so easy and light, nutritious and flavourful.  It’s also inexpensive and the basic soup only has a handful of ingredients.  It also happens uses fava beans, which as you might know, were one of my favourite things about 2017.  Couldn’t get enough of them.  You can thin this out, or serve it as a dip.  Either way, it’s a dish I cook all the time, a great staple and something I’ve been meaning to put on here for years.  Finally, Bessara!

MOROCCAN MEALS

My favourite memories of Bessara was around 15 years ago (food lives long in my memory) when I was travelling all over Morocco and eventually found a little home in the Rif Mountains.  It was chilly, icy winds whistling through all the buildings, my favourite cafe’s door kept blowing off and was missing a window (but the mint and gunpowder tea and tunes were bang on).  I was lucky to be staying right beside the Hamam (steam baths), which was hewn from a hillside, so the whole area was warmed by the huge wood fires which heated the water.  The same wood fires where people would bring their clay pots of food to be cooked.  Great system there, plus the Hamas are the perfect place to meet people, like a pub really, without the booze and with the heating turned up to Gas Mark 2.  Oh, and the clientele are mostly naked.

Every morning I met some friends and went for Bessara, it makes for a lovely breakfast, and we sat on little rickety benches with all the djellaba wearing locals and morose Mohammed (cook and propietor) sat before two giant vats of bubbling Bessara.  His joint was basically a corrugated steel roof between two wonky buildings, but it was always buzzing and cosy.  It’s a warming soup in more ways than one.  Mohammed’s Bessara was very cheap and served without glee but with fragrant local olive oil and small bowl of fresh cumin and salt on the tables.

The bread man would occasionally whistle past on his push bike and we’d score some fresh bread straight from the bakery, that flat Moroccan bread that you may have tried.  If you’re from the North East, it’s basically stottie cake (more stottie here).  I’ve never been able to find out if there is any relation between the two, my romantic side which easily eclipses any of my other sides, says that yes.  There is.  In the middle ages some sailors from Seaham were blown of course and found themselves sahara bound.  Or maybe it was the crusades?  Either way, great bread and highly recommended with this soup.

PUNCHY DRIZZLE

I love harissa, especially with traditional Moroccan food, so I’ve come up with a zesty and punchy little oil to drizzle over the soup.  You’ll have a little bit leftover no doubt, but I love dipping bread into it to finish it off.  Just keep leftovers sealed in a fridge for a few days.  It’s perfect I think after one day in the fridge, all the spices and flavours settle and mingle.

LOVE THY FAVA

I have some organic Hodmedod split fava beans, they actually have a Bessara recipe on their site!  Great minds!!  Hodmedods were kind enough to send me some of their range, which is awesome, so you’ll be hearing from them more this year.  We love to give shouts out to producers who are doing brilliant things in enlightened ways.  Hodmedods are all about incredible pulses basically and are bringing back many traditional British varieties.  Fava beans are actually traditional in the UK, but I think more of them as a Middle Eastern/ North African ingredient.  We have used them to make traditional Egyptian Falafels (Ta’amia) in the past and they make a delicious hummus.

So a big shukran to Mohamed the mirthless in the Rif Mountains for warming my belly each morning with this classic soup, I wrote his recipe down one day, but it got lost along the way, I’m sure this is a reasonable attempt.  Proper mountain Bessara.  Travelling around Morocco changed my life, my world view and my feelings about stottie cake.  Bismillah!


Recipe Notes

By adding 750ml of hot water to the finished Bessara, you’ll have a soup.  As the soup cools, it thickens.

My favourite garnish for this soup is the harissa oil and black olives, maybe a sprinke of dried mint.  Toasted almonds are tasty too, as is fresh mint and you might like a lemon wedge on the scene…..the soup is really like a blank canvas for flavours, simply delicious but easily embellished.

If you are using split fava beans, there is no need to soak them beforehand.

Stirring a few handfuls of greens into this soup just before serving will be delicious and add a health twist and different texture, try spinach, chopped kale or spring greens.


———–

One of my favourite simple Moroccan dishes

Moroccan Bessara Soup with Harissa Oil 

The Bits – For 4 bowls

400g dried fava beans (split broad beans)

6 garlic cloves (peeled and finely sliced)

1.5 ltrs water

2 tbs cumin seeds

1 tbs paprika

2 tbsp olive oil

1 lemon (juice)

Sea salt (to taste)


Garnish (optional)

2 handfuls nice black olives (destoned) or toasted almonds (roughly chopped)

Sprinkles dried mint or chilli powder

Extra virgin olive oil (if not using the Harissa oil)

Fresh coriander (chopped)


Harissa Oil

The Bits – For one small bowlful

1-2 tbs harissa paste (how hot do you like it?!)

1/2 teas cumin seeds

1 teas coriander seeds

1/2 teas dried mint

1 garlic clove (peeled and crushed)

100ml olive oil

1 lemon (juice)

½ teas sea salt


Do It

Rinse the beans well in a colander with cold water.  Place in a large saucepan and cover with 1.5 ltrs of cold water, bring to a boil, lower to a simmer and place a lid on.  Leave to cook for around 45 minutes, until soft, stirring occasionally.

Place all the ingredients for the Harissa Oil in a blender and blitz until smooth.  Check the seasoning.

When the beans are about cooked, grab a small frying pan and warm on a medium heat, add your cumin seeds and toast them for a minute, tossing them gently in the pan.  They should begins to release their aroma and change colour slighty.  Place in a pestle and mortar and leave to cool a little, them grind them.  Enjoy the smell!  Taste a smidgen, if they are very bitter, they’re burnt, give them another try.  It’s easily done!

In the same frying pan, add the oil and then the garlic, fry until golden, should take a couple of minutes.  Add the cumin, garlic and paprika to the pan, stir in and simmer for a few minutes, then add the lemon juice and salt.  Check the seasoning, this soup will need a good amount of salt to bring the flavours out.  You might prefer it chunky, but when blended, this soup is velvety smooth.  I prefer it that way.  Use a stick blender.  It’s easiest.

Ladle the Bessara into bowls and top with olives, dried mint and harissa oil, or any of the other options above.  Best with flatbread.


Foodie Fact

Fava (very similar to Broad) beans are like all beans, they’re brilliant and protein powerhouses!  Nutritionally, they’ve no cholesterol or saturated fats, have plenty of fibre, vitamin K, B1 and B6, loads of minerals like iron, copper, magnesium, manganese, selenium, potassium and zinc, they even have some calcium.

Some tests have even claimed that fava beans can help with depression, they contain dopamine.


Categories: Budget, gluten-free, healthy, Healthy Eating, Nutrition, photography, plant-based, Recipes, Side Dish, Soups, Travel, Vegan | Tags: , | 4 Comments

Roasted Winter Vegetable Salad

Roast Winter Vegetable Salad

You know me, I like a salad anytime of year!  Lots of classic flavour combos and textures going on in this simple and nourishing winter salad.  Sweet apple and roasted winter roots, crunch of toasted hazelnut and the rich and zesty roasted garlic yoghurt dressing.

With all those bright seasonal colours, it’s a bit of a looker too and something bright for the eyes and taste buds, to get enlivened in the festive times.

Jane’s working hard at the minute and challenged me to make something that was substantial but not stodgy, we seem to have been eating a load of stodge of late.  Feels good when we’re eating by the fire to fill our bellies with big plates of rich stews and pies with mounds of potatoes, but we’re not exactly sprightly afterwards!  Maybe that’s what winter is about though.  Taking it easy and going with the flow of the season.  Chilling out!!

I think a tray of roasted veggies is one of the most satisfying things you can do with an oven and winter roots offer up so many tantalising combinations.  It amazes me that nature is so kind to us, putting all those nutrients and colours beneath the soil, pre-packed, giving us all we need through the long winters.

I like to roast at least two trays of veg and keep stocked up for a couple of days.  Make a quick soup, add to a stew/ curry, or mix with grains like we do here.  They’re just ideal things to have hanging out in the fridge.  I encourage you to double these quantities and roast away!

I know that pearl barley has slipped out of most peoples cupboards, other grains will also be great.  Something hearty like buckwheat would be really nice to try, wild rice, millet is one of my favs (all those gluten free too) as well as freekeh (well worth a try).  Good full flavoured grains.

Barley has that lovely chewy, nuttiness and is also really filling and inexpensive.  It’s the ideal winter grain for the UK!  I like to cook a mixture of wholegrains in a pan together, millet, quinoa and buckwheat are my staple for whole grain salads.  The flavours a knockout, especially when the grains are toasted in a dry pan for 5 minutes before adding any water.

Whole grains are one of the cornerstones of our diet in the BHK,  we definitely wouldn’t get very far without them.  We tend to eat them for two meals a day on average, ranging from oats to amaranth, faro to freekeh, we love ’em all.    Whole grains are super foods, nutritional powerhouses and give our body an amazing source of slow release energy, the ideal fuel for us wrapped up in little, easy-to-cook grains.

I would serve this on Christmas day, it would be especially good in the evening, when we want something tasty, but a little lighter.  You can serve it on a large platter and it will look amazing!  A real centre piece.

Recipe Notes

This salad can be served hot or cold.  It’s nice to plate it up and then pop it back in the oven to warm for a while.

Use any range of winter root veg you like here, squash and parsnip would be nice added to this recipe for example.  Even potatoes would be awesome

I’m not sure if you’ve ever put lemon on a radish before, check out the transformation.  They get even pinker and the pink leeches and they just look incredible.

If you don’t have fresh thyme, go for other wintery herbs like fresh rosemary or sage.

Roasted Winter Vegetable Salad

The Bits – For 2 as main 

100g pearl barley (rinsed in a colander)


2 large beetroots (chopped into wedges)

1 large carrots (thickly sliced)

2 small red onions (chopped into wedges)

6 cloves garlic (whole, skin on)

2 tbs rapeseed or any cooking oil


2 radish (finely sliced)

1 apple (cored and cut into wedges)

1 big handful kale (chopped)


30g hazelnuts (roasted)

3 tbs fresh thyme leaves

1 lemon (juice)

1 teas rapeseed/olive oil

5 tbs unsweetened soya yoghurt

Salt

Do It
Place your rinsed pearl barley in a saucepan and cover with plenty of water.  Bring to a boil and then simmer for 45 mins – 1 hour.

Preheat an oven to 220oC.  Place your beetroot, carrot and red onion on a baking tray and toss in a little oil and salt.  Roast for 40 minutes, turning everything at least once. Take out the garlic after about 20 minutes, when its nice and soft.  The hazelnuts will take around 5-10 minutes to roast on a tray in a hot oven.

Toss your apple half the thyme leaves and your radish in a bowl with the juice of half the lemon.

In a bowl, take the skins off your garlic and mash with the back of a spoon, squeeze in half the lemon, a little salt and the yoghurt.  Mix well together.

When your pearl barley is cooked, toss in the kale and stir, cook for a minute and then drain in a colander, pouring over cold water to cool the grains and kale fully.  Alternatively, serve it warm if you prefer.

Arrange the pearl barley on two plates, top with the apples and radish, then the roasted veggies, before spooning over the yoghurt dressing and finishing the dish with a sprinkle of fresh thyme leaves and hazelnuts.

Foodie Fact

Barley is a great source of minerals and fibre and it may also lower cholesterol.

Categories: healthy, Healthy Eating, Nutrition, photography, plant-based, Recipes, Salads, Side Dish, Vegan, Winter | Tags: , , | 10 Comments

Roast Carrot & Ginger Hummus

p1340868

Roast Carrot & Ginger Hummus – Get dippin’!

This is a lively one; zesty, colourful and filled with spice.  Ideal for a winter party, sure to brighten things up!  Playing with hummus flavours is something I believe all vegans enjoy, absolutely nothing wrong with the classic, but hummus is one of the tastiest vehicles imaginable for fabulous flavours!  Hummus is important!!  It’s one of those things that we can all cook, and we all have our own take on, some prefer a little more tahini, some more garlic…..

This hummus is not only a great combination of flavours, it’s also filled with all we need at this time of year to keep us shining, ginger, turmeric, cinnamon, citrus and of course tahini (we love it!)  I have added a small amount of oil here and think its rich enough, but by all means, add more to make it a really rich treat.  Just sub the water for oil.

I’ll be sharing some more festive recipes soon…..

The Bits – One medium bowlful, For 4-6 for dipping

500g chickpeas (cooked, drained and rinsed)

2 large carrots (roasted and chopped)

1 1/2 teas turmeric

1 teas ground cumin

1/2 teas cinnamon

4 tbs light tahini

2 tbs heaped ginger (finely diced or grated)

2 limes (juice)

50ml olive oil

50ml water

Salt


Do It

Add carrots, chickpeas, spices, lime juice, ginger, 1/2 teas salt and tahini to a blender and blitz for a while.  As it’s going, pour in the water and oil.  It is fine a little chunky, but blend for longer if you like a really smooth hummus.  Taste and add salt if needed to really bring out those zingy flavours.

Foodie Fact

There is so many vibrant and healthy ingredients packed into this hummus, it’s difficult to know where to begin with this foodie fact.  Shall we talk about turmeric?  Why not!  Turmeric is a colourful root, that looks a lot like ginger in it’s raw state.  Most of us know that turmeric is an incredible ingredient from a nutritional point of view, here’s a quick low down.  It full of beneficial bits and pieces, loads of iron, vitamin C, magnesium and good amounts of protein and fibre.  I like to sneak turmeric into meals, smoothies etc whenever I can.  Turmeric is also known as an anti-inflammatory and has been said to cure a whole host of ailments.  It is also a very cool colour (which is important;)

Categories: gluten-free, healthy, Nutrition, photography, plant-based, Recipes, Side Dish, Snacks and Inbetweens, Superfoods, Vegan, Winter | Tags: , , | 10 Comments

Pickled Jalapenos – Easy & Quick Way to Pickle

img-1605 (1)

Pickled Jalapenos – The easiest way to pickle

This is a legendary way to spice up your winter burgers, burritos or pizza (?!) plus homemade pickled jalapenos are way, way better than shop bought.  When not pickled, I even like ’em in a smoothie, something like kale, banana and apple, is awesome with a few slices of jalapeno, great also paired with pineapple.

You can take this recipe wherever you like flavouring wise, add spices or herbs, but I went for simple garlic with a little tickle of ginger.  Maybe some chipotle or other Mexican dried chillies, I wonder how that would go, never tried it…. let me know!

Use this method of pickling for most veggies, it’s a really simple way to preserve and enhance the flavours in vegetables.  For some strange reason, they were selling off jalapenos for pennies at our local shop in Caernarfon, I snapped them up and knew exactly where they were heading.  Jane is not a massive chilli fan, so having a jar of jalapenos in the fridge is perfect for me, I pop in there every now and again to add a little zing to dishes, of course, these will light up anything remotely Mexican.  They are surely one of the most legendary Mexican ingredients.

When I love a dish, I always want to find a way to make it myself.  These pickled are something I first really got a taste for in Mexico, I especially like the big jars of pickles in most street food style eateries, called ‘Escabeche’, huge jars of things like carrots, radishes, cauliflowers and onion.  A perfect lift to go with the rich Mexican dishes.  You can make ‘Escabeche’ like this, maybe add some black peppercorns to the mix.

These chillies will be nice served with our Cashew & Kale Black Bean Mole with Tofu Bacon or Mexican Corn & Mushroom Omelette with Avocado & Tomato Salsa.

Recipe Tips

I said this will work for most veggies, which is true, but with watery vegetables like cucumber, it’s best to salt them first.  Rub some salt into them and leave them to drain over a colander for an hour or so then rinse well.  This removes a good amount of the water and makes for more intense pickles.

If you leave the seeds in, expect fireworks!  In a good way if you’re a chilli head.  Take them out for milder, more placid results.

I love pickled garlic, so I’ve added a load of garlic cloves.  They mellow when pickled and are really crunchy and lovely.  If you’re not a fan, just omit them and add more chillies.

———————–

Pickled Jalapenos

The Bits – One large jarful

14 jalapeno chillies (sliced)


175ml white wine/ distilled white vinegar

175ml water

8 or as many as you like garlic cloves (peeled and whole)

2 bay leaves

4 slices fresh ginger

2 tbs sugar

1/2 tbs sea salt

Do It

In saucepan, add all the ingredients, bar the chillies.  Stir and bring to a boil, making sure the sugar is dissolved.  Add the chillies and leave to cool for 15 minutes.

Using a slotted spoon, pack your chillies, garlic and ginger into a clean jar, pour over enough pickling brine to cover.  Seal the jar and leave in the fridge and enjoy!  You can eat them straight away, but they’re better after a day or two.

The chillies will be quite happy in the fridge for a week.


Foodie Fact

Chillies are full, full, full of Vitamin C.  Perfect for a boost in the winter.  They are also rich in vitamin A and K, they even have a little fibre going on.


Categories: gluten-free, healthy, Healthy Eating, Nutrition, Recipes, Side Dish, Vegan | Tags: , , , | 4 Comments

Italian Vegan Summer Feast – A Celebration! (pt 2)

Italian Vegan Summer Feast!  

Here’s part two of our Italian vegan feast, a whole heaving table of vegan delights perfect for a summer celebration.  The idea is that they’re quick and easy to get together and show-off the incredible produce we get when the sun comes out to play.

These are the flavours of summer and I think Italy is one of my favourite countries to eat, wander and marvel.  I’ve never visited big cities I must add, but the chilled life in the Italian countryside is my kind of vibe.  Simplicity and balancing flavours are just second nature to the cooks and magnificence is never far from my taste buds.  Italy is a vegan travellers dream, in fact, any travellers dream.  I agree with the old school maxim, ‘don’t mess with the produce, just let them shine!’ (I might have just made that up).

EATING ITALIA (JUST THE PLANTS GRAZIE MILLE!)

I’ve done a load of travelling in the past year and was lucky to tour around the south of Italy again; Puglia, Campania, Basilicata, just the names alone have my mouth watering.  The south of Italy has so many vegan choices, traditionally, veggie food down there is very popular.  It was a poorer part of the country where people couldn’t always afford meat and dairy, so they got creative with the plants.  My kind of place!  I love the parmesan they make with basically just fried breadcrumbs.  Great texture and crunch.  I also love the ever present mushrooms.

Every restaurant has a range of vegetable dishes, generally simply prepared, sauteed quickly or char grilled.  There is of course, the classic Marinara pizza.  Just tomato sauce and maybe the occasional basil leaf, but the quality of the base is regularly sensational.  There is Arrabiata and its varietals, huge bowls of fresh pasta with a rich tomato sauce and knock out olive oil.  Occasionally a basil leaf.  The tomato foccacia is dreamy, melts in the mouth and I haven’t even mentioned the Antipasto.  Jeez.  Huge, elaborate displays of preserved flavour explosions.  All kinds and colours of olives, sun dried tomatoes, artichokes, aubergines, peppers, you know the score but really, if you haven’t nibbled one standing in a Puglian market post espresso, you haven’t really tasted the true antipasto.  The pizza/ pasta dishes mentioned normally weigh in at 5-6 euros in a nice restaurant.  Not bad eh!

I think the markets in the south of Italy are my favourite places for sniffing out fresh produce and generally, just to hang out.  I spend quality time admiring the creations on display.  Did I mention the sorbet, no need to miss out on the evening gelato ritual, the sorbet is normally incredible.  Really, incredible.

Have you ever eaten a peach in Italy!!?  That’s a whole other level and blog post I feel.  Even the plums are a wake up call generally to the potential of fruit and veg.  The sweetness.  In Britain, we’re doing out best really.  Great apples and potatoes.

One of our favourite little restaurants, in a cave overlooking the Amalfi Coast.

Italy has a reputation of being an expensive place to travel, not for me.  There is also a growing vegan movement and even in small towns, I found vegan restaurants, salad bars, kebab shops.  It’s become quite trendy, restaurants advertise vegan options via flashing lights or blackboards.

Basically, all lovers of food and the simpler, finer things in life cannot help but fall in love with rural Italy.  Is that right?  Have you been?  What can I look forward to in the North?  The tastebuds boggle.

Back to our humble little feast with an Italian flava.

See the first post here for the Pepper, Basil & Cashew Cream Cheese Tart, Rosemary Roast Potatoes, Tomato & Balsamic Salad and Italian Style Dressing recipes.

The Bits – For 6-8 as part of the Italian Feast

Aubergine Antipasto

2 large aubergines (peeled)
1 large garlic clove (crushed)
4 tbs olive oil
Large pinch salt
Dried oregano

1 handful sun dried tomatoes (chopped)

——————–

Roast your aubergine in the oven, 200oc, 25 minutes, until cooked and a little caramelised. Toss gently with the other ingredients. Leave to cool and pop in the fridge. Can be done in advance.

Roast Squash & Wholegrain Pasta Salad

Roast Squash & Wholegrain Pasta Salad

8 handfuls wholegrain penne
5 tbs vegan mayo
3 handfuls squash (small cubes)
1 bulb of garlic
1 large handful sun dried tomatoes (chopped)
1 handful parsley (chopped)
1/2 lemon (juice)

Salt and pepper

——————

Cook your pasta. Drain and leave to cool a little.

Roast the squash and garlic for 30 minutes in 200oC fan oven with a little oil and salt and pepper, take the garlic out after 20 minutes. Peel the garlic cloves and mash with a fork, stir into the mayo.

Place all ingredients in a large bowl and toss gently together.  Season with salt and pepper.

This dish is nice served warm, but also good cold.

White Bean Puree (Vegan)

White Bean Puree

450g white beans
4 tbs olive oil
1/2 lemon juice
1/2 teas sea salt
Parsley

Garnish
Whole beans
Olive oil

————————-
Place all in a blender and blitz until smooth. Check seasoning.

Serve ideally with a drizzle of olive oil and a handful of whole beans on top and maybe chopped soft herbs (basil, parsley) or dried oregano.


Serve dishes with


Large bowl of mixed salad leaves

Bowl of Olives

Olive oil/ Balsamic

Vegan cheese, like cashew cream, vegan parmesan.

Fresh Foccacia/ Ciabatta/ Any nice bread really

Extra bowl of dried oregano and mild chilli flakes

A bottle of something nice

Sunshine + smiles

Rosemary Focaccia

That’s it!  Enjoy the feast.  If you get to try it all out, or even just a few of the dishes, let us know in the comments below.  We love to hear about your kitchen adventures.


Categories: healthy, photography, plant-based, Recipes, Salads, Side Dish, Summer, Travel, Vegan, veganism | Tags: , , , | Leave a comment

Italian Vegan Summer Feast – A Celebration! (pt 1)

Italian Vegan Summer Feast – Get a load of that!!

We love sharing with you our favourite recipes!  Here’s a whole feasts worth!!  If I had time, I’d blog every night.  I think good recipes are best shared.  Let’s cook!

The post was originally so long, I’ve had to split it into two.  But don’t be overawed, the recipes are straightforward.  

The simple and delicious flavours of Italy make the most out of our summer produce. When the sun comes out, we start getting tasty tomatoes, peppers, and the flavours of the Mediterranean can be found locally in the UK for a short window. I love it! This is a feast designed for a party or entertaining guests/ people you hopefully like, when you want a table filled with a wide range of dishes, not too complicated food that compliments each other.  For me, Italian food goes perfectly with a sunny afternoon and a bottle of something amazing.

THE ITALIAN CONNECTION

The reason for this meal was our relatives visiting from Italy, they live near Lake Como. Jane and I love Italy, one of our favourite places on this big rock, but we’ve never been North.  Can’t believe we’ve got family living in Italy and we haven’t been to see them.  Shame on us.   Since coming back to the UK we’ve been loving kitchen time and trying out ideas from our travels.  I guess the tart is like a pizza, but with a puff pastry base.  When I’m busy, I like working with puff pastry, it’s far too easy.  I’ve just discovered pre-rolled puff pastry.  Wow!  That is pure laziness and brilliance at the same time.   Whack it on a tray, bake, job done.

Here’s some of our Italian travel snaps.

When preparing a menu, we need to think about textures and flavours, how they mingle and benefit from each other. I find writing menu’s really enjoyable and a great challenge.

If you can, present the dishes on large plates or shallow bowls. Spread things out, make them look lovely.


Recipe Notes

This is going to take a few hours to get together.  Its a weekend special.

Gluten-free – Just use gluten-free pastry/ pasta for the tart and your favourite gluten free bread.

Additional deliciousness – this tart is awesome with some prated vegan parmesan sprinkle over at the end.  Violife do a parmesan which is scarily like the real thing Jane and I were amazed by it, you could smell the pong upstairs and in the garden.  Just like the other stuff.  Potent.  There must be some kind of genius going on there. Vegan parmesan!! Whatever next. Exciting times in the foody world powered by plants.

(You’ll notice a couple of dishes are missing from the picture above, you’ll find a Chocolate Cake recipe here the Peanut Butter Scones may appear soon.)


The Bits – For 6-8 Light Meal

Pepper, Basil and Cashew Cream Cheese Tart (Vegan)

Pepper, Basil & Cashew Cheese Tart

1 pack puff pastry

1 tin chopped tomatoes
1 garlic
salt and pepper

3 peppers – different colours looks nice (sliced)
2 onions (thickly sliced)
2 handfuls squash (chopped into cubes)


Cashew Cheese

1 cup cashews
1/2 lemon (juice)
3 tbs nutritional yeast flakes
1/2 garlic clove
Large pinch dried oregano


1 handful fresh basil leaves

Dried oregano

3 tbs plant milk (for brushing)


—————-

Preheat fan oven 200oc.

Place the peppers, onions and squash on a large baking tray, season with salt and pepper, use two if squashed, and roast for 25-30 minutes.

In a sauce pan, add tomatoes, garlic, season with salt and pepper. Simmer for 15 minutes, until a thick sauce forms.

Roll out your puff pastry thin on a piece of lightly floured greaseproof paper. Brush with milk. Bake in oven for 12 minutes. Leave to cool slightly.

Spread a layer of tomato sauce over tart, scatter onions, peppers, squash, sprinkle with oregano, black pepper.

Brush the edges of the tart with plant milk, bake for 15 minutes. Can be served hot or cold.

Place all the cheese ingredients in a blender and blits until smooth.

To serve, blob on cashew cheese and tear over some basil leaves.


Tomato & Balsamic Salad

Tomato & Balsamic Salad

4-5 ripe tomatoes (chopped)
2 tbs balsamic vinegar
1 tbs olive oil
Salt & pepper
1 handful basil leaves

——————–

Mix together in a bowl and tear your basil leaves over.


Roast Rosemary Potatoes

Roasted New Potatoes & Rosemary

New potatoes (par boiled)
Few sprigs of Rosemary
Salt
2 roasted garlic bulbs


——————-

Take your par boiled potatoes, toss them in the rosemary, salt and oil, roast in the oven for 30 minutes. (200oC) until crispy and golden, turning them once.

Serve warm.


Italian Style Dressing

8 tbs olive oil
3 tbs white wine vinegar
2 small garlic cloves (crushed)
3 tbs chopped parsley
1/2 teas dried oregano
1/2 small lemon (juice)
Large pinch dried red pepper

——————-

Whisk all together in a bowl or shake together in a jar.  Check seasoning.


Buon appetito!


This is only half of the recipes, check out the Italian Vegan Summer Feast (pt 2) post for more.


Categories: Dressings, healthy, photography, plant-based, Recipes, Salads, Side Dish, Special Occasion, Summer, Vegan | Tags: , , , | 7 Comments

Msabaha – Lebanese Chickpeas (A tasty twist on hummus)

Msabaha – Lebanese Chickpeas

Better than hummus!?  Or at least equal!  Regardless, an awesome, quick and easy summer dish to be eaten alone with warm bread, maybe a salad and then take it the whole way and make it part of a summer feast.  Tables filled with lovely dishes one of my favourite sights, especially in the garden with a shining topping of sunshine.  Come on sunshine!!

BEIRUT BITES

I ate this mainly for breakfast on a recent trip to Beirut.  Warm, with crisp tomatoes and pepper, plus fresh, thin pitta bread, it set me up for days traveling around the fascinating country of Lebanon.  It’s a simple dish and can be ready in minutes.

Msabaha (some spell it Mussabaha, Msabbacha, Mschabeca, Messabbeha but in Lebanon I saw Msabaha, I hope that makes some sense) is a great twist on hummus, containing most of the same ingredients.  This is a really creamy, more-ish way of serving chickpeas, perfect as a picnic mezza.

I was sharing a table with a friendly American one morning and I recommended the Msabaha, he exclaimed “THIS IS THE NEW HUMMUS MAN!!”  I’m not sure about that.  I don’t think it really matters. It’s just Msabaha.  And it’s just amazing.

CHICKPEA LOVIN’

The Lebanese love, I mean love, their chickpeas.  I excitedly ordered a dish in a bar/ restaurants (there are loads of excellent bars and restaurants in Beirut, especially in and around Gemmayzeh.)  What showed up was basically a bowl of chickpeas, dusted with cumin and a splash of olive oil.  It was delicious, but still, just a bowl of chickpeas straight up.

The main challenge with travelling for me is re-creating the dishes that I loved once I arrive back home. It can be a thankless task, we cannot recreate the chickpeas here, for some reason, they taste so much better in the Med/ Middle East. Also the veg, the cucumbers and tomatoes in Lebanon were a constant sensation. We can’t replicate their fertile soil and sun. But we can try and we can get close.

THE BEST SOUVENIRS ARE RECIPES!

The funny-ish thing about travelling is we go away and sample all of these delicious delicacies and local people are unfazed by the adulation.  It’s like a tourist wandering into a Gregg’s and getting worked up about a pasty.  These kind of dishes are what everyone eats, they’re the working persons food, cheap, delicious,  plentiful and ever present.  In Britain, I think things like good chips and mushy peas, or a cheese and pickle sandwich (now back on the menu with vegan cheddar), or maybe even the perfect shepherd-less or apple pie are our equivalent of hummus, falafels, baklava and the like.  Simple food that everyone loves!  My best souvenirs are always recipes like these and delicious memories.

Art in Beirut – Sursok Museum

THE GREAT HUMMUS DEBATE – WHICH IS BEST?

Basically, don’t go there!!  In Lebanon, hummus recipes are precise and it can be a point for debate. I’ve encountered this in other countries, many little variation, some say add ice and blend, others say only use a hand masher, some say painstakingly remove the jacket from each individual chickpea.

Most people I spoke to in Beirut said keep it simple. No garlic, no spices. Just lemon, salt and a little olive oil. The hummus we eat in the UK, especially those pale imitations in the supermarkets, are nothing like those in Lebanon and Egypt. Their hummus is super creamy and perfectly balanced, also, the olive oil is normally very fruity.

In Lebanon, the folk I spoke to would never put cumin in hummus and many would not dream of garlic.  No, no, no, nooooo!  “Garlic!!  Are you crazy Britishman!!”  Direct quotes from a falafel stand in Beirut.

I think it’s about balance and knowing what your dream tahini tastes like and the texture you want.  Some like it a little rough, some smooth.   I like mine with a little more tahini. But anyway….back to Msabaha……

Remember this though, tahini alone, mixed with water, a little garlic and salt, makes for an incredible sauce for many, many dishes.  Can be called Tarator.  I love tahini, we should all be eating it at least twice a day in my humble opinion.  More at weekends.  Have you ever mixed tahini with jam/ molasses/ something sweet and spread it on warm toast or drizzled it over things like porridge or muesli?  You’ve got to try it!!  It’s a breakfast based revelation.

I love the simplicity of Msabaha, so easy to get very wrong and incredible when mastered. I’m no master, but this is a decent effort I reckon. If you’re from Lebanon, please try it and send me your kind and not-too-harsh feedback.  Chokran!!

Beirut has a few ‘beaches’. Thin strips of sand. This man was enjoying himself with his sound system and hookah (water pipe)

Recipe Notes

If you like a thicker sauce, stir in a few spoonfuls of hummus.  This is perfectly acceptable behaviour.

I ate this with hummus, so I didn’t make it really saucy.  Feel free to add more sauce.

Cook the chickpeas until they’re nice and soft, melt in the mouth!

I prefer soaked and cooked chickpeas, better flavour, but tinned will be fine.

I think this dish is best served warm.

I like cumin, so I put it in.

A nice twist on hummus!  Mussabaha, Msabbacha, Mschabeca, Messabbeha, whatever you call it, it tastes amazing!!


The Bits – Enough for 4-6 as a mezze

550g chickpeas (cooked) – 2 tins

1 teas ground cumin

6 tbs light tahini

1/2 lemon (juice)

5 tbs water (more if needed)

1 small clove garlic (crushed)

Salt


Toppings 

Sprinkle of paprika

2 cloves crushed garlic (optional but nice)

1/2 handful chopped parsley (use the soft stems also)

Big glug of extra virgin olive oil


Salad

1 green pepper

1/2 cucumber

2 tomatoes (all sliced)

Fresh mint leaves (I used basil)


Do It

Cook your chickpeas, as you like, and drain.  

When still warm.  Stir the tahini, water, garlic, lemon juice, cumin and salt together, adding the water gradually to make a thin sauce.  If you didn’t cook your chickpeas with bicarb of soda, use the chickpea cooking broth instead of water. You can make the sauce in advance if you like.

Gently stir the sauce into the warm chickpeas.  Top with parsley, paprika and crushed garlic and serve with warm flatbreads and crisp, chopped salad.


The incredible Baalbek, Roman and Persian monument, on the border with Syria. One of the most incredible historical sites I’ve visited.  Well preserved and totally empty.

Foodie Fact

Tahini!  Why we love it so, other than it tastes awesome.

Tahini is one the best sources of calcium out there, it keeps your skin and muscles healthy, high in vitamin E and many of the B’s, helps with detoxing, full of minerals like magnesium, potassium, iron and more, a great source of protein (even better than nuts), it is highly alkaline, it is high in unsaturated fats and therefore can help with weightloss.  

Categories: Breakfast, gluten-free, Healthy Eating, Nutrition, photography, plant-based, Recipes, Side Dish, Summer, Vegan | Tags: , , , | 13 Comments

Butter Bean, Lemon and Black Olive Salad – A Real Taste of Murcia!

Butter Bean, Lemon and Black Olive Salad

Butter Bean, Lemon and Black Olive Salad

A simple sunshine salad which makes a great quick summertime lunch.  Ideal served as a side or starter, add some chunky croutons or toasted nuts for a more substantial dish.

The sun is coming and with it comes sprouting a host of beautiful fruits and vegetables. Summer is an exciting time of year, we can finally don shorts again and be collectively surprised at how white our feet are! The flip flops are out in force, maybe a vest and we’re into the garden with salads and fizzy glasses. Certainly in Spain, salads are an every day delight.

There is a global constant that baffles me. You visit local markets and shops (this does not apply to the sub-Saharan region) and there are a wonderful selection of fruits and veggies displayed. You then go to the restaurant next door to find that none of the lovely local fruits and veggies are present on the menu. It’s a strange old situation. The world is addicted to potatoes and tomatoes it seems. Murcia is similar. Although this is the ‘garden’ of Spain, and possibly Europe, a Murcian salad consists of onion, tomato and some black olives (plus tinned tuna if you’re particularly unlucky). This is my version of the local salad using things we can all get our hands on.

You can’t just throw things into your finest salad bowl and expect magical results, salads need a little thought. There’s a balance there. I’d say always gently handle and chop your ingredients and toss them together with care. You want a nice combo of flavours and textures, without over doing it. Salads are our chance to showcase amazing produce and whenever possible, lets buy good stuff for our salads. You might be able to hide vacuous tomatoes in a stew, but in a salad, they just look so lame.

Puerto Mazarron market in full swing

Puerto Mazarron market in full swing

DOWN AT ‘EL MERCADO ESTUPENDO’

I’ve just been down to the local Sunday market here in Mazarron and beeeee jeehzus there is a startling array of amazing produce at the minute. Piled up like technicolour forts; melons like beachballs, bewildering varieities of tomato action, gangs of crimson peppers so deep and vivid, every conceivable shade of olive and crispy, fresh donuts (churros). Well, they seem to balance up all the healthy veggie behaviour. Spain is hot in weather and generally, super chilled in attitude. My kind of combo. ‘Manana!’ (tomorrow) is the Murcian moto. Their crest is probably a tranquil terrace scene, but I can’t verify that. Today is for enjoying…..

I rock up mid-morning just after the donut breakfast feast that’s washed down with goblets of brandy or thick coffee (maybe beer) sometimes a combination of them all will lashing of condensed milk and randomly, nutmeg. It’s a coffee called an Asiatico and is more like several desserts in a small glass swimming in a few shots of black espresso. If you’re lucky, you can score a fresh orange juice, but expect at least two funny looks as you make your way back to a wobbly plastic chair in the sun. Sunday is a good day here.

There is a whole host of other items sold at the market; counterfeit cd’s, plants, leggings, trees and the occasional pot or pan or pot plant. There is also a very cool pan pipe band from Peru who belt out all the classics. I must say, I just focus on edibles. I have a routine, I sweep past with an empty backpack, the first pass. I am above temptation. I don’t buy anything. This is a strict regime, fact finding, and essential for quality control and price comparison. There is no Asda price in Murcia, you’ve got to do the leg work and have hawk like instincts. Bargains are fleeting and sometimes well disguised.

I asses the form and then stop for a well earned cafe americano (sometimes plus a few crispy donuts). If I don’t have donuts, the lady will feel sorry for me and give me some anyway. Older ones from the bottom of the pile. A donut constant that I go with. Then the fun begins. I have pockets of small change and throw myself into the crowds of haggling Spanish and Moroccan housewives, all at least half my size and double my strength, who posses pin sharp elbows. Dead legs and worse have been known around the olive stand and especially at the bargain tomato family and always at the toothless apple dude.

Tomatoes - so many new types to try in Murcia

Tomatoes – so many new types to try in Murcia

The olive stand is a piece of work, ran by three generations of a family. It seems they’ll pickle or preserve anything going. Capers, caperberries, garlic, cucumbers, pink pickled onions the size of a cricket ball, the olives are pretty hot too. You’ll always get a few freebie tasters if you offer equally confused and intrigued expressions. Have you tried a purple olive? I went for some bitter bright green local olives today, they love their bitter olives in these parts, stuffed with lemon rind, minced onion and rosemary. Quite a thing I can assure you.

I know each stand intimately by now, after ten years, I’m one of the villages most well schooled veg selector. They all have their stregths and weaknesses and I try to spread the wealth (amounting to a few euros) around. I’d say on average, the fruit and veg here is at least 1/3 price in a UK supermarket. The Spanish supermarkets also charge more than Mazarron market. The market shifts from town to town, four days a week, I’ve been to each location but the Sunday one is the best. People are letting there hair down and there is a sense of celebration, most of the stall owners clutch a cold can of beer, churches occasionally ring bells and you’re never far from a chuckle or guffaw.

It’s a tough old life in Spain guys!! I’ll keep the sunny plant-based correspondence flowing. Here’s what I did with todays haul.

Mazarron sunsets are regularly a bit special

Mazarron sunsets are regularly a bit special

Recipe Notes
For a more filling salad, drizzle some bread with olive oil and toast under a grill. Roughly chop up and toss in a little more oil, a pinch of salt and a few pinches of dried herbs like oregano and thyme. Scatter over the salad before serving.

Pickled garlic is not that easy to find but it is a superstar ingredient. Use a couple of cloves of fresh garlic instead, it’s worth noting that the flavour is different, pickled garlic is sweet and mild tasting pretty well pickled! I find it quite addictive and sometimes just eat it straight up, I find its quite nice served with nibbles.

I find the lemon and a good extra virgin olive oil is more than enough dressing wise.

Spain boasts very fat and creamy butter beans. Seek out some beauties for this salad, they are one of the highlights.

Using pitted olives is a good idea.  An unexpected olive stone is always an unwanted crunch.

Great with some toasted croutons or a handful or toasted almonds

Great with some toasted croutons or a handful or toasted almonds

The BitsFor 4 as main course, 6-8 as side salad/ starter

500g cooked or 2 tins butterbeans (the fatter, the better)
1 small sweet onion or 3 spring onions (finely sliced)
6 medium sized tomatoes (ripe and sweet)
1 handful pickled garlic cloves (roughly chopped)
1/2 courgette (diced)
1/2 cucumber (diced)
1 head baby gem lettuce or similar (sliced)
2 big handfuls black olives

1 handful parsley (finely sliced)
Extra virgin olive oil
1 lemon (juice and zest)
Salt and pepper

Do It
Place all ingredients in a large salad bowl, drizzle with a little olive oil and the juice and zest of one lemon. Toss gently together with your hands.

Scatter over the parsley, some salt and pepper and croutons if your using them. Serve with more wedges of lemon if you fancy a little more zing and extra virgin olive oil for drizzling.

2016-05-08 17.05.07

Categories: gluten-free, healthy, Healthy Eating, Lunch, photography, Recipes, Salads, Side Dish, Summer, Travel, Vegan | Tags: , , | 4 Comments

Quick Carrot and Ginger Pickle plus Five Health Benefits of Ginger

Quick and easy - Carrot and Ginger Pickle Quick and easy – Carrot and Ginger Pickle

This is the perfect accompaniment to your Saturday night curry feast!  Curry makes any weekend extra special.

I like shop bought pickles, it’s generally what you eat in restaurants in India. Although the very best pickles I’ve ever eaten have been home made (no surprises there then!) Mango, lime and mixed pickles are my favs but I had a few nice carrots in the kitchen, so I thought I’d give this a go. The spice combination and method can be used for most firm, sweet veggies, pumpkin or squash for example also work very well. This is very much a milder pickle don’t expect that eye-popping and taste bud tickling saltiness.  Its mellow like a mango pickle with spicy bells on with a nice sweet and sour chilli-ness.

The drawback of most shop bought pickles is the salt. In India I have noticed pickles are used sparingly, a couple of teaspoons per meal. In Britain, I think we can overdo it sometimes and all that salt is just not cool. The lovely thing about taking a wholefood approach, making an effort to cook much of your food at home, is that you know whats going into your dishes. We can moderate the sugar and salt levels here accordingly.

FIVE HEALTH BENEFITS OF GINGER
Really ginger is more like a medicine than a food!  It is just so good for us.  Some people get a little freaked out when I start talking about the health properties of food, but I can’t help myself!!  I love to know that the food I enjoy is actually doing me some good, not just tasting amazing, but filling me with nutrition and vitality.  Healthy food is not the worthy, boring grey slop of old, its the bright and very tasty future for us all!

  1. Anti-oxidant – Ginger contains a powerful anti-oxidant and anti-inflammatory called gingerol.  It is one of the natural oils in ginger which gives it such a powerful aroma.  Ginger may also help to prevent cancer and helps to fight infections.
  2. Helps Nausea – Many people use ginger to treat nausea like morning sickness and sea sickness.
  3. Lowers Cholesterol – Ginger has been shown in many studies to reduce bad (LDL) cholesterol and has even been shown to lower blood sugar levels.
  4. Helps the brain – Studies show that ginger can help to prevent age-related damage to the brain and improve brain function in elderly people.
  5.  Can help to treat chronic indigestion and pre-menstrual aches – Food containing ginger leave the stomach quicker, beneficial for people who suffer from indigestion.  It may also help reduce pre-menstrual pains if taken at the start of the menstrual cycle.  It has shown to be as effective as taking drugs like Ibuprofen.

Ginger is most certainly one of those foods worthy of the ‘superfood’ name!

Back to pickle.  Enjoy this tangy, spicy pickle with flat breads and of course, a curry or two for company. It also goes down well in sandwiches and I even like it on toast in the morning. Remember, I also eat chillies for breakfast on occasion. I understand that it’s a slightly more intense affair than strawberry jam.


The Bits – Makes 1 jar or serves 4-6

450g carrot (peeled and cut thin half moons – slice anyway you like really as long as its thin)

1 onion (finely sliced)

3 tbs ginger (finely sliced or grated)

3 tbsp oil

½ tsp fenugreek seeds

1 1/2 teas cumin seeds

1 teas coriander seeds (the smaller ones are best)

5 whole dried red chillies (cut in half length ways – more if you love chilli)

1 ½ tsp turmeric

2 tsp salt

5 tbsp unrefined sugar

1/2 lemon (juice)

Very simple recipe:) Very simple recipe with brilliant results:)

Do It

If you are jarring the pickle and looking to preserve it for a while, sterilise the jars by either boil the jar and lid in a pan of water or bake in the oven for 15 minutes.

Add the oil to a large saucepan on medium heat and when hot pop in the fenugreek, cumin seeds and dried chillies. Fry until they pop, a minute or less, then add the carrot, onion and ginger, fry for five minutes.

Add the salt and turmeric, stir and lower heat, cover the pan and leave to cook until the carrot is soft, 20 minutes. Add the sugar and lemon juice stir, warm through for a minute and then leave to cool.

This pickle can be enjoyed once cooled or preserved for later tasty times. It will keep nicely in a sealed container for three days.

Quick Carrot and Ginger Pickle Quick Carrot and Ginger Pickle

Serve

With your favourite curry or like I said, good on toast!

Foodie Fact 

See above – we’ve got ginger covered.

We've been loving the winter sunshine down on the beach. We’ve been loving the winter sunshine down on the beach.
Categories: Chutney, gluten-free, Healthy Eating, Nutrition, photography, Recipes, Side Dish, Superfoods, Vegan, Wales | Tags: , , , , | 2 Comments

Braised Maple Parsnips with Young Nettles


Pan Roast Maple Parsnips and Young Nettles

Braised Maple Parsnips with Young Nettles

An ideal, quick and easy side dish and we are quite partial to the odd parsnip at the moment!  Throw some grains into this recipe (like millet or buckwheat) and a couple oh handfuls of walnuts or hazelnuts and you’re looking at a fine lunch.

Don’t let the bristly stings put you off, nettles are one of natures greatest gifts to Brits, they come just after winter and are packed with brilliant nutrients (see the ‘Foodie Fact’ below) that will help us get over our long winter blues. You can make them into a soup, stew, smoothie, pan fry them as they are; in fact these prickly lovelies are good in most things.  Nettle cupcakes may be pushing it however!

Nettles have a lovely flavour, quite unique, a little like spinach but with a unmistakable nettle tingle to them.  Nettles really feel alive, they are certainly a feisty plant and grow everywhere when given the chance.  The worst  thing you can do with nettles is cut them and leave them on the ground.  More will grow!  This is a good thing for us but can wreak havoc on your Dahlias.

HARVESTING NETTLES

Harvesting nettles is so easy, just handle with care.  We have been walking loads at the moment, reacquainting ourselves with all the local flora and fauna.  We normally stash a plastic bags in our pockets and use it for nettle picking.  A rubber glove, like a marigold or garden glove, can also be very handy.  If you are walking on a path, where people walk dogs, pick high.  For obvious reasons!!!  Some people even pick the nettle bare handed, apparently if you grab them quickly, it doesn’t hurt.  We have obviously not mastered this technique. OUCH!

Jane feeding our neighbourly horses - mid Nettle pick

Jane feeding our neighbourly horses – mid Nettle pick

Nettle season is coming to an end, but it seems that there are still many tender young plants around the Beach House.  Just pick the first four leaves down, anything below will be a little tough and coarse.  As with most leaves, don’t eat nettles when they have started to flower.  Something happens chemically and they lose their nutrients and become tough on the belly.

Fill your boots.  Now is the time of year to get your last batch of nettles and dry them for later in the year.  You can use dried nettles in soups and stews, but its really best as a tea.  Nettle tea is packed with nutrients and tastes delicious.  Free food!  We’d be silly not to!!!!  You can also make a load of tea and then cool it, strain it and keep it in the fridge and drink throughout the summer as an awesome, chilled infusion and full-body tonic.  Trust us, nettles are magic and will keep you shining!

One of the easiest ways to dry herbs, if you don’t have a dehydrator (they are becoming cheaper and more popular), is to lay your leaves out in the boot (for estates) or seats of a car and roll the windows up.  On a hot summers day, your herbs will dry out in no time at all.  You can dry herbs in a warm oven, but this can be energy consuming and hit and miss.  Sometimes they can burn.  Ideally, you live in a hot and dry part of the world, where drying means putting things outside in the sun.  In Wales, we have to be a little more creative!

I like to add a little lemon juice at the end, just to lift a little of that intense sweetness.  It gives a bit of a sweet and sour finish to the dish.  If you love sweet things straight up, you don’t have to bother with the citrus.

The Bits – For 4 (little plates), 2 (big plates)

5 medium sized parsnips (lightly scrubbed, but not peeled.  Cut into 3 inch batons or as you like)

6-8 big handfuls young nettles

1 tbs rapeseed oil

2 tbs maple syrup

1/2 tbs lemon juice

Sea salt and pepper (to taste)

Do It

Pick all the stems, insects etc off your gorgeous nettles (use your gloves for this), give them a good rinse.  We just want the small, tender, fuzzy leaves.  Get a small saucepan of salted water boiling.  Add the nettles to the water and blanch them for 30 seconds or so, then plunge into some cold water (keeping them vividly green).  Drain well just before serving.  If you want them warm, just blanch them before you serve the parsnips and don’t bother with the ‘plunge’.

In a large, heavy frying pan, warm the oil on a medium high heat.  Add the parsnips, toss in the oil and fry for around 7 minutes, until they begin to go golden and caramelised.  Then add roughly 2 tbs of water and cover with a lid, lower the heat to medium and leave them for 7 more minutes.

Then whip off the lid and turn the heat back up.  Pour over the maple syrup, gently toss the parsnips in the syrup and cook until you are happy with the beautiful, dark, caramelised glaze, a few minutes will do, then squeeze in a little lemon juice.

Braised Maple Parsnips with Young Nettles

Braised Maple Parsnips with Young Nettles

Serve

Stack the parsnips onto a nice plate, surround with a nettle ‘nest’ and tuck in.  You may fancy a little more salt and pepper.

Foodie Fact – Nettles

Nettles are actually more nutritious than Broccoli or spinach.  And they are free.  How cool is that!  I wonder how long until one of the big supermarkets starts to bag them up and sell them as a ‘niche’ product?

Eating nettles helps to keep our kidneys and adrenal glands up to speed.  Nettles are the perfect detox food, as they assist our bodies in expelling toxins.  These lovely leaves have also long been used as a diuretic and to treat joint pains.

Nettles are very high in Vitamin A (bones), K (blood clotting) and Calcium.  In fact, just 100g of nettles contains 1/2 your daily calcium requirement.  Calcium can help to alleviate symptoms of premenstrual syndrome, headaches, mood swings and bloating.

Nettles are also rich in minerals like Iron and Magnesium and are packed with dietary fibre.

Categories: Detox, Foraging, gluten-free, Healthy Eating, Nutrition, photography, Recipes, Side Dish, Spring, Wild food | Tags: , , | Leave a comment

Toasted Cashew and Green Pepper Pulao plus the healthy magic of Cinnamon

Toasty Cashews.  YUMAH!

Toasty Cashews. YUMAH!

Toasty cashews with sweet peppers and a raft of spices and fluffy rice.  Its all there.  Indians taking a staple dish way up there towards Nirvana and beyond!!!!!!

A simple rice dish (don’t be put off by the long list of ingredients) with some seriously tasty touches.  Toasted cashews are ever delicious.  Pulao is basically a side dish, but can really be a main course, something like a Biryani for example, with a few more veggies and a little more spice.  Pulao is like a toned down cousin of Biryani.  Just like all Indian food, flavours here are turned up to 11 and the possibility of spice combing are fully explored.  This may seem like alot spices to be putting into your rice, but they are worth it and if you are interested in cooking Indian food, you will find that all of these spices are used almost on a daily basis in your average Indian kitchen.

In India this March, above the Himalayan snowline in a family home.  Dinner time was a huge highlight (we could warm out hands over the rice)

In India this March, above the Himalayan snowline in a family home. Dinner time was a huge highlight (we could warm out hands over the rice)

A SPICY CONUNDRUM 

When you see the recipes for many Indian dishes you are immediately confronted with the sheer length and seemingly mind boggling array of spices in even a simple dish.  Do not fret, once you get them all together and start cooking more Indian food, your dhaba (spice rack) will become your best friend.  I always bang on about this, but keep your spices in sealed containers and preferably in the fridge (if you live in a hot place or your central heating is potent).  Don’t mix strong smelling spices with, like Hing (Asafoetida) with other spices, they’ll all be tinged with the funk of hing.  Get your spices ready, in one bowl if possible, before hand.  Then when the pan is hot and the spatula is flying, you can simply pour them in with no real fuss.  Bear  in mind however that some spices are better added earlier or later in the cooking process, depending on the dish/ spice.  Its a little complex really!  Being a bit organised with your spices beforehand saves you clambering around with slippy jars and unruly spice bags.

I’ve used brown rice and thrown some of my favourites, flax seeds in, but both are not exactly traditional.   If you use white rice, you could knock 10 minutes off the overall cooking time.

One of the main men in Nainital market.  Great onions.  India '15

One of the main men in Nainital market. Great onions. India ’15

The Bits

1 tbs cooking oil (vegetable/ sunflower etc)

400g brown rice

600ml light vegetable stock

1 green pepper (as finely diced as you can)

1 handful of cashews (chopped in half lengthways, like half moons)

2 cloves garlic (peeled and smashed up or finely diced)

1 large tomato (finely diced)


Spices

1-2 large red chilli (dried and cut lengthways, remove seeds for less heat)

6 green cardamom pods (split)

1 small cinnamon stick (2 inches long)

5 cloves

6 green cardamom pods (split)

1 teas cumin seeds

1 teas fennel seeds

½ teas nigella seeds

1 tbs flax/linseeds


Optional Topping

1 handful toasted cashews

1 handful fresh coriander leaves (roughly chopped) – we didn’t have any (soz)

Fried Pulao - Just add a few tomatoes

Fried Pulao – Just add a few tomatoes for a super simple lunch treat

Do It

In a large saucepan, with a good fitting lid, warm the oil on medium high heat and add the green peppers, fry them for a couple of minutes before adding the cumin and nigella seeds, stir for a minute and then add the rest of the spices and garlic, stirring all the time.  Cook these for a minute and then it’s time to pour in the rice and tomatoes.  Combine all the ingredients well and leave to warm through for yet another minute.

Pour over the stock and turn the heat up a little until the rice is vigorously boiling.  Now place a well fitting lid over the rice and turn the heat down to minimum.  Leave to steam away for 40-45 minutes (white rice, know off 10 minutes cooking time).

While the rice is cooking, grab a small frying pan and on medium heat, add the cashews and toast them gently.  Tossing them about, getting them nice and coloured.  Toasty.  Gorgeous.  Dark golden.

Once cooked, have a peak, the rice should be nice and fluffy.  With a fork, being careful not to scratch your nice, non-stick pan (if you are lucky enough to have one), gently tease and fluff the rice.  If you like added richness, you can add a drizzle of oil here and coat the rice.  It gives nice shine and richness and would be condone by most Indian cooks I know, although they would probably add a good knob of ghee.  Pop the lid on and leave to sit for a few minutes before serving.  The final, fragrant mingle……

Side/Main Dish (just add spoons)

Toasted Cashew and Green Pepper Pulao – Side/Main Dish (just add spoons)

Serve

Pulao is an occasion.  Mix in most of the cashews.  Warm a platter and pile it in the middle, this makes for a lovely centre piece for any Indian feast.  Or you can line some tea cups with cling film and spoon the pulao into them, packing it down quite well.  Turn the cups over, onto the plate you’re using for serving and gently lift off the cup.  This will leave you with a very neat and professional looking pile of rice.  Scatter with some freshly toasted cashews and a little fresh coriander.

Foodie Fact

All these spices are so very good for you.  At random let me pick cinnamon, a serious, serious anti-oxidants.  So much so, that it should be offered in all pharmacies across the country to treat and prevent things like colds.  Cinnamon has anti-inflammatory properties, it can help to stabilise insulin and hormones and can even help against heart disease.

Spices are our natural friends and the more spices you can add to your food, namely cook plenty of food from India or the Middle East, the healthier you will no doubt be.  Imagine the cumulative effects of eating decent amounts of cinnamon, fennel seeds, cloves, cumin, coriander…………….you’ll live a healthy life until you’re 200 (with some decent karmic conditions along the way).

JUST ADD SPICEX

Jane in Norbulingka Palace, Dharamasala, India '15

Jane in Norbulingka Palace, Dharamasala, India ’15

Categories: Curries, Healthy Eating, Recipes, Side Dish | Tags: , , , , , , , , , | 10 Comments

Homemade Baechu Kimchi

rsz_p1080453

Homemade Baechu (Cabbage) Kimchi

Kimchi is certainly pickle/ condiment royalty.  Very Korean and yet superb with traditional British veggies, a home for all your seasonal veggie fest’s and the perfect way of preserving the ‘gluts’ that we experience at this plentiful time of year.

I don’t know why I’ve used the ‘Homemade…’ in the title, it seems quite obvious that it would be homemade, but it does give a nice homely ring to a dish and there is nothing like the rancid smell of festering cabbage to make me feel settled and comfortable. I love the smell of kimchi and sauerkraut in the house, but I must admit that after a week or so, the garage beckons for our fermenting friend. Kimchi is a labour of love, but isn’t all cooking. Surely when we cook we are bucking the convenience trend and doing something for ourselves that is quiet intangible, but easily felt and munched. Food made with love, fermented with relish, is as integral part of any home. Sacrifice for our bellies is a worthy sacrifice I say. Kimchi will test your culinary resolve and passion for pickles to the max. Its like marmite you could say, there is an intense love/ hate things going on, Jane and I are in the Korean cabbage love camp.

Kimchi is a great place to start fermentation exploration, a spicy pickle that can be taken in many different directions from a flavour point of view.  This Baechu (Cabbage) Kimchi recipe is basic and very open to embellishments.  It is normally made with fish sauce, but for obvious reasons, your won’t find that on the BHK.  It is not missed either.

Kimhci is very simple to make and the toughest part is being patient enough to let it ferment properly before you munch it.  Kimchi lights up any meal, especially salads and rice dishes and can even be used in soups, stir fries and stew .  It is the national dish of Korea, where they eat it with pretty much anything and in vast quantity.   Your average Korean eats 125gms of Kimchi per day.  Three quarters of the Kimhci consume in South Korea is still made at home, which is great  to hear, although most South Korean residential areas must have quite a fragrant cabbage pong going on!!  Surely they have a special Kimchi closet or well ventilated area for its maturation.  Many businesses in Korea give a yearly ‘Kimchi’ bonus, so employees can go out and buy the ingredients to make a years supply of this wonder pickle.  Kimchi made in Korea is controlled by a legal standard, basically if it isn’t made the traditional Korean way, it just ain’t Kimchi.   In Korea instead of saying ‘cheese!’ when you have a photograph taken, they say ‘kimch!’.  Its a happy sounding word!  It certainly makes me smile.  Koreas obsession with Kimchi and the fact that it is normally eaten with rice or noodles is one of the factors keeping obesity out of Korea, generally they enjoy a high fibre, low fat diet with Kimchi as a tangy constant.

Kimchi is alot like its German sibling Sauerkraut, the only major difference being flavouring and the fact that Kimchi is softened in very salty water to start with and then fermented in less salty water.  Sauerkraut is slightly more straightforward.

We make a big batch of Kimchi, you can half this quantity if you are just starting out and are unsure as to whether Kimchi will become a major part of your life.  You will not be disappointed with the results, as I said, homemade Kimchi cannot be replicated and it is surprisingly easy to prepare.  Lastly, we should mention that Kimchi is ridiculously good for you and contains all the magic of other fermented foods.  This type of pickle cleanses the palate and also aids digestion.

If you are on a low salt diet, you can make Kimchi and Sauerkraut without salt, just substitute with wine, seeds like fennel, aniseed, dill, carraway etc or even seaweed (which contains sodium naturally).

One thing is for sure, fermenting is addictive and once you start, it opens so many doorways for tasty pickles to complement any meal.  Being fermented, they also store very well, so for minimum effort, you can have a constant supply of glorious tangy condiments.

Kimchi can also be made with most root vegetables; Swede, Turnip, Burdock, Jerusalem Artichoke, Horseradish……etc in Kimchi is awesome and any radishes are always welcome (and quite traditional to boot).

Chinese cabbage is easy to find in Asian/ Oriental Food shops throughout the UK and I’d imagine, the world.  Local cabbage also works well, it just isn’t quite as Korean looking or tasting.  Where you find Chinese cabbage, you will also find Daikon radish.

Have fun with your microorganisms!

The Bits – Fills one massive gherkin jar (see picture above)

1 kg Chinese cabbage (you can use bok choi or white cabbage as subs)

2 Daikon radish (or a large handful of radishes)

3 carrots (or turnip)

3-4 onions (or 1 large leek)

6-8 cloves garlic

6-8 red chillies (depending on how hot you like it!)

6 tbs fresh ginger (grated)

Sea salt

You may also like to add green peas, seaweed, artichokes, in fact most veggies that are seasonal can be added to a Kimhci to great effect.  Potatoes do not work so well.  

Veggie mix after overnight soaking

Kimchi veggie mix after overnight soaking

Do It

Grab a large saucepan or bowl with vertical sides that is big enough for the job.  You will also need a lid/ plate that fits snugly into the pan/ bowl, something that will be suitable to press the kimchi down and keep it submerged beneath the brine.  You don’t need purpose bought equipment here, just use whats hanging around the kitchen.  You’ll also need a weight, we use a large jar filled with water, anything good and heavy.   Really, the heavier the better.  The more you press and bash the kimchi, the quicker it breaks down and better it tastes (all the flavours can then get right into the cabbage and veggies).

Mix your brine, 2 litres of water and 9 tbs of salt.  Stir to dissolve salt, taste to check that it is very salty.

Roughly chop the cabbage and finely sliced the radish and carrot.  Leave these veggies to soak in the brine, weight them down and leave overnight to soften.  Add any other seasonal veggies at this stage.

Grate the ginger, mash and slice the garlic, remove the seeds from the chillies and slice (pop them in whole to reduce the heat of the kimchi), use loads of spices and flavourings, Kimchi loves it!  I then like to add the spices to a pestle and mortar and mash them up a bit, this can also be done in a food processor (just pulse a few times).

Drain the brine off the vegetables (reserve the brine) and taste them to ensure they are salty enough.  If they are too salty, unpleasantly so, rinse them with fresh water.  If they are not salty at all, sprinkle in a few more teas of salt.

Mix the veggies with the spice paste thoroughly and stuff into your saucepan/ bowl.  Pack it down tightly, bash it around a little bit with a rolling pin if you like, lovingly abuse it!  Press down with your plate/ lide until the brine is released and rises above the veggies.  You may need to top it up a little using your reserved brine.  Leave the kimchi, with a weight on top, for a day, covered with a kitchen cloth or anything that will keep out insect intruders and dust.  Any bits of vegetable that float to the top, escaping the lid, just throw into the compost bin.

Leave to ferment in a warm place, the smell will be overpowering at times, so bear this in mind.  Taste the kimchi everyday or as often as you can (or remember to do so).  When the Kimchi tastes ripe, tangy and very flavourful, place in a sterilised glass jar (or several) and keep in the fridge.  This will take between one to two weeks.  The warmer the place, the faster the fermentation.  Keep the Kimchi well weighted and pressed, you can even do this by squeezing it with your hands on a daily basis (which I quite enjoy).  Microorganisms work better in the heat.

This is a relitively low salt Kimchi, traditonally in Korea it would have more salt and be left in a cooler place to ferment for alot longer.  This works if the smell is overpowering your house and it needs to be moved to a cellar/ garage.  We are gluttons, we cannot be that patient unfortunately!!!!

Pressing the Kimchi down evenly is very important

Pressing the Kimchi down evenly is very important

Any mould/ spores that form on the brine surface are perfectly natural, just skim them off regularly.  Your Kimchi is very safe in its neutral brine home with its friendly and beneficial bacteria.  Bacteria has such a bad rap, but we are made up of billions maybe trillions of them!

Serve

I like it stirred into plain rice, a very Korean way of eating it.   Jane likes it on a mixed salad plate.  Stir frying it with tofu is a real treat, or use it to liven up soups, especially miso based soups we have found.

We both like it pure, spooned straight from the jar into our mouths, no nonsense, no additions required.  Kimchi is a flavour-fest straight up.

Foodie Fact

Kimchi is packed with vitamin A, B and C but its real star is the healthy bacteria present in all fermented foods, called lactobacilli.   It is normally found in yoghurt, so for vegans, eating fermented foods is a great way of getting this wonder bacteria into our diets.  Loctobacilli helps with digestion and works to prevent yeast infections.  Fermented cabbage has also been shown to help fight cancer.

The Beach House at sunset (through the Hawthorn tree)

The Beach House at sunset yesterday (through the Hawthorn tree) – we’re having an amazingly sunny autumn up here.  Summer hasn’t ended yet and its Oct 1st!!!! 

Categories: Fermentation, Healing foods, Recipes, Side Dish | Tags: , , , , , , , , , , | 8 Comments

Beetroot, Apple and Caraway Sauerkraut

Great jar, inaccurate label.  It should read 'Beetroot, Apple and Caraway' Sauerkraut

Great jar, inaccurate label. It should read ‘Beetroot, Apple and Caraway’ Sauerkraut

Sauerkraut is a well disguised super hero. Cloaked in cabbage and a fermented glow, Sauerkraut is a dish that is not only delicious, but is very easy to make and gives us some very pleasant nutritional boosts.

China, with its amazingly rich and ancient food tradition seems the source of picklin’. It is said that traders brought many of their tasty pickles and fermented fare from the Far East to Europe. ‘Sauerkraut’ is the German name for fermented cabbage, the French call it ‘Choucroute’ and British people just call it “Fermented YUM”.

The fermentation of Sauerkraut involves a number microbial species; one creates an acid environment for another to thrive and the process continues until the ph is acid and we are left with the perfect conditions for pickling a cabbage. You just need to form a decent brine, cover the vegetable with it and leave it until you like the texture and flavour. Any kitchnen will have the equipment necessary to produce a decent ‘kraut and you can play around with the veggies, mixing and matching different combos.

This time of year, early Autumn in North Wales, is the perfect time for Sauerkraut making. All the ingredients we use here are bang on seasonal and we’re stocking up our larder for another long winter time, when vividly coloured sauerkraut is a pleasant surprise to unearth (not that we’ll be here, we’ll be in Turkey!!!!!!!). A ray of purple light in the chilly grey gloom. We like the addition of apples here, it gives a hint of sweetness. Beetroots are also doing well up here and a little caraway is always welcome to the party, giving things an unmistakeable, East Europe feel (where this kind of preserving behavior is very popular). Red cabbage makes an appearance to add even more colour and a backbone.  Proper cabbage-ness.

The process may seem a little long winded, but I’ve tried to simplify it down and make it accessible to the ‘kraut curious.

Buster (always interested in the smell of sauerkraut)

Buster (always interested in the smell of sauerkraut)

This recipe is lifted, with a few BHK modifications, from the brilliant book ‘Wild Fermentation‘ book by Sandor Ellix Katz. We are really getting our teeth into all things fermented at the minute, coming soon, the easiest Apple Juice Hooch imaginable (you almost have to do nothing to make home crafted booze!) and a really simple Kimchee recipe.

If you are avoiding salt, there are many salt-free sauerkraut recipes out there. We are yet to try them, but they will definitely be interesting!

You can add virtually anything to sauerkraut and it tastes good (this is not a challenge!); different herbs, spices etc.  We’re just sampling an Indian spice stylee version (you will not be surprised to hear!!!!) Can’t wait for the pokey results.

Fermenting and conserving vegetables using brine is something that once picked up, will be a constant source of inspiration in the kitchen. Making things like the glorious Kimchee or pickled onions/ gherkins is a not to dissimilar technique and of course, homemade stuff tastes leagues better than our shop bought friends. Once you start picklin’ and preservin’, its hard to stop (strange as that may sound).

Get your ‘kraut on!

The Bits – Makes roughly 1 kg of ‘kraut

1 medium-sized red cabbage
2 beetroots
1 red onion
(roughly grate these)
1 apple (cored and sliced)
2 teas caraway seeds
2 tbs sea salt

Grated and ready for action

Grated and ready for action

Do It

In a deep bowl or pan (preferably with straight sides), add the grated bits, caraway and sprinkle over the salt. Mix in well with your hands, pack down as well as you can.

Pick a lid/ plate that fits snugly over the sauerkraut and place a weight on top. Use kitchen weights, bottles of wine, whatever is handy and weighty. This weight will force the liquid from the veggies and fruit, the salt takes care of the rest via osmosis. The brine will begin to form. As the liquid gradually rises, keep pressing the lid down regularly until the brine covers the sauerkraut (this may take 24 hours). This is what we want. You can now cover this with a kitchen cloth and leave for 2-3 days and let the microbials do their work.

Some cabbages contain less water than others, if after 24 hours the brine is not covering the veggies, add salted water (1 tbs salt per 250ml water). Check the ‘kraut every day or two and skim off any ‘bloom’ that may form. This is technically mould, but is rare and does not affect your sauerkraut as it is protected by the brine.

The sauerkraut is normally ready after 3 days, depending on the heat of the room (the hotter the less time it takes to mature, the cooler the longer it can be left). It should be tangy and crisp.

You may like to scoop some out and keep it in the fridge when it is young and leave it for a few more days to mature, noting the flavour difference and what is your preference. We like ours funky and leave it for 5 days-ish. If the sauerkraut is getting soft, its probably passing its best and should be eaten pronto.

Serve

We’ve been having ours all over the place.  Great for picnics and packed lunches, on toast and a nice little surprise package on a plate of salad.

Foodie Fact

Fermented cabbage and other Brassicaceaes (Bok choi, broccoli, cauliflower, Brussels sprouts, mustard, kale, spring greens and many more) have been shown to help against cancer. When the cabbage breaks down, it goes through a chemical shift and the resulting isothiocyanates have been shown to fight the big C.

Sauerkraut juice is also a magical tonic, regarded as a digestive aid second to none.

Hell's Mouth Beach, Llyn Peninsula - Ideal picnic spot for sauerkraut scoffing

Hell’s Mouth Beach, Llyn Peninsula – Ideal picnic spot for sauerkraut scoffing

Categories: Healthy Eating, Raw Food, Recipes, Side Dish | Tags: , , , , , , , , , | 9 Comments

Creamy Broccoli, Sunflower and Lemon Dip

Broccoli, Sunflower and Lemon Dip

Broccoli, Sunflower and Lemon Dip

Fancy a quick dip!  This simple, creamy vegan dip is a great way to get more broccoli into our lives.  Which is never a bad thing!

Broccoli is one of the healthiest things sprouting from the earth.  Outrageously high in vitamin C and K.  Broccoli should not be cut before storing, otherwise the vitamin content decreases and should not be washed before popping in the fridge (a general rule with all fruit and veg) as this speeds up the spoiling process.

The nutrients in vegetables and fruits is directly effected by the soil and methods used in growing.  Organic is best, but even modern organic, industrialised practices leads to an depletion in the nutrients in soil and  subsequently the things grown in it.  In the Beach House, we wholeheartedly recommend befriending local producers/ farmers or even better growing your own.

This went down a treat at lunchtime today, perfect summer dipping fodder with the added benefit of being super healthy and light.

The Bits – Males one bowlful

300g silken tofu

2 handfuls sunflower seeds (soaked overnight = smooth dip, unsoaked = crunchy dip)

1 small head of broccoli (finely chopped)

1 small clove garlic (peeled and crushed)

1/2 lemon (juice and zest)

1/2 handful of fresh dill

1/2 handful of mint leaves

1 tbs good olive oil

Cracked pepper and sea salt (to taste)

Do It

Place all in a food processor and blend for a minute, scraping the sides down if you need to.   If you have used unsoaked seeds, expect a nice crunch to your dip, otherwise, make it nice and smooth.

Beach House radishes - ready for dipping action

Beach House radishes – ready for dipping action

Serve

With all your favourite crudites, we love to dip oat cakes into ours.

Foodie Fact

By birth, Broccoli is an Italian.  A member of the cabbage family and the green sibling of the cauliflower.  It is never good soggy, steam for 5 minutes max or serve raw.  Broccoli is a meal in itself, use the leaves and stems for different textures.

Broccoli has excellent anti-inflammatory and anti-oxidant properties, especially high in vitamin C.  We regularly add it to morning juices to gives us a gentle kickstart in the right direction.  Broccoli is also outrageously high in fibre, helping fight cholesterol and keeping our digestion ticking over nicely.  This green hero also helps our eyes and repairs our skin.  Only a handful of broccoli per day will have considerable benefits.

Summer time and dippin' is easy.....

Summer time and dippin’ is easy…..

Categories: Nutrition, Recipes, Side Dish, Vegan | Tags: , , , , , , , , , | 3 Comments

Creamy Tofu & Olive Dip (Vegan)

Tofu and Olive Dip

Tofu and Olive Dip

HAPPY EASTER Y’ALL!x

Easter is all about family, Mum’s here and we’ve been doing some celebrating.  It seems nowadays that no party is complete without a stonking dip to showcase (or is that just me!)  Dips act as the perfect accompaniment to pre-meal nattering and decadent snacking antics.

This is a very creamy/ cheesy tasting dip without the cheese.  I think its the olives and tofu that combine to form an unusual vegan cheesiness.  It is rich and like all dips, superbly versatile.  Spread it on things, dip things in it, eat it by the spoonful, anyway you enjoy this is just fine by us.

Making our own tofu appeals, but we hear it can be a pain.  Here is an interesting little clip that has inspired us and simplified things greatly:

We are moving back to our vegan ways, little by little and this kind of vegan dip leaves us with plenty of space to get stuck into our Easter bounty.  Mum even made Jane and I an egg this year, what a talented creature!  Its chocolate and ginger and will definitely not be seeing the light of Easter Monday.  YUM.

I’ve put one clove of garlic down here, but we actually had two as we are full-on garlic fiends.  One is erring on the side of normality.

This can be thinned down by adding a cup of water, or a little oil, depending on your persuasion, to make a nice thick salad dressing.

Happy dipping!

The Bits

250g firm tofu, 1 cup green olives (pitted), 1 lemon (juice and zest), 1 clove garlic (crushed), 1 handful mint leaves, 1 handful basil leaves, sea salt and cracked pepper to taste, dash of fruity olive oil

Do It

Pop all ingredients in a blender and blitz until smooth.

Serve

We added it to a salad, adding nice creaminess and have also dunked wedges of carrots in with gusto.

We Love It!

All the cheesiness without the dairy bits!  A pleasant change and very quick to get together, for all your impromptu party dip needs!

Tofu in all its glory

Foodie Fact

Tofu is a magic food with a bad rep due to tiresome jokes about vegetarian hippies and the like.  It is an acquired taste to some, but adds a great texture to all it touches and is a great vehicle for bags of fat-free protein in anybodies diet.  Tofu contains more protein than eggs and milk and contains a quarter less calories than beef and a third of the calories (that’s the main protein brigade taken care of!).  Like all plant based foods, tofu is completely cholesterol free.

Like with all soya products, we strongly recommend going organic.

Categories: Dressings, Recipes, Side Dish, Vegan | Tags: , , , , , , , , , | 2 Comments

Blog at WordPress.com.

%d bloggers like this: