Chutney

Coconut and Caulilflower Gigglebean Curry with Coriander and Lemon Chutney

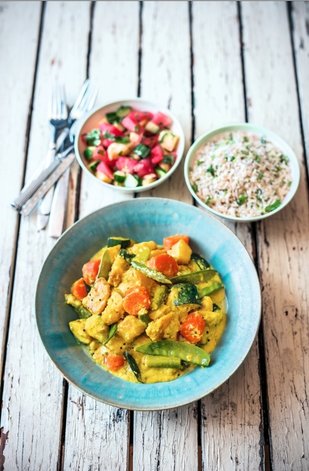
Vegan Coconut and Cauliflower Chickpea Curry – Quick, healthy and delicious!


A one pan, seasonal curry.  All vegan and very easy to cook.


It doesn’t get much easier and nutritious than this to make a crowd pleasing curry.  This really feels like a bowl of spicy abundance, a staple bowl of sunshine.

This was lunch today as Storm Something-or-Other blows itself up outside.  The trees are rocking, the rain’s coming down sideways, even our blackbird has took shelter just outside the kitchen, not fancying getting mixed up in that raging wind.  But we loved this one, so I thought I’d quickly share it with you.  This is the kind of bowl that will fuel happy bellies in our house all the way through the depths of winter and beyond.

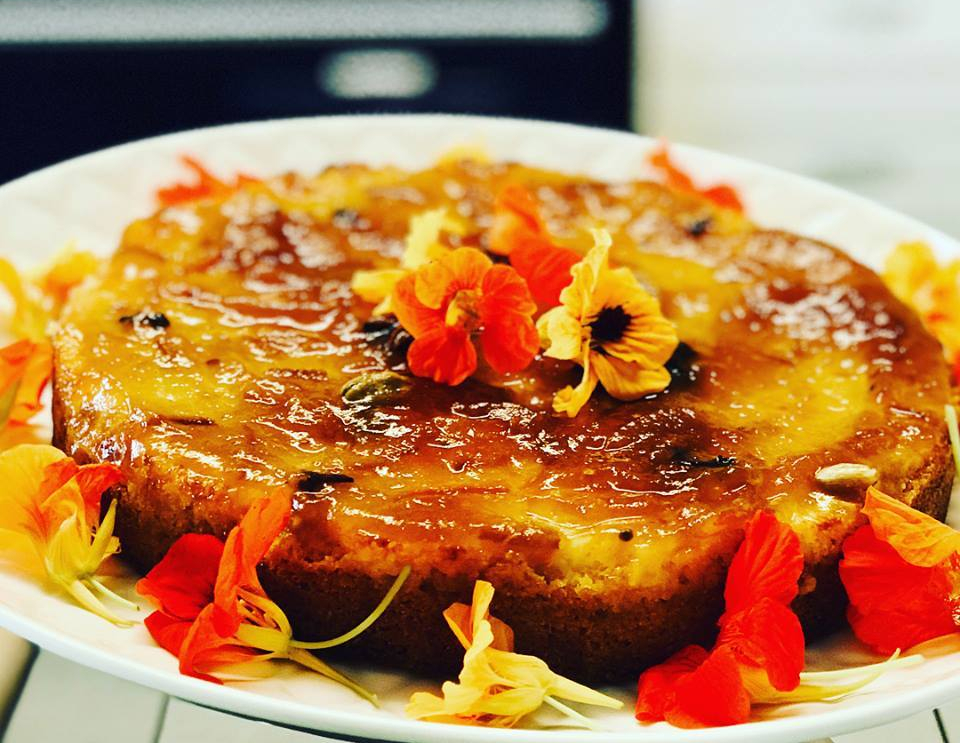
Taking this picture was a little tricky, but the colours are there for you, loads of nourishing ingredients meeting in a vibrant bowl of spicy winter comfort food.  The rain is lashing the house, the wind is whipping the world, but we’re cosying up to a curry.  Happy days!!

Chutney is generally a bit different in India to the British variety (fruity, sweet and sour, eaten with cheese etc).  Chutney can mean many things, a whole variety of pastes and sauce bases.  Here, we’re talking a creamy dip, which adds bags of herbs to any plate of Indian food.  This chutney is versatile and will accompany many dishes, add a twist to a noodle bowl, stirred into a soup, drizzle over salads or even add to an Asian-style sandwich.

What we’ll do here is make a nice thick spiced tomato sauce, then cream it up with coconut, chickpeas are radiant in so many ways, add seasonal veg, a fresh and zesty chutney, there’s a wholeness to this kind of eating.  A mild and satisfying curry with minimal fussin and frettin. Jane is not a fan of chilli, so this is a mellow curry.  Light, something non-curry fans (do they exist?!!!) can enjoy.


Enjoy this bowlful of home cooked happiness!


I hope you get to try this recipe out, let us know in the comments.  Feel free to say hello or sign up to our newsletter here.  There will be lots of new recipes and travel stories.  I’m heading to Israel, Spain, Italy and Austria soon.  I’ll be doing some cooking and always enjoying the ride!

Plus, I’ll be posting more about our experiences walking the Camino Portuguese from Porto to Santiago de Compostela.  


PS – I’m told that Gigglebeans is a nickname for Chickpeas in Germany, and we like it!!


Recipe Notes

Coconut cream is the thick cream on the top of many tins of coconut milk.  A fail safe way of getting a good, defined layer of coconut cream is placing the tin into a fridge for a few hours.  Flip it over and open.  Scoop out the coconut cream.  Reserve the rest for adding to soups, cakes or stews.

Use any mix of seasonal vegetables you like here.

This recipe does make a BIG panful!

Taking shelter from the storm – Wintery Vegan Chickpea Curry, full of creamy spiciness, loaded up with nutrition and big flavours, plus some spicy red cabbage ‘kraut


Coconut and Caulilflower Gigglebean Curry with Coriander and Lemon Chutney – Vegan, Gluten-free


The Bits – For 4-6

2 tbs cooking oil (cold-pressed rapeseed we like)

1 tbs cumin seeds

3 large garlic cloves (finely sliced)

3 tbs fresh ginger (finely sliced)

2-3 teas garam masala

2 teas ground turmeric

150ml hot water

1 tin tomatoes (or equivalent fresh tomatoes)


1/2 small/ 400g cauliflower (chopped into chunks)

1 pepper (deseeded, chopped into chunks)

2 tins/480g cooked chickpeas

1 tin coconut milk


1 bok/ pak choi (sliced)

3 tbs fresh coriander (finely sliced)

Sea salt


Do It

In a large saucepan or frying pan, warm your oil on a high heat, add the cumin seeds.  Stir, then quickly add the ginger and garlic, continue stirring.  Cook for 2 minutes, then stir in your spices, followed by the tomatoes and hot water.  Add 1 teas sea salt and stir.  Bring to a boil and cook for 3 minutes.

Now add your cauliflower and pepper to the mix, stir and cook for 5 minutes.

Pour in you coconut milk and chickpeas, bring to boil again and cook for 5 minutes, more. Check that the cauliflower is cooked, nibble a bit.

Stir in the bok choi and fresh coriander.  Cook for 2 minutes and check seasoning, adding a little more salt if your tastebuds agree.

Serve in a shallow bowl, drizzled with the coriander and lemon chutney.  We added some more freshly chopped coriander and desiccated coconut, along with warm paranthas.  Your favourite rice is also delicious, chopped chillies for spiciness.

All of your favourite curry accompaniments apply too.


Coconut and Lemon Chutney 

The Bits – For One Small Bowlful

35g desiccated coconut

60g fresh coriander (with stems)

4 teas lemon juice

4 tbs coconut cream (from the top of a tin of coconut milk)

100ml water

1/2 teas sea salt


Do It

Place all into a decent blender.  Blitz on high.  Scrape down the sides and blitz again.  Do this until a creamy chutney is formed.  Taste and add salt as needed.


Foodie Fact

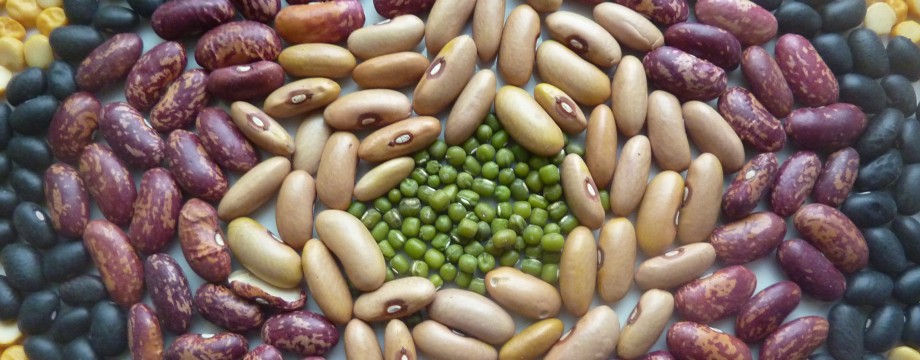
Chickpeas are a staple for most of us, so versatile; hummus, stews/ curries, makes an awesome flour (gram), roast them, add them to a cake mix, they know no limitations!!

Maybe you’re not so aware of how amazing gigglebeans are for our dear old bodies.  They’re a good source of protein and fibre, a great start, this means that they’re filling.  They are low GI and are a good source of vitamins and minerals; there’s iron, calcium, potassium and magnesium.

What’s not to love!!


Categories: Chutney, Curries, gluten-free, healthy, Healthy Eating, Nutrition, photography, plant-based, Recipes, Vegan, Wales | Tags: , | 5 Comments

Mango and Papaya Chutney

Mango and Papaya Chutney (vegan, gluten-free)

A tangy summertime tropical treat that goes well with most things; curries, burgers, salads, vegan cheese.  I used our Moxarella – Vegan Mozzarella recipe here on quite a tropical ploughman’s style platter.

Mango and papaya are two of my favourite fruits, although getting good ones can be tough in Wales.  I’ve noticed more papayas becoming available and the key to a papaya is to get them nice and ripe.  The skin should be almost completely yellow and orange and it should feel a little soft.  When I’ve eaten papayas in more tropical places, they go from just ripe to woah, take it easy, way too ripe in around 10 minutes.  It seems that in cooler climates, papayas are more relaxed.  Ours took around 4 days to ripen in a fruit bowl with bananas, if you want to keep it from ripening, pop it in the fridge.  I think a ripe papaya is a match for a ripe mango and, in India especially, is probably a 1/5 of the price.  No wonder Christopher Columbus called it ‘The Fruit of the Angels’.

Papaya Farming

I’ve worked on a organic farm which grew papayas in India. I became pretty good at harvesting them.  This entails using a long piece of bamboo, standing under the tree and jabbing (gently) a ripe papaya with your bamboo appendage, they’re the yellow/ orange ones, and in approximately less than a second, catching the falling papaya with your free hand.  This is a tricky business and takes practice and the reactions of a mongoose, of which there was family of living just beside my hut.  This was in Tamil Nadu.  Most mornings we harvested the crops for the local market, a fascinating array of produce created in a relatively small area, using mainly permaculture farming practices.

I was writing parts of Peace & Parsnips at the time, in the sweltering heat of summertime, the farming was a day job of sorts.  It was a organic farm in a community called Auroville.  A fascinating place.  The farm was called Solitude Farm and I also cooked lunch there with the women in the kitchen.  I learned much, mainly about using tropical ingredients like yams, banana flowers, plantains, various flowers, purple amaranth, snake gourds, plenty of coconut, and all kinds of other things.  Surprisingly for me, basil and little sweet cherry tomatoes grew like weeds all over the place.  We cooked on wood fires, crouching on the floor.  I loved it.  The restaurant used only organic produce grown on the farm, even the rice and peanuts.

Lunch is legendary at Solitude – celebrating the produce from the farm

I’ve also harvested mango’s. It’s a more dangerous undertaking.  Mango trees do not want you to pick their fragrant fruits.  Goggles and gloves can be useful.

This chutney is quick n’ easy, give it a whirl and be sure to let us know how it goes in the comments below.

Recipe Notes

This is a lower sugar chutney, I prefer it that way.  This has a good balance I feel, but if you like a very stick and sweet chutney, you may prefer a few more tablespoons of sugar.

We enjoyed this chutney with a mixed bag of a platter.  Nachos, salsa, smoky vegan mozzarella and pickled jalapenos.

Papayas are easy to skin, you can use a potato peeler or a sharp knife.  Then just scoop out all the big black shiny seeds.  The seeds are edible, quite peppery and bitter.  Your papaya flesh should be soft and deep orange/ pink in colour.

When you cut into a mango, be sure to trim away as much fruits as possible from the seed.  There can be quite a bit of fruit hidden around the seed.

Papayas can be huge, but in Britain, they are sold quite small, lets say around 8-10 inches in length.  That’s the size we use here.  Avoid papayas which are bruised or have lots of black spots.


Mango and Papaya Chutney (Vegan. Gluten-free)


The Bits – Make two large jars or 1 litre kilner jar

1 onion (finely diced)

2 heaped tbs fresh ginger (finely chopped)

1 small cinnamon stick

1 teas cumin seeds

1 teas coriander seeds


4 green cardamom pods (cracked)

1/3 – 1/2 teas chilli flakes or 1 red chilli (deseeded finely diced)

1/2 teas ground turmeric

3/4 teas nigella seeds

2 mangoes (peeled, deseeded and diced)

1 papaya (peeled, deseeded and diced)

100-125 g light brown sugar

125 ml red wine vinegar

1 tbs cooking oil


Do It 

In a sauce pan, add the oil and warm on medium high heat.  Add the cumin, cinnamon and coriander seeds, stir a few times, for around 30 seconds.  Then add the onions and ginger.  Fry for 6 minutes, until soft, then add the rest of the spices followed by the fruit and then finally, the sugar and vinegar.  Stir well and bring to a simmer.  Leave to cook for 35 minutes, until the chutney thickens.

Allow to cool, then spoon into a sterilised jar and use within three days. This chutney is ideal served with your favourite curries, salads, burgers or why not try a tropical cheeze platter.

Foodie Fact

Papaya is very high in vitamin C and is also a good source of folates, vitamin A and fibre.  Papayas help to support our immune system, are anti-inflammatory and may well keep our hearts healthy.

Categories: Chutney, Curries, gluten-free, Nutrition, photography, plant-based, Recipes, Travel, Vegan | Tags: , , , | 24 Comments

Quick Carrot and Ginger Pickle plus Five Health Benefits of Ginger

Quick and easy - Carrot and Ginger Pickle Quick and easy – Carrot and Ginger Pickle

This is the perfect accompaniment to your Saturday night curry feast!  Curry makes any weekend extra special.

I like shop bought pickles, it’s generally what you eat in restaurants in India. Although the very best pickles I’ve ever eaten have been home made (no surprises there then!) Mango, lime and mixed pickles are my favs but I had a few nice carrots in the kitchen, so I thought I’d give this a go. The spice combination and method can be used for most firm, sweet veggies, pumpkin or squash for example also work very well. This is very much a milder pickle don’t expect that eye-popping and taste bud tickling saltiness.  Its mellow like a mango pickle with spicy bells on with a nice sweet and sour chilli-ness.

The drawback of most shop bought pickles is the salt. In India I have noticed pickles are used sparingly, a couple of teaspoons per meal. In Britain, I think we can overdo it sometimes and all that salt is just not cool. The lovely thing about taking a wholefood approach, making an effort to cook much of your food at home, is that you know whats going into your dishes. We can moderate the sugar and salt levels here accordingly.

FIVE HEALTH BENEFITS OF GINGER
Really ginger is more like a medicine than a food!  It is just so good for us.  Some people get a little freaked out when I start talking about the health properties of food, but I can’t help myself!!  I love to know that the food I enjoy is actually doing me some good, not just tasting amazing, but filling me with nutrition and vitality.  Healthy food is not the worthy, boring grey slop of old, its the bright and very tasty future for us all!

  1. Anti-oxidant – Ginger contains a powerful anti-oxidant and anti-inflammatory called gingerol.  It is one of the natural oils in ginger which gives it such a powerful aroma.  Ginger may also help to prevent cancer and helps to fight infections.
  2. Helps Nausea – Many people use ginger to treat nausea like morning sickness and sea sickness.
  3. Lowers Cholesterol – Ginger has been shown in many studies to reduce bad (LDL) cholesterol and has even been shown to lower blood sugar levels.
  4. Helps the brain – Studies show that ginger can help to prevent age-related damage to the brain and improve brain function in elderly people.
  5.  Can help to treat chronic indigestion and pre-menstrual aches – Food containing ginger leave the stomach quicker, beneficial for people who suffer from indigestion.  It may also help reduce pre-menstrual pains if taken at the start of the menstrual cycle.  It has shown to be as effective as taking drugs like Ibuprofen.

Ginger is most certainly one of those foods worthy of the ‘superfood’ name!

Back to pickle.  Enjoy this tangy, spicy pickle with flat breads and of course, a curry or two for company. It also goes down well in sandwiches and I even like it on toast in the morning. Remember, I also eat chillies for breakfast on occasion. I understand that it’s a slightly more intense affair than strawberry jam.


The Bits – Makes 1 jar or serves 4-6

450g carrot (peeled and cut thin half moons – slice anyway you like really as long as its thin)

1 onion (finely sliced)

3 tbs ginger (finely sliced or grated)

3 tbsp oil

½ tsp fenugreek seeds

1 1/2 teas cumin seeds

1 teas coriander seeds (the smaller ones are best)

5 whole dried red chillies (cut in half length ways – more if you love chilli)

1 ½ tsp turmeric

2 tsp salt

5 tbsp unrefined sugar

1/2 lemon (juice)

Very simple recipe:) Very simple recipe with brilliant results:)

Do It

If you are jarring the pickle and looking to preserve it for a while, sterilise the jars by either boil the jar and lid in a pan of water or bake in the oven for 15 minutes.

Add the oil to a large saucepan on medium heat and when hot pop in the fenugreek, cumin seeds and dried chillies. Fry until they pop, a minute or less, then add the carrot, onion and ginger, fry for five minutes.

Add the salt and turmeric, stir and lower heat, cover the pan and leave to cook until the carrot is soft, 20 minutes. Add the sugar and lemon juice stir, warm through for a minute and then leave to cool.

This pickle can be enjoyed once cooled or preserved for later tasty times. It will keep nicely in a sealed container for three days.

Quick Carrot and Ginger Pickle Quick Carrot and Ginger Pickle

Serve

With your favourite curry or like I said, good on toast!

Foodie Fact 

See above – we’ve got ginger covered.

We've been loving the winter sunshine down on the beach. We’ve been loving the winter sunshine down on the beach.
Categories: Chutney, gluten-free, Healthy Eating, Nutrition, photography, Recipes, Side Dish, Superfoods, Vegan, Wales | Tags: , , , , | 2 Comments

Festive Pear & Cranberry Chutney

Pear & Cranberry Chutney Pear & Cranberry Chutney

Making your own chutneys at Christmas is a joy! A jar of homemade chutney is such a lovely gift and is so special to crack open at this time of year.  The gift of chutney!

This is a traditional-ish recipe with less sugar and a very decent kick of spices.  I have made chutneys and jams with chia seeds and no sugar etc, but my Auntie Betty would approve of this one and at Christmas, Auntie Betty know best!

This festive time is a wonderful opportunity to enjoy the bounty of the year, all those tantalising tubs of things we’ve been keeping in cupboards, tucked away for a special occasion, finally get dusted off and shared with loved ones.  We have loads of interesting little foodie bits that have been amassed from food fayres and markets this year and have no idea how we can form a cohesive, tasty meal out of them?  I’m sure we’ll figure something out!  Theses pots and parcels have many positive memories attached to them.

We’ve been getting some wonderfully sweet pears at the minute and really relishing them.  This is the ideal time to think chutney and preserving, when there is a glut, the jars come out!  When made in bulk, things like chutney are easy and cost effective.  I know we are all a little busy at this time of year, but this is something I think you’ll squeeze in.  The flavour is worth it!

This chutney could hardly be easier, pop in a pan and simmer.  The results are suitably chutney, like a tangy taste explosion!  I’ve reduced the amount of sugar in here, as I find most chutneys way too sweet.  I like mine with plenty of spice and twang.

CHUTNEY TIPS:

If you’re planning on keeping a chutney for a while, check what your lids are made of.  Most jar lids are metal and you’ll need to place a disk of greaseproof paper between the lid and the chutney to stop it reacting.

Chutney can be kept, in a dark place for years, if jarred properly.  This means that the jars must be well sterilised in an oven, which is the easiest way to sterilise a large number of jars.

Shaking bicarb and water in jar can get rid of unwanted, lingering smells that may taint your precious chutney.

Chutneys are like fine wines, they get better with age.  Some people keep chutneys for years!  Vintage chutney.  The flavours definitely mellow and deepen after around a month but this chutney is good to go straight away and consumed within two weeks.

Recipe Notes

If you are short of fennel, use something like celery or even carrots.

Pears, glorious pears...... Pears, glorious pears……

The Bits – For two regular sized jars (280g-ish) 

475g firm pear – cored and peeled (cut into 1cm small cubes)

130g fennel – ½ medium sized bulb (finely diced)

140g unrefined brown sugar

50g onion – 1 small

175ml apple cider vinegar

2 inch cinnamon stick

1 teas ground ginger

50g dried cranberries

Large pinch chilli flakes

1 small clove garlic (crushed)

Large pinch sea salt

3 cloves

1 teas mustard seeds


Do It

Put all ingredients into a saucepan and bring slowly to a boil.

Stir regularly and simmer with a loosely fitted lid for 1 1/2 hours, until the chutney is a nice dark brown colour and has thickened.  We don’t want it to be like a jam, the pears and fennel will still have a little texture and the chutney will be thick but runny.

Spoon into sterilised jars straightaway and screw lids on firmly.  This should mean that the jars are well sealed (i.e. the lids are sucked in and pop when opened)

Decorate with amazing labels and enjoy!

Pear and Cranberry Chutney - on the hob Pear and Cranberry Chutney – on the hob

Foodie Fact

Pears are a member of the rose family and are a great source of fibre and vitamin C.

Categories: Chutney, Recipes, Vegan | Tags: , , , , , , , , , | 2 Comments

Blog at WordPress.com.

%d bloggers like this: