Posts Tagged With: cooking

Vegetable Peel and Herb Crisps – Don’t throw them away!!

Celeriac, Brussel’s Sprouts, Swede, Squash and Potato Crisps – Food waste made tasty!!

These just make perfect sense.  Transforming, what for many, is food waste into something delicious.

Why throw all those vegetable peels away?  Especially when you can make these delicious, light crisps.  They’re very tasty and they crisp up beautifully and are so easy and quick to prepare.

Veg peels are also packed with vitamins, fibre and minerals.  We normally throw away by far the most nutrient-rich part of the vegetable!   See below for more, ‘Foodie Fact‘.

I used some of my favourite winter vegetables; celeriac, squash, potato, swede, Brussel’s sprout leaves and parsnip.  I think these crisp are ideal when you’re making a big dinner, when your food waste bowl fills up, it’s time to get excited.  Peel crisps are on the menu!

I’ve been making a vegetable and potato broth for a while now and needed a crisp topping, something that would be light and packed with flavour, with that very crisp texture.  Here they are!  They arrived by chance the other day, I was frying off some rostis and had a large bowl of vegetable peels……It just fell nicely into place.  I was blown away by the results, you’ve got to try these out!

FLAVOUR IDEAS

You can flavour these crisps with anything you fancy, some smoked paprika is nice, I fried some fresh herbs, which gave a earthy, full flavour to the crisps, plus, you can eat the herbs as well.  A sprinkle of sea salt is essential.  Try seaweed flakes, nutritional yeast flakes (NOOCH!), mushroom powder, za’atar and sumac (especially yum), citrus zest, garlic powder and chilli, mixed spices, you can even make peelings like sweet potato and carrot into a sweet snack, with cinnamon and sugar.

I’ve given you two options for cooking, roasted in an oven or fried in oil.  As you would expect, the fried in oil option is a crispier way of doing things.

So crispy, these are the best!

HOW BEST TO PEEL – HARD LEARNED LESSONS

There are many ways, this is mine, hard learned from years of peeling piles of vegetables in kitchens.  Here we go.  Use a sharp, French peeler, they’re by far the best and most efficient.  A blunt peeler is a recipe for grunts and straining.  A sharp peeler will glide, most of the time, through the veg peel.

Have a food waste bowl handy, it keeps your kitchen surfaces clean and tidy and ensures your chopping board is kept clean.  Working in a clean and efficient way in the kitchen is essential.

The easiest way to peel anything is to not pick it up.  Leave it on the board, hold it down and peel away.  You’ll find that holding a vegetable in your hand, especially large, heavier veg like squash or big potatoes, lead to exertion and strain.  Let the board and the sharp peeler do most of the work for you.  Because the veg is stable, you’ll also notice you’ll get longer and better peels to make crisps out of.  I hope that makes sense, it took years for me to figure this one out!!

A good peeler is sharp, be careful when peeling.


Recipe Notes

Try out any veg peels, but make sure they’re nice and dry.  Pat them with kitchen paper or a clean kitchen towel.

Make sure you wash your vegetables thoroughly and give them a good scrub.

Use any veg peelings, beetroot, sweet potato, carrot, for example, are also delicious.

I use a French Peeler when peeling vegetables, they’re the best.  If your peeler is nice and sharp, you’ll get nice thin, uniform peels.  That’s what we’re looking for.  The longer the better.

These veg peels are best cooked fresh, not too long after you peel them.

It’s always a good idea to use organic veggies when you can, especially with these crisps.

You know your oven, these crisps will burn quickly if you have hot spots, make sure you turn them and move them around on the tray to get even cooking.

If you’re going to fry them, and in fact generally with cooking, use an oil with a high smoking point.  Cold pressed rapeseed oil works very nicely for me.

Vegetable Peel Crisps – My new favourite snack

Vegetable Peel and Herb Crisp 

The Bits – For One Small Bowlful 

4 big handfuls vegetable peels – I used celeriac, squash, potato, parnsip, swede, outer leaves of Brussel’s Sprouts

1 large sprig fresh rosemary

1 large sprig fresh thyme

Cold pressed rapeseed oil

Sea salt


Do It

Frying

In a small saucepan, add an inch or so of oil.  Warm on a high heat.

Pat your vegetable peelings dry with kitchen paper. Making sure there is non excess water.

Test the oil is hot by dropping a single veg peel into the pan, if it sizzles frantically, it’s ready.

Add your peelings and herbs to the pan, stir a little so they don’t stick.  Don’t overload the pan. Fry into batches if needed.

Fry until crisp and golden.  Remove using a slotted spoon and place on a plate lined with two layers of kitchen paper, leave the crisps to drain off excess oil.

Serve straight away, season and flavour as you like.


Baking

Preheat an oven to 190oC.

Pat your vegetable peelings dry with kitchen paper. Making sure there is no excess water.

Toss the peelings and herbs in a bowl with 2 tbs cooking oil until well coated.  Add spices or flavourings now if you’re using them.

Spread them out, without overcrowding, on a large baking tray.

Pop in the oven, bake for 5-7 minutes.  Turn the crisps and bake for another few minutes.  Check them at this stage, this is the burn zone, when they may well go from perfect to a burnt crisp in a minute.  Keep your eye on them!


Foodie Fact

Most of the nutrients of vegetables is found just below the skin, so basically, we normally throw the best bit away!  This varies from veg to veg but generally, veg peels contain considerably more vitamins, fibre and minerals than the rest of the vegetable.  The same can be said for many vegetable leaves.

Here’s a quick example; it’s said by some that non peeled apples contain over 100% more vitamin C and A than peeled apples.  Plus over 300% more vitamin K.  Pretty impressive!!  A non-peeled potato contains over 100% more potassium, vitamin C, folate, magnesium and phosphorous, than a peeled one.

The research on this, like with most things nutrients and health, varies.  But from what I’ve read, everyone agrees that veg skins contain good amounts of the right stuff.

The skin also contains loads of anti-oxidants and fibre.  So if you feel like being healthier, leave your skins on!
Categories: gluten-free, Nutrition, photography, plant-based, Recipes, Snacks and Inbetweens, Uncategorized, Vegan | Tags: , , , | 1 Comment

Christmas Lunch Made Easy! – Full Planner and Top Tips

VEGAN CHRISTMAS LUNCH MADE EASY!

Or at least, a bit easier!!  I’ve been asked before how to make cooking easier.  Of course, there’s no one answer, that would be way too easy!! But here are some guidelines and plenty of helpful tips I’ve learned from experience/ my mistakes.

I’d like to help to make your Christmas lunch 2018 really delicious and the most stress-free festive feast ever!

The only way to do this is with a little preparation and planning. It will mean that you’re comfortable and confident, ready to create a delicious meal for your loved ones and also have a chilled and enjoyable day yourself.

Here’s a few general tips I’ve learned over the years:

  • Try to keep it simple, but tasty. Know your limits and don’t try anything extravagant or totally untested. A main dish with a few side dishes is more than enough, we eat way too much on Christmas day!
  • If you are cooking for people with dietary requirements, like no sugar or gluten-free, get them ready in advance or make the whole menu gluten/ sugar free. There are simple ways of doing this and it will make your life much easier. The last thing you need is to be cooking many different dishes for people on the big day.
  • People expectations don’t matter. Cook the best meal you can with the skills and ingredients you have. Cook the food you love and I’m sure others will enjoy it too. Trying to cook like super chef once a year is just unrealistic!!
  • Chill! Take it as easy as possible on the day. Using this plan below, it will be plain sailing!! Try to keep calm and be focused. Have some trusted helpers around if you can, who are good in a kitchen. What you’re doing is not easy, especially if you do not cook meals like this regularly.
  • Things will, very probably, go wrong.  Take it all in your stride. You’re cooking for loved ones and it’s supposed to be fun!! Remember that professional chefs make mistakes and lose their cool all the time, but staying calm, taking some deep breaths if you need to, will ensure your meal is delicious.


Check out our recent Christmas recipes:


Portobello Mushroom Wellington with Toasted Walnut and Rosemary Stuffing


Festive Chocolate and Orange Brownie Cake with Mulled Berries – Vegan


Shallot and Red Wine Gravy – Vegan, Gluten-free


Some preparations tips:

The run up….

  • If you can do a dry run of the meal you have planned, invite some people over for a pre-Xmas feast.
  • Buy dry and frozen ingredients, things that will store well, don’t leave all your shopping to the last minute.
  • Cook dishes beforehand that can be easily frozen or jarred, like Cranberry Sauce, even the gravy.
  • Yorkshire puds can be made before and frozen. Just warm them in the oven for 5-10 minutes.
  • Oven space will probably be an issue on the day, plan your menu around this, make sure there is a balance between dishes prepared in the oven and on the hobs.
  • Equipment check, make sure you have big enough dishes, tins and pans. Especially if you don’t normally cook for lots of people.
  • Sizing up recipes. If you’re cooking for a full house, you may need to double or sometimes triple recipes, this can be a challenge. Recipes don’t always work out so well when multiplied up, it’s simply a case of using common sense, especially with things like flavourings, spices etc. Taste the dishes regularly. Always!
  • If you think the meal will be ready for 1pm, set a meal time for 2pm. Don’t feel pressured into getting a meal out bang on time, people are enjoying a drink and the Xmas vibe, take you time, hurry leads to mistakes.

The day before

  • Get a load of your cooking done on Xmas eve.  I know this is idealistic, it’s such a busy time of year, but if you have time, doing all, or some of this, will make Christmas day so much easier in the kitchen.
  • Re-read your recipes highlighting areas of confusion or difficult bits, small things you might miss when busy.
  • Plan a cooking list for the day (see below), noting times for cooking and if different from the recipe, quantities calculated.

On the day

  • Have a good breakfast. Sit down and look over what you have planned with a cuppa. Start calmly, as you mean to go on.
  • Get the kitchen organised, make sure you know where everything is and have all the ingredients and equipment to hand.
  • Have a washer uperer on standby all day. If they want to eat your lovely food, they’ve got to play ball and get the marigolds on! Ask them nicely and I’m sure someone will help
    Delegate jobs for success. You’re the cook, let other people set the table, peel the vegetables, tidy up. In an ideal world, surround yourself with helpful and competent people. That’s a secret to kitchen success!!
  • Have a festive tipple, but not too many!! Being tippled in the kitchen is a recipe for burnt bits.
  • Always best to start earlier than you think, time in the kitchen really flies.
  • It’s true what they say with a Roast Dinner, it’s all about timing. Cook your veg last, as this will not do well sitting around waiting to be served.
  • Warm your plates in the oven if you have time. This will ensure everything is hot for service.
  • Clear the kitchen down before serving, get as much surface space as possible. Serving up is one of the most important times of the process. Make sure everything is simmering and hot and you’ve thought a little about how you’re going to present the meal.

We’ll be cooking using this plan:

Cooking List/ Timetable – Example (with time added for plenty of chatting and sipping)

1 hour Wellington or Nut Roast
1 hour Brownie Cake (including decoration time)
30 minutes Shallot and Red Wine Gravy
45 minutes Soup
30 minutes Glazed Roots
30 minutes Creamy Mash
20 minutes Cranberry Sauce
20 minutes Yorkshire puds
20 minutes Brussels Sprouts (essential!!:)
30 minutes **For when things don’t necessarily go to plan or totally mess up:)**


I hope this helps, do let us know if you have any questions in the comments below.


Happy Cooking and Merry Christmas! Lee and Jane:)


Merry Vegan Christmas 2018!!!!!

Categories: Healthy Eating, plant-based, Special Occasion, Vegan, veganism, Winter | Tags: , , , | Leave a comment

Roasted Mediterranean Vegetable Rice – Lebanese Style

A simple, stand out dish to spice up your autumn

This is a real centre piece dish which is simple to make and packed with big flavours and colours.  This recipe will add a little warming spice and vibrancy to your autumn cooking.

You may not have roasted, or baked, rice before, but it’s an easy way of getting really intense flavours into a rice dish.  This is a great base for all kinds of variations, I made it Lebanese, down to the fresh spices I had; bharat, za’atar and sumac, but you could easily make it Moroccan, Italian, Indian, even Spanish, whatever spices and herbs you prefer.  The technique is the same, highly untraditional, but tasty non-the-less.

You could say that this is a Lebanese Paella, but maybe that’s pushing things.  I have a feeling I’d upset many of my Spanish friends and readers.  Paella is a passionate subject!

I’ve never had a dish like this in Lebanon, I know there are a load of rice dishes, but I’ve not tried a baked rice one.  I do love a Maqluba though, here’s my recipe from a few years ago Maqluba with Roasted Pepper, Aubergine and Almond.

This was cooked when we were in Spain, so I was making Paellas regularly, mainly because I love them dearly.  They are great cooked on a hob in a traditional Paella dish and in the oven, a little variation cannot be bad.  I think nailing a paella is important, get one paella that you know and love and your quality of life increases dramatically.  Paella is such a satisfying dish, a dazzling centre piece and like I said, is pretty easy when you know how.  Practice + a little know how = yums!

Big on flavours and colours.

A baked rice dish goes well on a sunny day, but I think they’re even better in autumn and winter time, when the toasted, roasted, aromatic flavours of this dish really come into their own.  There are many layers of flavours and textures, to me, this is what makes vegan cooking awesome.  I was talking at the weekend at Ludlow Food Festival, to a tent full of meat eaters, about the very same thing.  Most agreed that they’d eat vegan/ plant-based food if it was tasty without any qualms.  It’s all about unlocking the deep and stunning flavours in plant-based food.  This dish is like a key.  Meat eaters will love it, something you can cook for your family or a group of friends, and all will leave satisfied.

CRUSTS

Crusts.  They taste good.  They’re like a concentrated version of the rest of the dish.  The crispy, dark best bit. Many cultures agree with me, those who know a thing or two about cooking rice, I’m thinking Iran and Spain in particular.  The crust has a special name and is the prized part of the dish, handed to the most deserving person and polished off with relish.  Don’t fear a crust on this dish.  It’s a good thing.  Scrape it off and serve it as a crispy topping.  Of course the art is to discern between a crust and a layer of burnt food.  It’s a skill best learned through practice and a keen sense of smell.  You can also peek a little when the rice is cooking.

Rice is a source of carbs, which is a good thing.  They keep us ticking over.  Nothing wrong with a nice plate of carb rich bits like rice mixed with plenty of fresh veggies and legumes in our opinion. They give us the energy to swim and run around.  Using brown rice here would make the dish even healthier, slow release carbs, long lasting energy.

I love this dish served with hummus or tangy labeh (yoghurt or sour cream would also be ace), a crisp green leaf salad and some lemon wedges.   Maybe even a sprinkle more za’atar and bharat.  Now that’s getting my taste buds excited.  In fact anything which combines the Lebanese flavour trinity of bharat, za’atar and sumac is exhilarating food.  If you haven’t tried these together in a dish, I highly recommend you pop down to the shops and get some.  They are widely available.  A nice idea is to toast some flatbread/ pitta, drizzle with olive oil and sprinkle over these spices/ herbs.  Instant Lebanese toast!  Serve with chopped tomatoes and cucumber, a nice breakfast there.

Shall we call this a Lebanese Paella? Controversial.

If you’re interested in my travels around Lebanon last year, here are a couple of blog posts:

Seeking Falafel Perfection in Lebanon

I Ate Lebanon!

Or just click on the recipes header (above) for a selection of Lebanese recipes.  Surely one of my favourite cuisines with so many vegan options.

If you like this recipe, please let us know.  If you make this recipe, maybe you’d like to share a picture over on our Facebook cooking group, click here.  Lots of vegan cooks with positive outlooks over there doing amazing things with vegetables.  Feel free to share this recipe far and wide! 

Happy cooking!!

——————–

Recipe Notes

Top this dish with any veg that is looking good.  Autumn is here in the UK, we are spoilt for choice.  I used Med Veg because I was in Spain.  If I cooked it here I may top this with ingredients like red cabbage, more onions, wild mushrooms, carrots or squash.  My point is, feel free to play.  Let us know about your amazing creations in the comments below.

Don’t have bharat, use another spice mix like garam masala or ras el hanout.

Don’t have za’atar, use dried thyme with a few sesame seeds mixed in.

Don’t have sumac, leave it out.  When you serve this dish with lemon wedges, it adds the citrus kick we need.

Lemon wedges.  Yes, I do serve everything with lemon wedges!  It adds a lovely citrus lift to this dish.

You can use any type of shallow oven dish.

This dish will vary, mainly depending on the type of rice and dish used.  Check after 25 minutes, most of the liquid should have evaporated, remember, the rice will soak up a little liquid when you leave it to rest.

Roasted Mediterranean Vegetable Rice – Lebanese Style

Roasted Mediterranean Vegetable Rice – Lebanese Style


The Bits – For 6

400g short grain rice (risotto or paella rice works well)

50g green/ brown lentils

1 tbs cooking oil

1 tbs cumin seeds

2 medium onions (sliced)

4 large cloves garlic (sliced)

2 tbs bharat – spice mix

2 tbs za’atar

2 teas salt

650 ml light vegetable stock or hot water

400 ml tomato passatta

1 big red pepper (sliced)

1 small aubergine (sliced)

1-2 tbs olive oil


Toppings

Toasted walnuts/ almonds

Za’atar and sumac

Chopped fresh parsley


Serve

Lemon wedges

Hummus or vegan labneh


Do It

Wash and rinse your rice and lentils with plenty of cold water.  Drain well.

Preheat oven to 225oC.  Place in your shallow oven dish to warm.

In a large frying pan on medium high heat, add the oil and when warm the cumin seeds.  Fry them for 30 seconds and then add the onions and 1 teaspoon of salt.  Cook for 12-15 minutes, until nicely golden and caramelised.  Add the bharat spices, garlic and za’atar, stir and fry for a minute then pour in the passatta and 1 teas more of salt.  Simmer and stir for a couple of minutes.  Now mix in the rice and lentils and then vegetable stock, stir well to combine.

Pour the rice mix into your warm, not hot, oven dish.  Level it out with a spoon and scatter over the aubergine and peppers and gently press them down with your hand, until they’re roughly half submerged in the stock.

Place your dish in the oven for 30-35 minutes. Check after 25 minutes and drizzle over a little more olive oil to help the vegetables caramelise and add richness.

Once cooked, cover and set aside for 5-10 minutes to cool a little.  Then sprinkle over parsley, more spices and toasted nuts.  Best served as suggested, with hummus/ labneh and a crisp salad.


Foodie Fact

Aubergine is a superhero of the veg world.   Have you tried cooking an aubergine on an open flame until charred.  When peeled, the aubergine is smoky and delicious, ready for traditional dishes like Babaganoush, but also makes an amazing burger filling or pizza topping.

Nutrition wise, aubergines are not exactly outstanding.  They do contain some fibre, vitamin B1 and minerals like copper and manganese, there are some cool chemicals in the black skin that are really good for us. 

Categories: Autumn, gluten-free, healthy, Healthy Eating, photography, plant-based, Recipes, Travel, Vegan | Tags: , , , | 3 Comments

Mango and Papaya Chutney

Mango and Papaya Chutney (vegan, gluten-free)

A tangy summertime tropical treat that goes well with most things; curries, burgers, salads, vegan cheese.  I used our Moxarella – Vegan Mozzarella recipe here on quite a tropical ploughman’s style platter.

Mango and papaya are two of my favourite fruits, although getting good ones can be tough in Wales.  I’ve noticed more papayas becoming available and the key to a papaya is to get them nice and ripe.  The skin should be almost completely yellow and orange and it should feel a little soft.  When I’ve eaten papayas in more tropical places, they go from just ripe to woah, take it easy, way too ripe in around 10 minutes.  It seems that in cooler climates, papayas are more relaxed.  Ours took around 4 days to ripen in a fruit bowl with bananas, if you want to keep it from ripening, pop it in the fridge.  I think a ripe papaya is a match for a ripe mango and, in India especially, is probably a 1/5 of the price.  No wonder Christopher Columbus called it ‘The Fruit of the Angels’.

Papaya Farming

I’ve worked on a organic farm which grew papayas in India. I became pretty good at harvesting them.  This entails using a long piece of bamboo, standing under the tree and jabbing (gently) a ripe papaya with your bamboo appendage, they’re the yellow/ orange ones, and in approximately less than a second, catching the falling papaya with your free hand.  This is a tricky business and takes practice and the reactions of a mongoose, of which there was family of living just beside my hut.  This was in Tamil Nadu.  Most mornings we harvested the crops for the local market, a fascinating array of produce created in a relatively small area, using mainly permaculture farming practices.

I was writing parts of Peace & Parsnips at the time, in the sweltering heat of summertime, the farming was a day job of sorts.  It was a organic farm in a community called Auroville.  A fascinating place.  The farm was called Solitude Farm and I also cooked lunch there with the women in the kitchen.  I learned much, mainly about using tropical ingredients like yams, banana flowers, plantains, various flowers, purple amaranth, snake gourds, plenty of coconut, and all kinds of other things.  Surprisingly for me, basil and little sweet cherry tomatoes grew like weeds all over the place.  We cooked on wood fires, crouching on the floor.  I loved it.  The restaurant used only organic produce grown on the farm, even the rice and peanuts.

Lunch is legendary at Solitude – celebrating the produce from the farm

I’ve also harvested mango’s. It’s a more dangerous undertaking.  Mango trees do not want you to pick their fragrant fruits.  Goggles and gloves can be useful.

This chutney is quick n’ easy, give it a whirl and be sure to let us know how it goes in the comments below.

Recipe Notes

This is a lower sugar chutney, I prefer it that way.  This has a good balance I feel, but if you like a very stick and sweet chutney, you may prefer a few more tablespoons of sugar.

We enjoyed this chutney with a mixed bag of a platter.  Nachos, salsa, smoky vegan mozzarella and pickled jalapenos.

Papayas are easy to skin, you can use a potato peeler or a sharp knife.  Then just scoop out all the big black shiny seeds.  The seeds are edible, quite peppery and bitter.  Your papaya flesh should be soft and deep orange/ pink in colour.

When you cut into a mango, be sure to trim away as much fruits as possible from the seed.  There can be quite a bit of fruit hidden around the seed.

Papayas can be huge, but in Britain, they are sold quite small, lets say around 8-10 inches in length.  That’s the size we use here.  Avoid papayas which are bruised or have lots of black spots.


Mango and Papaya Chutney (Vegan. Gluten-free)


The Bits – Make two large jars or 1 litre kilner jar

1 onion (finely diced)

2 heaped tbs fresh ginger (finely chopped)

1 small cinnamon stick

1 teas cumin seeds

1 teas coriander seeds


4 green cardamom pods (cracked)

1/3 – 1/2 teas chilli flakes or 1 red chilli (deseeded finely diced)

1/2 teas ground turmeric

3/4 teas nigella seeds

2 mangoes (peeled, deseeded and diced)

1 papaya (peeled, deseeded and diced)

100-125 g light brown sugar

125 ml red wine vinegar

1 tbs cooking oil


Do It 

In a sauce pan, add the oil and warm on medium high heat.  Add the cumin, cinnamon and coriander seeds, stir a few times, for around 30 seconds.  Then add the onions and ginger.  Fry for 6 minutes, until soft, then add the rest of the spices followed by the fruit and then finally, the sugar and vinegar.  Stir well and bring to a simmer.  Leave to cook for 35 minutes, until the chutney thickens.

Allow to cool, then spoon into a sterilised jar and use within three days. This chutney is ideal served with your favourite curries, salads, burgers or why not try a tropical cheeze platter.

Foodie Fact

Papaya is very high in vitamin C and is also a good source of folates, vitamin A and fibre.  Papayas help to support our immune system, are anti-inflammatory and may well keep our hearts healthy.

Categories: Chutney, Curries, gluten-free, Nutrition, photography, plant-based, Recipes, Travel, Vegan | Tags: , , , | 24 Comments

Super Tasty Mega Rice – Vegan Fried Rice

Sooooooooo tasty! Quick and easy rice dish, think Nasi Goreng (Indonesia)

There’s so much in this dish to get the tastebuds jumping; sesame pancake, oyster mushrooms, asparagus, ginger, crispy onions, deep and dark soya sauce……this is a quick lunch and an amazing way to treat leftover rice and veggies.

We all need a good, simple fried rice recipe under our aprons, in our cutlery draws or tucked away behind our chopping boards.  Super quick and tasty, some would say mega!!  This rice is something everyone will enjoy, packed with veggies and big flavours.

The sesame pancake is one of the stars here, it really adds something to the dish, giving it a change-up in texture and flavour.  It’s also very easy to get together and can be used in many dishes in many ways.  They’re great by themselves and are basically just a small cup of gram (chickpea flour).  Surely one of my favourite ingredients.

I was raised, for a chunk of my childhood in the Philippines, I just cooked this dish for Mum who says that it’s similar to my favourite Filipino fried rice that I ate breakfast, lunch and dinner as a nipper.  I’ve always loved trying new and exciting dishes.  Although this is a staple dish, we can take it in so many directions.  We eat it as a weekend treat in the Beach House, I like it especially in the mornings.  A big chilli hit in the AM beats an espresso any day!  Anyone else like fried rice for breakfast?

Use any array of veggies you like here, whatever is seasonal or hanging out in your veg tray/ basket.  This is similar to Nasi Goreng which is the ubiquitous vegan go-to dish in Indonesia, a country that Jane and I love deeply (see some our travel stories, street food or visiting tofu village).  I think it’s just as good without the fish sauce and Kecap Manis, which is a sweet soya sauce (I’m in Spain, so needed to improvise).

This style of rice dish is awesome with some aromatic paste, South East Asia style, probably the eastiest to get our hands on is Thai pastes, yellow, green or red.  A couple of tablespoons will do the trick.  But maybe you’d like to make your own, there are some good looking recipes for Basa Gede – Balanese Paste that are exciting me right now.  Must try soon, when lemongrass and the like are back on the menu.

Mega Tasty Rice – Leftovers given a very tasty make over

This is an awesome leftovers dish, using up rice cooked for something else.  If you’re cooking the rice especially for the dish, make sure it’s fully cooled first.  I always think fried rice is best when the rice has sat in the fridge overnight.  The best way to cool rice at home is to spread it our on a baking tray, it will cook much quicker than being left in the pan.  Rice needs to be cooled as quick as possible and then stored in the fridge.  Fried rice should be eaten straight away and not re-heated.

We love these little sesame pancakes

This dish is so simple and versatile, hope you get to give it a go!

Happy cooking!

—————————–

Recipe Notes

Any long grain rice will do here, whatever you like best.

Add more chillies, I dare you!  I love this dish fiery!!

If you’re cooking your own rice, roughly 140g of uncooked rice will make 400-ish g of cooked.

After cooking, cool your rice quickly by spreading it out thinly on a large plate/platter. Once cooked, place in a fridge.

Add whatever veggies you fancy to this, in fact normally, we add two or three more types to this dish.

To make this Mega Rice gluten-free, you can buy gluten-free soya sauce or tamari.

Fried Rice 101 – get all your ingredients and chopping done before you start cooking, makes things a cool  breeze as opposed to a potential heated stress-fest!

Super Tasty Mega Rice – Vegan Fried Rice

The Bits – For 4-6

1 small onion (finely sliced)

2 large garlic cloves (peeled and crushed)

2 tbs ginger (finely chopped)

1 small carrot (finely sliced into matchsticks)


100g oyster, or other, mushrooms (sliced)

1 green/ red pepper (deseeded and sliced)

2-4+ dried chillies or 1-2-3 teas chilli flakes (finely sliced)


6 asparagus spears (finely sliced at an angle)

400g cooked rice (from the fridge)

250g chickpeas (drained)

3 tbs good quality passata

1 1/2 tbsp tamari/ gluten-free soya sauce


2-3 tbs cooking oil (I use good rapeseed oil)


Sesame Pancake

50g gram flour

100ml water

½ clove garlic

Couple large pinches turmeric

Couple large pinches salt


1 1/2 tbs sesame seeds


Serve

1/2 cucumber (seeds removed and sliced)

1 large tomatoes (sliced)

Crispy onions (gluten-free)

Lime wedges

Your favourite chilli sauce


Do It 

Add the ingredients for the pancake, except the sesame seeds, into a bowl, gradually add the water, stirring as you go to make a smooth batter.

Grab a large, non-stick, frying pan/ wok, add 1/2 tbs oil, place on a medium high heat.  When the oil is warm, pour the batter mix into the centre of the pan, swirling the pan to make a thin pancake.  Cook for 1-2 minutes, halfway through that time, sprinkle over the sesame seeds to give the pancake a good covering.  Now flip the pancake using a spatula.  Cook for another minute, then set aside.  Give the pan a quick clean out.

Return the pan to the heat, add 1 tbs cooking oil, when hot, add the onions, ginger, garlic and carrots.  Toss and fry for 2 minutes, then add the mushrooms, dried chillies and peppers, cook for another 2 minutes, now add the passata, soya sauce, chickpeas, rice and asparagus.  Stir gently and warm through fully for 3-4 minutes, making sure nothing sticks to the bottom of the pan. Get it nice and hot!

Taste the rice, add a touch more soya sauce or salt for seasoning.  Chop up the pancake into strips and stir into the rice.  Serve straight away with crunchy veggies like tomatoes and cucumber, chilli sauce, crispy onions and a twist of lime is delicious.

View from the Beach House Kitchen (Spain branch) today. Way too close to the beach to work properly;)

Foodie Fact

Chillies have outrageously high levels of vitamin C, plus decent amounts of vitamin A, K and B-6. Vitamin C wise, they leave the oranges in the shade.

Categories: Breakfast, gluten-free, Healthy Eating, photography, plant-based, Recipes, Vegan | Tags: , , , , | 4 Comments

Charred Fig & Rocket Salad with Lemon Tofu Feta


untitled (30)

Photo by Al Richardson

This is a salad for all those who can’t say goodbye to summer just yet!  Figs seem all of a sudden plentiful in the UK.  I’m seeing them in most shops I go to.  I love cooking figs, so sweet and fragrant, and I can think of a few nice things to do with them, but charring them slightly and serving them with a crispy and lively salad is one of my favourites.

This is an original recipe from Peace & Parsnips, I rarely cook recipes from the past, I’m too busy creating new ones normally, but this is a winner and I really like the tofu feta and flavour combos.  I normally make tofu feta by simply crushing the drained firm tofu with herbs and other flavourings, but cooking it briefly in a pan here intensifies the flavours even more.

I’m very happy when eating figs, but must admit, most of the year only eat them dried.  I love the way they can be incorporated into traditionally savoury dishes like salads and they are perfect when mixed with a little spice and wholegrains.

I remember in Morocco living off figs for a few days in the mountains (which was not a great idea, they are full of oxalates), as a veggie back then, there was not a great deal to eat and I was really rural, up in the Atlas mountains hiking with some Berber musicians.  I bought figs on long ropes, big fig snakes, that I kept hanging from my backpack.  Whenever I needed a nibble, I just plucked one off the rope.  It was a great snack.

Experiences like that make me a little sentimental about some foods and figs do bring back loads of good memories.  Still, this is quite a long way from this dish which was influenced by my times picking grapes and travelling through France.  One of  the stand out dishes of that time was a meal prepared in the Loire region, a salad with charred figs that I’ll always remember.  I felt so grateful that the chef prepared a special dish just for me.

Most of you know that Jane and I can normally be found tucked away somewhere in Snowdonia, or travelling the less beaten path somewhere in the world, but this recipe found its way over to the food section of the Washington Post!   It’s incredible to see the food that we are passionate about in the Beach House in newspapers and blogs around the world.

Joe Yonan’s version of our ‘Charred Fig & Rocket Salad with Lemon Tofu Feta’ from The Washington Post

So this is a very healthy twist on a traditional feta salad that can be bulked out by adding more toasted nuts (cobnuts would be perfect!) and maybe some white beans would be nice, even mix in something like orzo or oven baked polenta…..ok, I’m getting carried away now!  It’s ideal for an autumn lunch, as we’re just hanging onto the sunshine and warmth in the UK and getting ready for the big, sustaining stews and soups of winter.  I say, get in the fresh figs while you can!

Recipe Notes

As we all know, figs are precious!  They are delicate and should always be handled and stored with care.  Give them a gentle squeeze when you buy them to check that they’re not too soft.

Figs are best washed just before you use them, because they can be so delicate, it’s best to cut them with a sharp knife.  Eat them within a few days of purchasing.

If you don’t have a griddle pan for the figs, a nice frying pan will do the trick.

————-

Charred Fig & Rocket Salad with Lemon Tofu Feta

The Bits – Serves 4

3 handfuls of rocket leaves
handful of fresh basil leaves
6 ripe figs, quartered
2 tablespoons balsamic vinegar
3 tablespoons toasted pine nuts

Lemon tofu feta
1 tablespoon nutritional yeast flakes
juice of ½ a lemon
½ teaspoon lemon zest
1 tablespoon olive oil
400g firm tofu, well drained, crumbled
1 clove of garlic, peeled and crushed
large pinch of sea salt
pinch of cracked black pepper

Lemon dressing
1 tablespoon lemon juice
1 teaspoon brown rice syrup
½ tablespoon balsamic vinegar
pinch of sea salt
1 tablespoon extra virgin olive oil


Do It

To make the tofu feta, put the nutritional yeast flakes into a bowl with the lemon juice and zest and leave to dissolve.
Heat the oil in a small frying pan on a medium heat and add the tofu and garlic. Pan-fry until slightly golden, then add the lemon mix, salt and pepper, bring to the boil and cook until the lemon juice has evaporated. Spoon into a bowl and allow to cool. Check that it’s just a little too salty, like feta.

To make the dressing, whisk together the lemon juice, syrup, vinegar, salt and extra virgin olive oil in a small bowl.
Mix the rocket and basil leaves together in a bowl. Drizzle 1 tablespoon of the dressing over the leaves and toss together. Keep the rest of the dressing for further dipping and drizzling.

Warm a griddle pan on a high heat and brush with a little oil. Just as the oil begins to smoke, place your figs widthways in the pan. Allow to cook for 2 minutes, basting them with balsamic vinegar as you go.Turn them when well caramelized, then remove the now sticky figs from the heat.

Scatter the leaves beautifully on plates, and top with the warm figs, a couple of spoons of the tofu feta and a sprinkling of toasted pine nuts.


Foodie Fact 

Apparently figs are one of the worlds oldest trees.  They are high in minerals like calcium, magnesium and iron and are a great source of anti-oxidants like vitamin A, E and K.  They also have a lot of fibre.


Categories: gluten-free, healthy, Lunch, Nutrition, Peace and Parsnips, plant-based, Recipes, Salads, Vegan | Tags: , , , , | 12 Comments

Banana & Peanut Butter Muffins with Date Caramel

Banana & Peanut Butter Muffins with Date Caramel

Most of the time, the simple things are the best.  Like these muffins.  They take a few minutes to make and I love the combination of banana, peanut and dates.  It’s like these flavours were created for a muffin!  This is a recipe that I keep going back to again and again, I’m really chuffed that I’ve finally got around to sharing it.

These muffins are loved by kids especially, I’ve seen some amazing reactions from kids when faced with these.  They disappear quickly and I think the caramel is a real favourite.   They are also pretty healthy, but kids are in no way put off by that, they just love them because they’re yum.  I’ve found kids are a good jury for muffins, they are perfectly honest and normally have an interesting point or two to make.

I have used a little white flour here, but you could go fully wholemeal if you’re feeling that.  Also, buckwheat flour is a lovely addition to these muffins, adds a real depth.  The key here it to not over bake them, they will go dry quickly.  Get them out when they are still soft in the middle, but a skewer comes out clean (a little stickiness is fine) and they will firm up when cooled.

The date caramel is so, so easy and can be used on all kinds of desserts and as a go to icing and filling, it’s just a superstar recipe with three ingredients only!!  These muffins also make for a great, super quick breakfast option.

These muffins use such simple ingredients that almost anyone can jump in their kitchen right now and give them a go!

Recipe Notes

Get some nice big muffins cases here.  Little cup cake cases won’t do.  Preferably without frilly patterns on.  I’m against frilly patterns in this case.  I like plain brown or white, however Jane has talked me into a pink muffin case in the past.  

If you’re feeling chocolaty, add a few tbs of cocoa/ cacao to the mix, the results are amazing!!

I like coconut oil, but normal vegetable oil is also fine.

———-


Banana & Peanut Butter Muffins with Date Caramel

The Bits – 10 muffins
3 ripe bananas
70ml coconut oil (melted)
65g light brown sugar
100g self raising flour
120g wholemeal flour
1 teas bicarb
1 teas cinnamon
3 tbs peanut butter

Date Caramel

175g dates
3 tbs peanut butter
3-4 tbs water

Topping

1 handful toasted peanuts (roughly chopped)
10 pieces dried banana/ banana chips

Do It
Preheat oven to 180oC, place 10 muffin cases in your muffin tin.

Mash the bananas in a mixing bowl, mix in peanut butter, oil and sugar, then the flour, bicarb, cinnamon. Mix well until a lumpy batter form.

Spoon the mix into your muffin cases, so they’re ¾ full. Pop in the oven and bake for 20 minutes.  Leave the muffins to cool in the tin.

Caramel – Place all in a blender and blitz until smooth. This will take a few goes. Drizzle in more water to thin out to a spreadable consistency.

Spread your caramel over cooled muffins, sprinkle with peanuts and stick a banana chip on top for a final flourish!

Foodie Fact 

Peanuts are nutritional powerhouses, like most nuts.  A handle full a day is a great idea.  Packed with minerals, antioxidants and protein, they are the ideal snack, rich in good fats and fibre.  Peanut butter is a great way of adding peanut power to smoothies, dressings, curries/soups/stews.  The hype is that nuts are fattening, but it has been shown that adding nuts to our diets can actually help us loss weight.

Jane and I have been enjoying them boiled, something we’d not tried until we went to China.  Great added to a stir fry or tossed with a Chinese Style dressing in a salad.


Categories: Baking, Cakes, Desserts, healthy, Nutrition, photography, plant-based, Recipes, Vegan | Tags: , , , | 6 Comments

Simple Seared Mushrooms with Pea Puree & Minty Crushed Peas

Seared Mushrooms with Pea Puree & Minty Crushed Peas

We had this for dinner tonight and thought it was definitely good enough to share.  So simple, light and flavourful.  This is the kind of dish that is perfect for a long summer lunch/ dinner.  Out in the garden, especially when you’ve a few courses planned.  Ideally, a low maintenance starter is a great way to kick things off in the kitchen.

It’s a attractive looking plate and the mushrooms can be done anyway you prefer.  Here I have put the easiest, but you could easily add a splash of sherry, like Pedro Ximenez, or balsamic vinegar, even a dash of good tamari, to the pan just before they’re done.  The mushrooms will absorb the liquid and caramelise even better.

We had this in the garden with Dad, we’ve loved visiting Durham of late, such a beautiful county and have recently been up to Banborough castle and beach for a look around.  It was a sunny day with stunning views, I love the castle, perched above the coastline.  We built a massive sand dragon with seaweed for flames and mussel shell claws.  I think we’re missing Wales!  We’ll be back there soon.  Dad lives in the countryside, not far from Yorkshire and we’ve loved walking around the local forests and fields.  One a good day, the countryside just comes alive.  I’m cooking quite a lot at the minute, so it’s great to get out in the fresh air and sunshine.

You can use those gorgeous King Oyster Mushrooms here, if you can find them.  I happily settled for portobellos.  I use frozen peas, but fresh peas would have been even more amazing.  Grab a podder and go for it!!

Banborough beach, Durham – it’s a bit freezing in the North East

The Bits – For 2 as starter

3-4 Large Portobello Mushrooms (cut into thick slices)
1 tbs olive oil

Mint puree
125g garden peas
2 small spring onions (finely sliced)
2 tbs olive oil
100ml boiling water

Crushed Peas
200g garden peas
8 mint leaves
200ml water

1 tbs olive oil
2 pinches sea salt

1 pinch black pepper


Garnish

Fresh mint, pea shoots or even edible flowers

Light and simple summer dish

Do It

Pea Puree
In a small sauce pan on medium heat, add the oil and sweat the onions with a pinch of salt and pepper for 5 minutes. When they are soft, add the peas and boiling water, turn the heat to high. Put a lid on and boil for 3 minutes. Transfer to a blender and blitz until smooth. Pour back into the saucepan and set aside.

Crushed Peas
In a small frying pan on high heat, add the peas, water and mint, boil for 2 of minutes. Drain and plunge into cold water.  Drain again and in a small bowl, crush the peas with a fork, mix in the oil, salt and pepper.

Mushrooms
Cut the mushroom into 1/2 inch slices.

Heat oil in a large frying pan on medium high heat, and sear the mushrooms for 1-2 minutes on each side. They should be golden brown and tender. Now pour in the pedro ximenez/ balsamic and cook until it has evaporated, another 30 seconds to minute, flipping the mushrooms to coat them.

Heat your pea puree back up.

On a warm plate, spoon on the pea puree, place the mushrooms nicely on the puree, scatter with the crushed peas and herbs. Garnish with herbs or pea shoots, sprinkle with salt and pepper. Serve immediately.

A walk in the woods – Durham
Categories: gluten-free, healthy, photography, plant-based, Recipes, Summer, Vegan | Tags: , , , , , | 3 Comments

Italian Vegan Summer Feast – A Celebration! (pt 1)
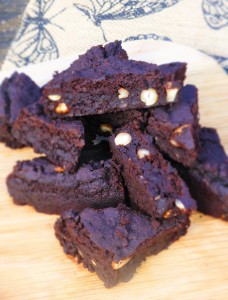
Italian Vegan Summer Feast – Get a load of that!!

We love sharing with you our favourite recipes!  Here’s a whole feasts worth!!  If I had time, I’d blog every night.  I think good recipes are best shared.  Let’s cook!

The post was originally so long, I’ve had to split it into two.  But don’t be overawed, the recipes are straightforward.  

The simple and delicious flavours of Italy make the most out of our summer produce. When the sun comes out, we start getting tasty tomatoes, peppers, and the flavours of the Mediterranean can be found locally in the UK for a short window. I love it! This is a feast designed for a party or entertaining guests/ people you hopefully like, when you want a table filled with a wide range of dishes, not too complicated food that compliments each other.  For me, Italian food goes perfectly with a sunny afternoon and a bottle of something amazing.

THE ITALIAN CONNECTION

The reason for this meal was our relatives visiting from Italy, they live near Lake Como. Jane and I love Italy, one of our favourite places on this big rock, but we’ve never been North.  Can’t believe we’ve got family living in Italy and we haven’t been to see them.  Shame on us.   Since coming back to the UK we’ve been loving kitchen time and trying out ideas from our travels.  I guess the tart is like a pizza, but with a puff pastry base.  When I’m busy, I like working with puff pastry, it’s far too easy.  I’ve just discovered pre-rolled puff pastry.  Wow!  That is pure laziness and brilliance at the same time.   Whack it on a tray, bake, job done.

Here’s some of our Italian travel snaps.

When preparing a menu, we need to think about textures and flavours, how they mingle and benefit from each other. I find writing menu’s really enjoyable and a great challenge.

If you can, present the dishes on large plates or shallow bowls. Spread things out, make them look lovely.


Recipe Notes

This is going to take a few hours to get together.  Its a weekend special.

Gluten-free – Just use gluten-free pastry/ pasta for the tart and your favourite gluten free bread.

Additional deliciousness – this tart is awesome with some prated vegan parmesan sprinkle over at the end.  Violife do a parmesan which is scarily like the real thing Jane and I were amazed by it, you could smell the pong upstairs and in the garden.  Just like the other stuff.  Potent.  There must be some kind of genius going on there. Vegan parmesan!! Whatever next. Exciting times in the foody world powered by plants.

(You’ll notice a couple of dishes are missing from the picture above, you’ll find a Chocolate Cake recipe here the Peanut Butter Scones may appear soon.)


The Bits – For 6-8 Light Meal

Pepper, Basil and Cashew Cream Cheese Tart (Vegan)

Pepper, Basil & Cashew Cheese Tart

1 pack puff pastry

1 tin chopped tomatoes
1 garlic
salt and pepper

3 peppers – different colours looks nice (sliced)
2 onions (thickly sliced)
2 handfuls squash (chopped into cubes)


Cashew Cheese

1 cup cashews
1/2 lemon (juice)
3 tbs nutritional yeast flakes
1/2 garlic clove
Large pinch dried oregano


1 handful fresh basil leaves

Dried oregano

3 tbs plant milk (for brushing)


—————-

Preheat fan oven 200oc.

Place the peppers, onions and squash on a large baking tray, season with salt and pepper, use two if squashed, and roast for 25-30 minutes.

In a sauce pan, add tomatoes, garlic, season with salt and pepper. Simmer for 15 minutes, until a thick sauce forms.

Roll out your puff pastry thin on a piece of lightly floured greaseproof paper. Brush with milk. Bake in oven for 12 minutes. Leave to cool slightly.

Spread a layer of tomato sauce over tart, scatter onions, peppers, squash, sprinkle with oregano, black pepper.

Brush the edges of the tart with plant milk, bake for 15 minutes. Can be served hot or cold.

Place all the cheese ingredients in a blender and blits until smooth.

To serve, blob on cashew cheese and tear over some basil leaves.


Tomato & Balsamic Salad

Tomato & Balsamic Salad

4-5 ripe tomatoes (chopped)
2 tbs balsamic vinegar
1 tbs olive oil
Salt & pepper
1 handful basil leaves

——————–

Mix together in a bowl and tear your basil leaves over.


Roast Rosemary Potatoes

Roasted New Potatoes & Rosemary

New potatoes (par boiled)
Few sprigs of Rosemary
Salt
2 roasted garlic bulbs


——————-

Take your par boiled potatoes, toss them in the rosemary, salt and oil, roast in the oven for 30 minutes. (200oC) until crispy and golden, turning them once.

Serve warm.


Italian Style Dressing

8 tbs olive oil
3 tbs white wine vinegar
2 small garlic cloves (crushed)
3 tbs chopped parsley
1/2 teas dried oregano
1/2 small lemon (juice)
Large pinch dried red pepper

——————-

Whisk all together in a bowl or shake together in a jar.  Check seasoning.


Buon appetito!


This is only half of the recipes, check out the Italian Vegan Summer Feast (pt 2) post for more.


Categories: Dressings, healthy, photography, plant-based, Recipes, Salads, Side Dish, Special Occasion, Summer, Vegan | Tags: , , , | 7 Comments

Everyone’s Lovin’ Jack! Ten interesting facts about jackfruit

A giant jackfruit, found dangling by a restaurant in Goa which cooked up an amazing jack and coco curry

Everyone is loving Jackfruit at the minute, all those pulled jack fruit sandwiches and have you tried jackfruit ice cream? It’s incredible! But how much do we know about this strange fruit? Don’t let the spikes put you off, this is a super fruit in every way!!  I’m lucky on my global wanders to have tried many varieties of jackfruit and different dishes. I’ve never met a jackfruit dish I didn’t like!

Here are 10 facts about this strange, spiky and wonderful fruit:

1) Jackfruit, the yellow bit we eat, is actually called an ‘aril’. It’s a flower and we eat the edible petals. One jackfruit contains hundreds of flowers and one tree can grow 250 fruits per year.

2) Jackfruit seeds are edible and healthy most people roast them. You can also boil them up and make a lovely attempt at hummus. Comes highly recommended.

3) It is said to smell and taste like a cross between very ripe bananas and pineapple, with a twist of apple and mango. It’s a confused fruit! I think that’s quite accurate but there is definitely a custardy, juicy fruit gum-ness there too.

4) There are many varities of jackfruit, some are pithy inside and some are very sweet and tender.

5) In Indonesia, they make chips out of jackfruit, called Kripik.  You can buy them and eat them like crisps.

6) Jackfruit seeds, when roasted, taste like brazil nut crossed with a chestnut. You can boil, bake and roast them.  They can also be ground into a flour.

7) Using jackfruit as a meat substitute is nothing new. In Thailand it’s sought after by vegetarians and historically called ‘gacch patha’ (tree mutton!)

8) In Indonesia, the wood of the jackfruit tree is used to maked the famous ‘gamelan’ drums.  Popular in Bali (see video below).  The leaves are also fed to cattle, but also make a nice alternative to other greens.

9) Every part of the jackfruit tree is medicinally beneficial, the bark, leaves, pulp, skin and roots.  It is also antibacterial and anitviral.

10) Jackfruit is the heavyweight of all fruits, growing to four feet long and weighing in at over 35kgs.  That’s a lot of burger right there!

Cooking wise, the main attraction to Jackfruit for me is the interesting texture, when unripe, nothing else gives that stringy, chewiness when cooked. It is meat-like and an ideal plant-based dish to serve meat eaters.  Also the flavour is totally unique, in fact, Jackfruit is a very strange fruit indeed, like nothing else.  As the world goes meat free (it’s happening!) we’ll be increasingly familiar with Jack.  It’s going mainstream!  Great news as the production of meat is one of THE main causes of global warming.

Delicious Indonesian jackfruit dish ‘Gudeg’ – actually being served at breakfast

I’ve been in Goa for a while and jackfruit grows everywhere.  Jackfruit has been hailed as a ‘future food’, due to the fact that it grows so easy and is high in nutrition. It requires minimal fuss and pruning. One jackfruit can feed many and some say it will help to ease the issue of global hunger/ food security.

For me, the country who does jackfruit the best is Indonesia. I’ve never been to a country where it is used so frequently. Almost every meal I had in a proper place had at least one dish using jackfruit. The dish ‘Gudeg’ is a stand out staple. Of course, it makes for a great dessert. It’s a very useful plant, although I have been warned that in places like Brazil, it can be invasive. This is probably not such a problem in rural Wales as it will only grow in warm places.

Fairly standard Indonesian lunch! You have jackfruit and it’s leaves here, plus tofu and tempeh.  Woah!

I also tried a ‘Pulled Jackfruit Burger’ in quite a cool little place in Yogayakarta, Indonesia. This is a contemporary twist on things and its great. You’ve probably tried one yourself?  I’ll be cooking it when I get back to the UK for sure. Unfortunately, up here in the Himalayas, it’s not a Jackfruit zone. Great organic veggies though.

You can eat ripe Jackfruit raw, I love it like that, but they have to be ripe. It’s also interesting when it pops up in a salad. Jackfruit originated in India and in the South you can find people selling it as a street snack and, of course, in parts of India it’s made into a curry. I know they sometimes make candies/ sweets out of the juice.

Jackfruit is easily confused with the pungent freak that is Durian (see below). Popular in South East Asia and banned from public transport there (it reeks like something gone way rotten and wrong). Durian is an acquired taste and once (or if) you can get over the stink, has an incredible flavour.  When I did the TV show ‘Meat vs Veg’ I was tasked with wandering around the streets of London, trying to get people to try it.  Some did and liked it, but most just looked sickened!  Again, something totally unique. Go to Thailand, try it out. The Thai’s adore the stuff. Durian looks different, bigger spikes and doesn’t grow as large.

Pulled BBQ Jackfruit Burger, Yogyakarta, Indonesia

Nutrition wise, for something quite starchy, its got lots to offer. It’s low in calories with good levels of Vitamin C and Vitamin B6 (which is quite rare). Its also a reasonable source of minerals and a good source of carbohydrates, fats, protein and has plenty of fibre.  The seeds have plenty of vitamin A.

Although it’s not exactly local (and you know we love our local produce) I guess there is little difference tucking into a pineapple or mango. Jackfruit is a treat and when you look at the quite high prices in the UK, this makes it even more so. I think for a every now and again, taste of something different, you can’t beat Jack!

You can buy jackfruit canned in most countries and if you buy a whole jackfruit, be warned, they can be a trick customer.  They ooze a white sticky liquid when cut into and it takes ages to pick out the little fruits, seperate the seeds etc.  It is well worth it, the texture of a fresh jackfruit is different from the tinned.

Have you tried Jackfruit? How did you cook it? It seems like a fresh and new ingredient in the UK and beyond that everyone is falling for.  We love it!

To avoid confusion, this is Durian. Bigger spikes. You normally smell it before you see it.
Evidence of its putrid odour. Banned on public transport in Thailand and other countries. Phew!

Finally, some fascinating and hypnotic ‘Gamelan‘ music from Indonesia:

Categories: healthy, Music, Nutrition, photography, Superfoods, Travel, Vegan, veganism | Tags: , , , , | 11 Comments

Dal Bhat Power! What’s cookin’ in Nepal

May I introduce Dal Bhat. If you've been to Nepal, you are already friends. May I introduce Dal Bhat. If you’ve been to Nepal, you are already friends.

After enjoying the most amazing traditional Nepali lunch earlier I had the urge to share with you all the delights of Nepali cooking.  My tastebuds were dancing and I felt inspired.  We’ve been here for two months now, travelling around, walking in the Himalayas, meeting the most amazing open hearted and kind folk. As usual, we’ve done a fair amount of hanging out in kitchens and nibbling things. We’ve been very pleasantly surprised by what Nepal has to offer and this is all made even more amazing by the fact that so many dishes are plant-based wonders.  Compared to China, life’s a breeze for a vegan exploring these stunning landscapes.

Nepal has a fascinatingly diverse and ancient culture, very distinct from Northern India and surrounding countries.  Nepal is technically a Hindu state, but many people we speak to are Hindu/ Buddhist.  They respect and adhere to some of the beliefs, festivals and rituals of both.  There is a great open mindedness about spirituality and it shows in the culture.  Nepalis are very tolerant, peace loving people and they know how to cook!

Nepal is basically the Himalayas in the top half and some flat lands in the south, there are countless valleys and micro-climates which means a huge diversity of crops; mangoes thrive in the south, millet and potatoes in the north.  There are many ethnic groups, the main ones being the Thakali and Gurung (north) and the Newari (Kathmandu valley) and Terai, further south, Lohorung in the east.  It’s a melting pot of cultures which can only add to the brilliance of the cuisine.

Jane is a big fan Jane is a big fan

DAL BHAT POWER!
Dal (lentils) Bhat (grains, normally rice) is what fuels this lovely country. Twice a day, every Nepali eats a big plate of Dal Bhat. I’ve never been to a country that adores a single dish so consistently.

Nepalis normally have a nice cup of strong tea for breakfast, maybe a baked good of some description, but the tastiness really kicks off around 11 am with an early lunch of dal bhat with some chutney or pickle (achar) and a tarkari (veg side dish). We love the fact that you normally get some fried greens, mustard leaves are very popular, and also the fact that in most restaurants seconds and thirds are politely enforced. If you turn your head for a second, your pile of rice magically grows.  It’s very rare that you leave a premise without being totally stuffed full of spicy veggies. You will sometimes also get a nice little salad going on and one single, solitary, tooth meltingly spicy chilli. To be eaten raw by the afeciandos and fool hardy. I love em!  Certainly wakes you up.

Dal Bhat is also served for dinner, again an early sitting, 6pm-ish. I like the simplicity of it all. All over Nepal, you hear the pressure cookers hissing in the early morning. The pungent aroma of frying onions and spices are to me something synonomous with the haze of Nepali mornings.  Everyone one knows where they stand food wise, no over complictions, and it must be so easy for the home cook. No one needs to ask whats for dinner! Of course, the veggies vary and the dal morphs from legume to legume, but the combo remains undiminished. Dal bhat rules.

The dal component can mean anything, but mung beans (halved) are very popular. You may also see some rajma (kidney beans – Jane’s recent favourite, see our recipe here) and chana (brown or normal chickpeas).  When I make dal, it’s thick and hearty, but you’ll find in Nepal and India, dal is more like a soup.  If you’re very luck indeed, the restaurant may have a tandoor oven which opens the door to all kinds of stunning breads. Warm and crisp naan being the royality of any tandoor behaviour.

Fortunately for the nomadic vegan in these parts the veggies are very, very tasty. Up in the mountains and in the countryside most people have their own veg gardens that really thrive. The produce is delicious; potatoes, carrots (quite expensive for some reason), spinach, chard, cauliflower, broccoli, turnips, long white radishes (like daikon), mustard leaves, bitter gourd, green beans, cabbage, tomatoes, cucumber.  We’ve even seen some pumpkin, but it’s a rare and very special event.  A beetroot curry has been savoured on one very special evening.  Even the stuff you buy from bigger Kathmandu markets is packed with flavour. We’ve enjoyed using this abundance in recipes in our little flat in Kathmandu, up in the north, a local neighborhood with dusty roads and a gently chaotic and superbly friendly nature.  We have a little kitchen and a sun trap terrace.

Monkey Temple Stupa - Kathmandu Monkey Temple Stupa – Kathmandu

WHAT ELSE?

But dal bhat is not the end of the line.  There are also such delights as momos (technically they’re from Tibet, but they are loved all over Nepal and there are many Tibetans living here), things like Chow Mein and Thukpa (Tibetan noodle soup) have also made the hop over the Himalayas/ border.  Barley, millet and buckwheat grow well in the cold areas and you’ll find these regularly made into  a range of noodles or tsampa, a flour which is made into a hearty porridge.  This is perfect early morning fuel for a day hiking.  You’ll also find these grains being made into Raksi or Chang, potent distilled moon shine or quite a mellow wine like booze that is mixed with fruit juice sometimes.  It’s perfect chilled with apple juice!  On average, 15p per cupful.

These cooks are superheroes. Nepali cooks are very talented and capable of creating complex menus/ meals with very basic equipment. Plus, this guy was cooking at about 4000m up a big snowy hill. These cooks are superheroes. Nepali cooks are very talented and capable of creating complex menus/ meals with very basic equipment. Plus, this guy was cooking at about 4000m up a big snowy hill.

THE REAL DEAL

So what was so special about todays lunch?  Thamel is the main tourist area in Kathmandu.  A jumble of lanes loaded with tourist traps of all forms and agendas.  You can get food from all over the world, but pizza doesn’t interest me in the slightest in Asia.  I could eat rice 24/7 anyway, so I’m never in the market for a seeded loaf or crepe when I’m wandering in Eastern parts.

We stumbled across a little old doorway, we ducked in and it opened out into a courtyard with beautifully carved wooden window ledges and perfectly wonky old walls.  Our host was toothless and beaming wearing a traditional Nepali hat.  We knew it was a proper joint, the kitchen was a hive of good natured activity.  I was excited as my expectations soared.

Most Nepali’s eat squating or sat cross legged on the floor, but in more urban restaurants, you’ll get a chair and tourists are always supplied a trusty spoon, although sometimes I like eating with my hands.  Really getting to grips with your food!  Just always remember, right hand only.  Left hand is a no go area for reasons I won’t go into on a food blog.

Safely perched on our chairs, we both went for the Nepali Veg Set or Khana, which is something we love.  It’s like Dal Bhat with a few more trimmings.  I went for dhendho with mine instead of rice, like a thick buckwheat porridge.  An earthy, wholegrain polenta.  The smells escaping the kitchen, a tiny room with very low ceiling, were tantalising.  No less than four pressure cookers were violently hissing, like some kind of out of sync steam train.  The waiters all fussed around us because there was only another couple of people in there and they were big fans of Gareth Bale (he’s a Welsh football player for non-sporties and officially the most famous Welsh person ever).  It’s always very strange to visit some very remote mountain village, lost to the vastness of the mystical Himalayas, and find a picture of Wayne Rooney pinned up beside Krishna in your family hostel reception.  I wonder what Wayne thinks about this kind of hero worship?  I wonder if he even knows!?

Mountain of dhendo! With all the Thakali trimmings I know what you’re thinking, ‘that’s a big pile of dhendo!’ With all the Thakali style trimmings flavoured with the mighty ‘jimbu’.

Anyway, lunch was ace.  Very traditional and a real taste of the Thakali style of cooking.  An ethnic group from mainly Mustang in northern Nepal (a fascinating region if you’re a culture/ history buff btw) which stretches down to Pokhara.  The Thakali’s love nothing more than flavouring their dishes with the brilliantly named ‘jimbu’.  It’s a member of the allium family, think potent onions crossed with chives, normally used to flavour dal but it was also evident today in the tarkari dishes. A delicious herby twist to the normally spice laden sauces.  The mustard leaves were radiantly green and fresh, there was even some gundruk, something you don’t always get.  Dried and fermented saag, which is a loose term for green leaves but something normally like spinach.  This was all finished off by some pickled white radish and a punchy chutney of tomato and coriander; plus crisp popadoms, some chopped up salad bits, a slice of lime and one of those highly explosive green firecrackers (chillies).  What a feast!  How many textures and flavours can you cram onto a large tin plate?!  All for the modest sum of £1.  You heard me right, £1!  And we still get people writing in asking why we choose to travel all the time.  £1 goes a long way in certain parts of the world and it can certainly buy you some delicious lunch options.

A random, yet delicious falafel wrap in Kathmandu. I may not seek out crepes when travelling, but falafels are always welcome. A random, yet delicious falafel wrap in Kathmandu. I may not seek out crepes when travelling, but falafels are always welcome.

Other Nepali specialities we’ve encountered include bread made from grains like millet or buckwheat (gluten free options abound), fermented soya beans (kinema).  We stay with an amazing family in Kathmandu, papa is called Raju and he takes wonderful care of us.  He was the first face we saw off the plane from Beijing, escorting us through the tangled Kathmandu streets on his motorbike (a Honda ‘Enticer’).  We love visiting Rajus family home and checking out what his sisters (he has seven!) and Mum are up to in the kitchen.  We’ve had some of our favourite food there, especially the popped, squashed and dried rice (baji) staple.  A dish normally served with roasted peanuts and different tarkaris (curries).  Something very uniquely Nepali and, I must admit, a little strange at first.  More like a pile of crunchy breakfast cereal has invaded your plate.

One of the most interesting dishes that Raju has introduced us to is Yomari (or ‘tasty bread’ – see below).  It looked like a hand crafted parsnip.  It’s actually made out of rice flour dough and stuffed with cane sugar, giving a gooey sweet middle.  It looks really tough to prepare and is loved by Nepalis.  Traditionally made for the Yomaru Puri festival, these funny things are something to do with an offering to the God of Wealth (Kubera).  There are so many festivals and religious rituals going on in Nepal, it’s almost impossible to keep pace.  I’ve never had anything like it, but I always appreciate a parsnip and the exploding soft sweet centre was a treat.

Yomari - a very interesting and unique Nepali sweet Yomari – a very interesting and unique Nepali sweet

Snack wise, our favourites are the peanuts sold off the back of carts.  Simple but effective.  They are roasted in sand and kept warm in big piles with traditional wood burning clay braziers.  Expertly moved around by the vendour.  A great smell on a brisk January morning.  A big bag is around 50p or less.  We’ve had some tasty samosas and also doughnuts, which the Nepalis call ‘sel roti’.  You’ll also get some dried fruit and roasted soya beans.  There are of course the massive corporations here dishing out crisps and poor quality chocolate.  In bus stations you’ll find men wandering around with big baskets on their heads filled with a selection of warm breads and pastries, all wrapped up snugly in colourful cloths.

Dessert wise, Nepal is probably not going to blow you away.  There are not the volume of sweet shops that you find in India.  Kheer is a constant, sweet rice pudding with dried fruits and coconut, but as a vegan, you’re really looking at fruits.  The papaya is sensational.  I have no complaints.  After three plates of dal bhat, I’m nowhere near the market for dessert anyway!  Randomly, some of the best sweet things can be found half way up mountains.  Little homestays do a roaring trade in fresh apple pie for weary hikers.

Of course, we’re only writing about the vegan highlights here.  There are vastly more dishes that contain meat and dairy.  A vegan must always be aware that many dishes are fried in ghee (clarified butter).  Many Nepalis speak very good English so explaining your needs is reasonably straight forward.  Even though Nepal is Buddhist (Gautama was born in Lumbini in the south) and Hindu, most people are meat eaters, especially in the mountains.  Veggies are harder to grow up there where arable flat land is scarce.  There are some signs in more touristy areas offering vegan options.  I feel that Nepalis are open minded, there has even been discussions about making Nepal an organic only country!  Big ambitions.  But what a great idea.  With an ethical, peaceful Buddhist and Hindu approach to things, I can also see veganism really connecting here.  After all, the veggies are amazing!

We made it up some mountains. Dal Bhat Power 24 hours!! (as they say here) We made it up some mountains. Dal Bhat Power 24 hours!! (as they say here)

We’re off for dinner in one of our favourite local Newari restaurants where the chef is a genius (he actually wears one of those proper chef white jackets with proud and shiny buttons) with all things spice and they have a tandoor oven that looks like an antiquated space rocket.  When it’s cranked up it actually sounds a bit like one.  The naans melt in the mouth, especially when dipped into a feisty bowl of beans or used to mop up the last drops of tarkari.  I’m getting hungry now……..

See here for more of our Indian/ Nepali inspired recipes.

Dinner way up in the Himalayas (we slept in a draughty cupboard that night, but dinner was fine.) Dinner way up in the Himalayas (we slept in a cupboard that night, but dinner was fine.)


Categories: Curries, Healthy Eating, photography, Travel, Vegan | Tags: , , , , , | 1 Comment

Visiting Tofu Village – Yogyakarta, Indonesia

The load, hot and crispy end of the kitchen

The load, hot and crispy end of the kitchen – Tofu Village

Jane and I are not fans of tour groups so we jumped on a motorbike and headed out into the countryside around Yogyakarta.  We’d been reliably informed that there would be huge ancient religious monuments, something like the grandeur of Angkhor Wat, and no shortage of tofu (tahu) making villages.  We were ready for some great times, lumps of tofu and stunning temples sounded like a decent way to pass a day.

This southern area is known as the garden of Java. Incredibly fertile and beautiful, lush countryside

This southern area is known as the garden of Java. Incredibly fertile and beautiful, lush countryside

We zig zagged and bounced our way out of Yogkakarta in the early morning, traffic flowing like a crazy vein of buzzing scooters making erratic patterns on rutted tarmac tracks.  We made it to the greener surrounds and went off piste down little tracks lined with rice paddies and folk thrashing their harvest by hand.  The countryside was breathtaking and so very fertile.  After the polluted city, the fresh air and open skies were a delight.

We began to follow our noses, asking the wonderful people of Java for tips and signals.  Many people understand English in Indonesia and they are so very kind hearted.  One chap hopped on his bike and led us over awesome off road terrain to a little village where an old lady was sat on a terrace.  ‘Tahu!’ he excitedly exclaimed and we knew we’d hit our plant-based jackpot.

Firstly - Cook the ground beans and add coagulant

Firstly – Cook the ground beans and add coagulant (great word!)

Tahu (tofu) is a staple in Indonesia, as well as Tempeh (more to come of that in following posts).  Many people in the countryside cannot afford to eat meat regularly and it seems that tofu and tempeh fills the gap.  Indonesians love it and it is available everywhere, mostly in little stalls selling it as a deep fried snack with a cup of Jasmine green tea.  We’ve so far eaten it many ways and have gobbled them all with glee.  The tofu is generally given a quick fry in coconut oil before being re-cooked and the tempeh is regularly served after being simmered with cane sugar.  Sticky and sweet.  In many ways, eating tempeh and tofu in Indonesia is a little like eating Focaccia and Pasta in Italy, this is it’s land.  Where it is from.  There is something intangible there that cannot be recreated.

Put into moulds, then leave to dry on racks

Put into moulds, then leave to dry on racks

The tofu kitchen was actually a mini countryside production plant.  Generations of the family were lending a hand as Grandmother supervised.  For those who know the process of tofu making, it is the same as you’d do at home, just a larger scale.  They made what we’d call ‘firm’ tofu in the UK and sold it straight up cubed or gave big chunks a couple of minutes in very hot coconut oil to crisp up and then stored the finished tofu in water.  All of the heat used was via wooden braziers, the frying pan was heated using a large pile of wood chips.  Very, very hot work but the aromas were a delight.

Chop it up (Jane slightly assisting)

Chop it up (Jane slightly assisting)

The family didn’t speak English and were a little shy.  Our two scrumbled pages of Indonesian and a few sentences got us somewhere, but two big gangly exciteable tourists poking about your work place is generally a little unsettling.  They were absolutely lovely and we got to taste the tofu at each process and it was excellent, as you’d expect.  One thing that I did find surprising is that the soya beans used were from the USA.   I know that the US grows vast quantities of soya beans to feed their insatiable appetite for beef, but I did not imagine that some of it would be feeding the people of Java!  I can only imagine that its cheaper than local soya beans which just seems bizarre, but understandable with our current methods of food production and distribution.  Organic tofu this was not!  Otherwise, this method of making curd from warmed bean milk is completely genius and has long been established (Han Dynasty, China, over 2000 years ago) as a vital way to get nutritious, protein-rich food into diets.  It’s also utterly lovely stuff.

Bubble, bubble......man, this pan was smokin'

Bubble, bubble……man, this pan was smokin’

This was our first time seeing tofu being made in a traditional way and the family had been making the local villages tofu for generations.  It is such a privelege to be able to travel and investigate the food that we love.  Our connection with and understanding of what we are eating grows and we can find new found enjoyment in the wonders of global cuisine.  We’ll never look at a lump of tofu the same again!
PS – We’d love to tell you the name of the tofu village, but we were scooting all over the place and had no idea where we really were.  It’s our little secret, somewhere near Karang.  We’d also just had a jug of thick black coffee from Papua New Guinea which gave us some kind of joy jitters; laughing, jabbering, sweating, dazed, frantic, dry mouth……you know how that goes.

All wood fired in these parts

All wood fired in these parts

Categories: healthy, photography, Travel, Vegan | Tags: , , , , , , , , | 6 Comments

Peace & Parsnips out now in the U.S.A!

It’s a great day for the BHK, our cookbook is out in the U.S.A!! Jane and I are very proud and super excited by it all. Jane is actually over in Santa Cruz, California now and will be buying a copy today. I’m expecting a picture very soon.  I can tell you that she is loving all the amazing vegan food in California, burgers bigger than your head washed down with vegan milkshakes!!  Wow!

Below are some links all about the book, there are over 200 plant-based recipes packed with flavours and colours. The book was a labour of love and its amazing to see it available now in the U.S.  I hope you love it guys!!!

Peace and Parsnips comes out soon in the USA:)

Peace and Parsnips out now in the USA!!!!!:)

Peace & Parsnips recipes, reviews, plus more.

Here’s a sneak peek of some of the recipes:

tablee_s0x500_q80_noupscale

Braised Cauliflower Tabouleh

Lazy Lahmacun - One of our Turkish favourites.

Lazy Lahmacun – One of our Turkish favourites

Oven Baked Squash Gnocchi with Sun-dried Tomato, Fennel and Spinach Pesto

Oven Baked Squash Gnocchi with Sun-dried Tomato, Fennel and Spinach Pesto

Aviyal - Keralan Coconut Curry

Aviyal – Keralan Coconut Curry

Fragrant Wild Rice, Curly Kale and Pistachio Salad - Recipe from Peace & Parsnips

Fragrant Wild Rice, Curly Kale and Pistachio Salad

Blueberry and Macadamia Cheesecake

Blueberry and Macadamia Cheesecake

I’m celebrating tonight with a very Stateside meal…….a sushi feast!!  I’m using the local avocadoes, smoked tofu, plenty of oyster mushrooms, roasted peppers…..yum! There may even be a glass of something fizzy!

Categories: cookbook, healthy, Peace and Parsnips, Vegan, veganism | Tags: , , , , , , | 4 Comments

Roasted Cauliflower Hearts with Hazelnuts and Creamy Asparagus Sauce

Roasted Cauliflower Hearts with Hazelnuts and Creamy Asparagus Sauce

Roasted Cauliflower Hearts with Hazelnuts and Creamy Asparagus Sauce

I know this may sound complicated, but it ain’t!  A light and simple summer time lunch which is a bit of a looker and won’t have you hanging out in the kitchen or shops for too long. The method is so easy and there are only a handful of ingredients. You want to be outside right, dancing in the sunshine, listening to reggae!!!

This is what you could call a restaurant style dish, I served it recently to some friends and it’s that kind of Saturday night dinner party plate. Dishes like this look much more complicated than they actually are, I think that makes for a good restaurant dish. Making our lives easier in the kitchen doesn’t mean the quality and presentation of food has to suffer. The contrary is generally true. The more chilled and effortless we are in the kitchen, the better the end product. Thats how it works in the BHK anyway!

KING CAULI
Cauliflower is so versatile and its finely getting some real kudos in the ‘foodie’ world. Long overdue! I actually endured the glorious cauliflowers former incarnation recently, that drab and vacuous, steamed way beyond death thing, that graces serving dishes in function rooms across Britain. It was at a wedding. Any flavour that the poor florets had were mercilessly boiled out. What a shame, I only hope they used the stock.

Cauli makes our sauce here super creamy, it actually contains pectin, like apples, which helps to thicken things up nicely. I use cauliflower in soups and stews when looking for a touch of silky creaminess. I’ve even used cauliflower in a chocolate torte which was actually really nice. It was for my Mum’s 60th birthday cake, which was admittedly, a bit of a risk. But no one could have guessed, primarily because I didn’t tell them about the secret ingredient until after they’d eaten at least two slices and showered compliments on the richness of the torte etc. Then I went in, a bit smug. No one was that surprised. They know what I’m like.

Of course, we’re all crazy for roasted cauliflower at the minute and bar maybe potatoes, few veggies can match cauli when it is nicely caramelised and a bit charred around the edges. Yumah!

A plate fit to grace a party

A plate fit to grace a party

Recipe Notes
You’ll probably have a little too much sauce from this recipe. You can thin it down with vegetable stock to make a lovely soup.

If your hazelnuts are not toasted, just pop them on a baking tray and into the oven for 10 minutes. Keep your eye on them.

You can easily cook the cauliflower on a bbq if you prefer. Cauliflower is perfect for all kinds of bbq style behaviour.

Asparagus can be substituted for a number of veggies in this dish. What ever is looking good and seasonal, I’m thinking peas, broad beans, kale, even peppers or squash. Cauliflower is fairly neutral and takes well to many other veggie flavours.

I served this with pan fried mushrooms and spinach with roasted potatoes. Unless you are looking for a light meal, I’d advised some of your favourite, complementarty sides.

The BitsFor 4
1.25 kg cauliflower (a big one)
600g asparagus spears
3 cloves garlic
500ml soya milk (unsweetened)
1 big handful toasted hazelnuts (finely chopped)
Olive oil
Salt and Pepper

Do It
Preheat an oven to 225oC.

Cut off the asparagus tips (first three-five inches), then chop the stems until you get to the woody bit. Try some, if it’s fibrous, you’ve gone too far.

Trim the leaves off the cauliflower by slicing off the majority of the base stem. Then cut into 3/4 inch slices straight across, use a long knife. Now cut off the ‘hearts’ of cauliflower, basically nicely shaped florets. The more broken, smaller pieces of cauliflower, add to a saucepan for the sauce. This should be roughly 1/2 the cauliflower. Use any leftover pieces of stem for the sauce.

Drizzle some oil onto a large oven tray, add the cauliflower hearts and season with salt and pepper. Toss a little so they are covered with oil and place in the oven for 25-30 minutes. Until they are well caramelised, I’m talking dark brown colours and charred bits here.

Add the soya milk and garlic to the cauliflower in the saucepan. Bring to a gentle simmer and cook for 15 minutes, until the cauliflower is just breaking down. Add the asaparagus and season with salt and pepper. Cook for 5 minutes more then leave to cool. You can do this in advance, preferably before the cauliflower is roasting in the oven. Using a stick blender or food processor, blitz the sauce until nice and smooth.

Just before serving, grab a frying pan, add a dash of oil and on a high heat, cook the asparagus tips. Fry for 5 minutes, until they caramelise and then season with a touch of salt and pepper.

Serve on big warm plates, add a few spoons of sauce to the centre, use a spoon to form a circle/ square (depending on the shape of your plate), form a row of asparagus tips along the centre, with four large cauliflower florets either side. Finish with a good scattering of hazelnuts. Or anyway you fancy.

This kind of dish demands a nice glass of chilled white wine (with or without bubbles).

Enjoy!!!!!

Enjoy!!!!!

Categories: Dinner, gluten-free, healthy, photography, Recipes, Vegan | Tags: , , , , | 3 Comments

Peace & Parsnips coming to the USA soon!!! Adventurous Vegan Cooking For Everyone – Reviews + release date

Peace and Parsnips comes out soon in the USA:)

Peace & Parsnips to be published soon in the USA:)

Not long now!!:)

It’s been over a year since Peace & Parsnips was released in the UK and now its off for an adventure over in the USA!  How cool!!

It will be published on 31st May and I’ve just had a peek at an advanced copy of the U.S. edition and its looking totally awesome!  I had to share.  It’s still bursting with over 200 plant based recipes packed with vitality and flavours.  More about the US version here.

Loads of super tasty, healthy, wholefood, vegan recipes for everyone!!

Loads of super tasty, healthy, wholefood, vegan recipes for everyone!!

So far the cookbook has been really well recieved, with a load of great reviews and comments:

“Plant-based recipes from a fun-loving, world-wandering chef you’ll want to follow everywhere!”

“Now, Peace & Parsnips captures 200 of Lee’s extraordinarily creative recipes, all “rooted” in his love of life and his many travels—from the streets of Mexico and the food bazaars of Turkey to the French countryside, the shores of Spain, the spice markets of India and beyond! Twelve chapters burst with gorgeous photos (200 in all!), tempting us with Lee’s mouthwatering recipes—all meat-free, dairy-free and egg-free, and many gluten-free—that are brimming with goodness. Get set to savor:

Breakfast: Plantain Breakfast Burrito with Pico de Gallo
Smoothies, Juices & Hot Drinks: Healthy Hot Chocolate
Soups: Zen Noodle Broth
Salads: Fennel, Walnut & Celeriac Salad with Caesar-ish Dressing
Sides: Turkish-Style Spinach with Creamy Tofu Ricotta
Nibbles, Dips & Small Plates: Shiitake Tempura with Wasabi Mayo
Big Plates: Parsnip & Walnut Rumbledethumps with Baked Beans
Curries: Roasted Almond & Kohlrabi Koftas with Tomato & Ginger Masala
Burgers & More: Portobello Pecan Burgers with Roasted Pumpkin Wedges
Baked & Stuffed: Mexican “Pastor” Pie
Sweet Treats: Raw Blueberry & Macadamia Cheesecake; Dark Chocolate & Beet Brownies

“[Watson] sets out to prove that tasty vegan food isn’t an oxymoron.”—Publishers Weekly

“Filled with 200 vibrant, appealing plant-based recipes.”—VegNews magazine

“As a long-time collector of vegan cookbooks, I’m always looking for the next great vegan chef: one who thinks outside the box and uses ingredients in new and interesting ways. Chef Lee Watson is the next great vegan chef for me, and Peace & Parsnips is a sensational addition to my collection.”
—Del Sroufe, author of the New York Times-bestselling Forks Over Knives—The Cookbook

“With vibrant imagery and abundant creativity, Lee takes us on a rich adventure that proves that clean, vegan eating is anything but boring. Peace & Parsnips is a true celebration of plant-based possibilities, and the ‘life’ these foods bring to our lives.”
—Heather Crosby, author of YumUniverse: Infinite Possibilities for a Gluten-Free, Plant-Powerful Lifestyle and founder of YumUniverse.com

“Bravo to Chef Lee Watson who has us covered in this mouthwatering cookbook! Everything you need to satisfy your cravings is right here starting with breakfast and smoothies, to dips, soups, curries, burgers, and desserts. An excellent vegan pantry section is included to help guide beginners who are just starting to cook vegan.”
—Chloe Coscarelli, author of Chloe’s Kitchen, Chloe’s Vegan Desserts, and Chloe’s Vegan Italian Kitchen

Passionate about vegan food without being preachy, Lee Watson brings a singular sensibility to the vegan cookbook shelf. He has worked in restaurants for more than 20 years, has cooked on TV as one half of the presenting team on Fox’s Meat v Veg and helped open a restaurant on the beach in Murcia, Spain. Besides growing his own organic fruit and vegetables, Lee writes poetry and plays guitar, practices yoga, hikes and runs in the mountains, swims in the sea, surfs and enjoys nature. He lives “the good life” with his partner, Jane, in western Wales, where he works as a vegan chef at an idyllic retreat center in Snowdonia.

2016-04-26 17.10.56_1

Loving the US edition;)

It’s now ‘Adventurous Vegan Cooking……Inspired by Love and Travel’ which is brilliant and I think sums things up perfectly.

As an appetizer, I’ll be sharing recipes from the book here in the lead up to publication, so stay tuned.

The last year has been so amazing and I can’t wait to see the reaction of the U.S. to ‘Peace & Parsnips’!!

Categories: cookbook, healthy, Healthy Eating, Peace and Parsnips, Travel, Vegan, veganism | Tags: , , , , , , , | 2 Comments

Pea and Mint Hummus

Pea and Mint Hummus

Pea and Mint Hummus

Now that one half (me) of the BHK is rocking Spain, things are going totally Med for a while.  Fresh, vital, packed with sun, light and easy. Tapas basically. Little plates of flavour explosions that tantalise and don’t make you feel like a stuffed courgette. Perfect summer fare.

This is a nice twist on your standard hummus, plenty of lemon to lift it and enliven and a good hit of mint. It looks so vibrant, everyone will want a dip!  The great thing about peas is they freeze brilliantly and a I used frozen peas here.  When frozen, they don’t lose much of their nutritional value or texture, so its all good.

A hummus twist

A hummus twist

In Spain, the hummus wave is really hitting.  We went out with out mate in Madrid, a cool area and all the bars were serving hummus.  It seems like all the cool kids were at the crudites.  I think hummus is such a staple now in the UK, its nice to give it a twist now and again, although there’s absolutely nothing wrong with a well made ‘normal’ hummus.  I like mine nice and thick and creamy, with plenty of tahini.  I don’t think I’ll ever tire of it.

*Warning* – my posts from Spain may get a little erratic at times.  I’m normally tucked away in one of the the few local bars that have wifi.  There is a heady atmosphere of shouting and laughter and I’m no doubt sipping a ferocious black coffee.

Give peas a chance;)

2016-05-09 17.23.45

The Bits – Makes one big bowlful

480g chickpeas

275g peas

1 tbs dried mint

1 big handful fresh mint (finely sliced)

150ml olive oil

4 tbs tahini

1 1/2 medium lemons (juice)

2 big cloves garlic (crushed)

1 teas salt

50ml chickpea cooking broth


Do It

Place all ingredients into a blender and blitz until nicely smooth, drizzle in the chickpea broth (or water) until you get the consistency you like.  Remember that the hummus will thicken up in the fridge.  Check seasoning and served with a crazy array of chopped vegetables, flatbread slices, oat cakes, whatever tickles your fancy really.

View from one of the local interent hubs/ bars

View from one of the local interent hubs/ bars.  Life’s a long beach!

Categories: healthy, photography, Recipes, Snacks and Inbetweens, Summer, Travel, Vegan | Tags: , , , , , | 7 Comments

Chickpea, Date and Potato Tagine

Chickpea, Date and Potato Tagine Chickpea, Date and Potato Tagine

Tagine is a great summer time staple, a light stew with lovely spice and hints of sweetness from the dates. The perfect place for brilliant seasonal vegetables, a straightforward and ideal addition to your mid week special board!

In Morocco, tagines are a showcase for the amazing local produce. The stock base is just the cooking juices of the vegetables and a little salt, no added stock needed. You know how good your veggies are, its a good test actually. If this tagine is tasteless, its all down to the produce (add a little veg stock).

I went to Morocco straight from Mexico and I remember being hungry quite a lot. I was travelling on hope and pennies and there was certainly not the range of cheap street eats that you find everywhere in Mexico. It was a bit of a shock to the system. When I found a place that did cook veggie food, normally cous cous or tagine, it was a real find. There was normally then a wait while the cook/ owner went out to but the vegetables and cook the tagine. I travelled in mostly rural areas and this could mean a long wait for dinner/ lunch. Still mint tea always flowed easy and the pace of life in Morocco suits me down to the ground. Life ebbs by nice and easy.

Let’s face it, most of us don’t have a proper tagine (the cooking vessel). That’s fine, we can still call it a tagine (just don’t tell your Moroccan mates!) As you’d imagine, we do have a tagine dish. It is normally used as a fruit bowl and I’m always looking for an excuse to use it. A tagine is actually a brilliant shape and design to cook vegetables and cous cous to perfection. You need very little water as the heavy lid keeps in most of the water, it acts as something like a pressure cooker. I find this especially helpful when cooking cous cous.

I like a good mix of veggies in my tagines and potatoes are very important base to other more glamorous (you know what I mean) veg like aubergine, peppers etc. The potatoes have the added benefit of making the tagine sauce thick when they begin to break down.

The flavour or Morocco (in a little jar), just add amazing veggies The flavour or Morocco (in a little jar), just add amazing veggies

I always bang on about fresh spice, but it makes a huge difference. Many spices have been lurking around our cupboards for a while and may be past their sensational best. Ras El Hanout is the traditional spice mix used, but you know what, other spice mixes can be added to make a tasty stew. Think garam masala, curry mixes, berbere, jerk style mixes. The basic technique will be the same, just experiment with the spice quantity.

I’ve been cooking all over the UK in the past month, it seems like a different kitchen every night! I love it!! I’ve found most people have really good kitchens and its interesting to try out different ovens and cook with a range of pots, pans and utensils. Most people have some amazing kit, much better than the stuff I’ve got!!!  This tagine was made in Durham a few days ago, my Dad who you probably know by now was like me, a real, full power, carnivore and is now going through a real shift. He’s making his own twelve veggie stew at home. I knew Dad would dig this and he says he’ll be trying it out again soon. It’s always wicked when your loved ones enjoy what you make.

Not Durham! Sunset from the terrace last night in Spain Not Durham! Sunset from the terrace last night in Spain

Recipe Notes

Tagines are normally chunky. Cut all the veggies into roughly 1 1/2 inch chunks.

As a variation, you can substitute the dates with dried apricots and use whatever vegetables are good and seasonal, easy to get hold of.

My friend Abdul, who lives in a cave near the Sahara, swears by a nice glug of olive oil when serving a tagine. It adds extra richness and gives the sauce a shimmer.

To make things extra special, adding a few handfuls of greens just before you serve the tagine would be nice. Something like spinach, kale or chard. Spring greens are awesome, just add then about five minutes before serving, they take a bit more cooking.

Do not use a metal spoon or spatula to stir stews, unless you want the vegetables to break down. A trusty wooden spoon is perfect.

We cooked quinoa to serve the tagine with, instead of the traditional cous cous. Gluten free and delicious, its also packed with massive amounts of goodness/ nutrition.

2016-04-28 19.00.21 Simple summer special!

The Bits – For 6-8

2 tbs cooking oil
1 onion (peeled and sliced)
2 inches fresh ginger (peeled and finely sliced)
½ medium butternut squash (peeled and chopped)

4 small potatoes (chopped)

2 bell peppers (deseeded and chopped)

1 aubergine (chopped)

4 large tomatoes (chopped)

250g/1 tin chickpeas
16 dates (de-stoned and cut in half)
4 tbs tomato paste
3 tbs ras el hanout spice mix
1 3 inch cinnamon stick
400ml hot water
Salt (to taste)

Serving
A little good olive oil, fresh coriander and extra spice

Do It

This is an easy one…….

In a large frying pan or saucepan on medium heat, add the oil and fry the onions and ginger for five minutes until soft, then add the other vegetables, cinnamon, spices and some salt. Stir and fry for two minutes then add the tomatoes, dates, tomato puree and water.

Stir gently and pop on a loose fitting lid and cook on a steady simmer for 35-40 minutes, until the potatoes are just breaking down. Season with a little more salt to taste.

Serve with cous cous, topped with a drizzled of olive oil, fresh coriander and a sprinkle of extra spices.

Nice with some greens! (Isn't everything;) Nice with some greens! (Isn’t everything;)
Categories: Dinner, gluten-free, healthy, photography, Recipes, Stew, Summer, Vegan | Tags: , , , | 3 Comments

Decadent Double Chocolate Cake

Decadent Double Chocolate Cake

Decadent Double Chocolate Cake

A really decadent vegan chocolate cake!  This is one we find any excuse to make.  Its a lovely light and rich cake smothered in a very silky, chocolaty icing.  I think you’re going to love it!!

Nigella Lawson certainly knows her way around a cake and this recipe is based on one from her new book. Thanks Nigella! Jane found it somewhere and is such a fan of sweet things, knew it would be a wonder.  It’s one of those recipes that any non-vegan would be amazed to find out had no eggs or dairy in. The texture is wonderful and the icing is a knockout.  I don’t always tell people things are vegan anyway.  It’s just shining, delicious food.  ‘Nuff said!

THE UK COOKING CREW

People like Nigella, Hugh Fearnley Whittingstall, Jamie Oliver and Rick Stein really kept me interested in cooking in my mid 20’s.  Mum normally had Rick and Nigella’s knocking around the house and Hugh was one of my favs. I remember him cooking things on open fires with antique looking pots dangling off his land rover and belting out ‘Baba O Riley’ by The Who with some proper chops. He seemed to be having a great time and it was infectious.  I loved the idea of grabbing a bunch of tomatoes from the green house and popping them straight into a pot.  That definitely sounded like the good life.

SIR JAMIE

A lady bought me Jamie’s first book in a hotel I used to work at, she knew I liked cooking and felt that a cheeky chap on a scooter would appeal.  I loved Jamie’s energy, skill and passion.  He didn’t go down stairs, he slid down bannister’s.  He tore stuff up, threw things, chopped things with his bare hands….  His carefree approach triggered something in me, I’d worked in a kitchen that was classically French, with big hats and all.  Simple, fresh and tasty food was where it was at and Jamie made it all accessible and fun.  That was one of the main things, it was FUN!  You didn’t have to take yourself or food seriously and this was surprisingly quite revolutionary.  Well done Sir Jamie (it can’t be long now lets face it with the sugar thing and all!!!)  Just one little question mate. When are you going fully vegan again????!  Jamie recently talked to Tim Shieff and came straight out and said that the future of food is plant-based.  Which was a really bold thing to say for a celeb chef but unfortunately, in his new book, there is not one vegan recipe.  Maybe the next one will be charged with plant power.  Fingers crossed.   I know that he loves vegan food and there are loads of vegan recipes over on Jamie’s site.

I used to try out loads of this crews recipes whenever I wasn’t working, which was quite a bit back then as I was a restaurant manager.  Cooking has always been a way for me to unwind and be creative.  I remember baking loads of Nigella cakes, there was one chocolate orange cake, oh! and who could forget the chocolate and guiness one.  I used to have it routinely for birthdays.  I just made some chocolate and stout cupcakes that I think you’ll like….coming soon.

Being a vegan chef now, I get the same feeling of inspiration that I did back in my early 20’s when I discovered the real joy of playing with pots and pans.  I can now check out these guy’s recipes and take them in a whole new direction.  The world of vegan cooking seems so vibrant and creative at the minute, I feel so lucky to be part of it.  It’s also great to see Nigella taking a step into the world of vegan baking.  There is an almost unlimited scope for brilliant baking without all that other, unnecessary stuff.  All you need is plants!!

THE MAIN EVENT

I make this Decadent Double Chocolate Cake recipe at least once a week in the kitchen and sometimes opt for a slightly less luxurious icing, a standard chocolate butter cream icing made using plant-based spread goes down very well (see below) and is a reasonable economy style option.  The team I work with in the retreat centre get quite excited when they see this on the menu, which cannot be a bad thing (as long as there’s leftovers that is!)

If you try this recipe out, please let us know.  We’ll be over the moon to hear that you’re in a happy chocolate place.

Recipe Notes

The batter is wet here, don’t fret.  Use a tight fitting tin and line it well.  This will mean that the batter doesn’t sneak through.

Please, please (please), please…..do not open the oven door, no matter how curious you get, when baking.  Leave it for 45 minutes before peaking.  This cake is a good sinker, the bicarb makes it shoot up, but until its almost baked, will quite happily sag back down making it a bit on the heavy side.

Ovens vary and this batter takes a long time to bake but thats what gives the lovely crust and gooey middle.  A winner of a cake combo!  It may need another 10 minutes.

Unless its a special occasion, we normally substitute the coconut oil in the cake and icing for vegan sunflower or olive spread.  This works well, but lacks the ultimate richness and shine that coco oil gives.  We’d recommend treating yourself to a nice big jar of coconut oil.  Early Christmas present.

You can see that I also make a version of the cake in a rectangular tin, whatever you’ve got really.  A rectangular cake is easier to portion, but in this instance, is much wider than a circular cake tin.  This means less time in the oven as the mix is thinner.  Go with your cake instincts!

The economy version with a more everyday icing

The economy version with a more everyday icing

Have some fun with this one!!!!!

Decadent Double Chocolate Cake

The Bits – 1 large cake (10-12 slices)

225g white flour

2 tbs chickpea flour

1½ teaspoons instant coffee powder

80g cocoa

300g soft light brown sugar

1½ teaspoons bicarbonate of soda

½ teaspoon sea salt

375ml hot water

75g non-dairy spread or solid coconut oil

1½ teaspoons apple cider vinegar or white wine vinegar

Chocolate Icing

150g dark chocolate (finely chopped)

75g coconut oil

50g light brown sugar

60ml cold water

1½ tablespoons cocoa

Decoration (optional)

1 tbs edible rose petals or flowers

2 tbs chopped pistachios or almonds

1 tbs orange zest

Do It

Preheat oven 180oC and pop in a baking tray.

For the icing – Put all of the icing ingredients except the chopped chocolate into a heavy-based saucepan and bring to a gentle boil.  Stirring and ensuring all is dissolve. Then turn off the heat and add the chocolate, stir until melted and the icing is glossy. Leave to cool, stirring occasionally.

Line the bottom of a 20cm round springform/ loose bottomed cake tin (you will need a leak proof one, this is a wet batter) with baking parchment.

Place the flour, bicarb, salt, instant coffee, chickpea flour and cocoa in a bowl and mix together.

In a separate bowl, mix together the sugar, hot (not warm) water, non-dairy spread/ coconut oil and vinegar until all has melted and is combined. Stir gradually into the dry ingredients, adding a little liquid at a time, then pour into the prepared tin and bake for 45-55 minutes.

Check after 45 minutes. When done, the cake will be coming away from the edges of the tin and a cake tester will come out clean, apart from a few crumbs. This is a fudgey style cake and you don’t want to overdo it.

Transfer the tin to a wire rack and let the cake cool in its tin.

Give the icing a good stir and check it is nice and thick, yet runny enough to spread on the cake. Pour over the cake and use a spatula to ease the icing to the edges.

A lovely light cake

A lovely light cake

Decorate the cake with scattering of pistachios, orange zest and edible flowers if you have them. Leave to stand for 30 minutes for the icing to set before slicing into the cake.

Store in an airtight container for up to 5 days.

This cake freezes well, without the icing. Wrap the fully cooled cake in a double layer of cling film and a layer of foil. Freeze for up to 3 months. To defrost, unwrap and place on a serving plate at room temperature for 3-4 hours. 

Pop some flowers on your cake - you won't regret it

Pop some flowers on your cake – you won’t regret it

Foodie Fact

For loads of information and nutritional facts about chocolate, or more specifically, cacao, head over to our previous post.  We had an almighty chocolate tasting recently and sampled all the wonders of cacao.


Categories: Baking, Cakes, Desserts, photography, Recipes, Vegan | Tags: , , , , | 20 Comments

Seeded spelt bread & simple tips to make awesome loaves

Seeded Spelt Loaf Seeded Spelt Loaf

Here’s a simple, wholesome and tasty loaf for all made with one of our favourite flours, spelt.  In the wonderful world of bread making, this Seeded Spelt Bread is one for the beginner but will no doubt be enjoyed by everyone.  There is nothing that can beat the fresh wafts of warm bread floating around your house, although Dad’s mulled wine at Christmas does come close.  Bread wafts instantly makes a house into a home.

Shop bought bread, not even the posh deli style stuff, can come close to a lovely loaf of home baked happiness.  Some things you just can’t buy and I believe that most foods are well worth that little bit extra effort and bread is definitely one of those.

There is something priceless and utterly magnificent about the whole bread making process.  Its magical and only takes a little practice and know how.  I’ve popped a few tips below that will get you started on the road to bread brilliance.  If you’re a keen baker, and lets face it, its become a bit of trend recently, this loaf is simple and yet delicious.

A loaf of bread is surely one of the nicest things you could ever give to someone.  If I enter a persons house and they say ‘I’ve just taken some loaves out of the oven’ it’s like entering some kind of ideal parallel universe where everything is just about right.  I was once made a German sourdough loaf by some friends and I rave about it still.  It was over five years ago but I’ll be taking that loaf to the grave!  I wanted to move into their kitchen and make baked goods for the rest of my days.

In my humble opinion, making bread is one of the most soulful things you can do in the kitchen.  Really, I see cooking for people as a privilege.  Once you get the hang of it, the world of bread is yours to explore.   There is no doubting that bread making can be daunting at first and you’ll probably not knock out a perfectly risen and crusty sourdough loaf at the first time of asking.  But stick to the basics and you’ll make something wholesome and full of homemade goodness.

We don’t eat loads of bread in the BHK, I might bake one morning a week.  At work, I bake bread every morning and its one of my favourite ways of starting a day.  All that kneading wakes the body up nicely.  For me, keeping things simple first thing is always a good idea!  

Breakfast loaves at Trigonos, almost ready for the oven

WHAT IS SPELT?

Spelt is one of my favourite flours giving a lovely light and nutty loaf.  It is really different from using wheat flour and is a highly nutritious grain that many people who are sensitive to wheat can enjoy.  Sometimes known as dinkel wheat (a word I appreciate) spelt has been cultivated since 5000BC.  It’s fair to say that folk around here in North Wales have probably been making loaves like this since the Bronze age.

Spelt is basically a sub species of wheat and being an ancient grain, has not been manipulated to meet manufacturing needs (like many variations of wheat have for example).  Spelt is easy on the digestive system as the gluten in spelt is water soluble and breaks down when mixed or chewed.  Being an ancient grain, spelt has kept its hard hull intact.  Many modern wheat grains have no hull which protects the grains from pests and the elements.  These wheat grains have now developed an enzyme inhibitor that keeps pests at bay but effects the way that we digest these grains, as enzymes are an essential part of good digestion.  If you feel bloated or heavy after eating bread, switching to spelt bread may be a good idea.

SIMPLE TIPS FOR AWESOME LOAVES

Bread takes some time and effort, not to mention a little technique and skill:

  • LINING – Line your loaf tin/ oven tray with baking parchment.  If your equipment is not totally non-stick, and that attribute is quite rare, then don’t risk a sticky situation.  Quickly line with baking parchment and you are certain of a simple extraction.
  • PROVING – The texture of a loaf comes mainly from the gluten waking up and doing its thing.   This takes a long proving and some kneading.  You don’t always have to pummel your dough for a long time, you can even leave dough in a fridge or a cool place for a very slow prove, overnight for example.  This allows gluten and flavours to develop and makes for a delicious loaf.  In Wales, it is so cold and we have no central heating, we have no choice but to take it slow.  We have however been known to use a warm hot water bottle to help get our dough woken up.
  • OVEN – Baking in general will mean getting to know your oven.  They are all different and timings may vary.  Where you place loaves/ cakes in an oven has a huge effect on the outcome and results will vary depending on whether the oven is heated by a fan or the main heat source is from the base etc.  It can be trail and error at first and the only way to learn sometimes is an over baked bottom on your loaf.
  • PRESENTATION – Bread looks cool when its a bit rough I believe.  Smooth is nice but try and give the surface some texture by not playing with it too much.  Tears and bobbles are great on bread and add to the texture of an interesting loaf.  You may also like to slash the top of the loaf before the final proving.  This adds texture to the loaf and also looks mighty fine.  Dusting with flour will result in a soft crust and brushing with soya milk will result in a crisp and darker crust.  With wet doughs, the loaf will spread out in the oven a little, this is worth bearing in mind if you have a particular shape in mind.
  • OBSERVE – Its also important to remember to be patient with bread making and flexible.  Observe the bread, whats happening to it?  When proving the loaf, is it rising too quickly or too slowly.  This will all be dependent on the ambient temperature (or you forgot the yeast!!)  Gauge whether the loaf is actually twice the size and amend the timings, less or more.  Sometimes the loaf will take much longer to prove and that is fine and actually preferred.  The key factor is that the yeast wakes up and does its thing, working its magic within the bread.  A quick prove can result in off, sour aromas and big air pockets in the loaf.
  • KNEADING – A wet, sticky dough is always better than dry and floury loaf.  I use oil when kneading the loaf as this will not add flour to the recipe, changing the texture of the loaf.  Many bread makers use dough spatulas instead of hands when ‘kneading’.  The old fashioned image of sleeves rolled up and pummeling an hapless lump of dough is not always the best way to go.  When your dough can stretched easily without breaking, around 8 inches is a good gauge, then its ready.
  • STEAM – Turn your oven at home into a professional bakers oven by adding a cooking tray to a lower shelf whilst preheating and when the loaf goes in, pour some water into the tray.  Creating steam which allows the loaf to develop a nice thick and light crust.  I do this with most loaves.
  • YEAST – This is the magic dust that makes bread rise.  Always keep it separate from salt,  they don’t get along and salt can kill it.  Add them to different parts of the bowl.  You can add your yeast to the warm water before mixing, but I find that it wakes up by itself.

Recipe Notes

I like this loaf with poppy seeds included in the seed mix.  They have a lovely flavour and give a nice bite to the loaf.  You may also like to add dried fruits like dates, apricots or herbs like rosemary and thyme to the loaf.  Spices like cinnamon and even garam masala can be delicious.

Rapeseed is one of my favourite oils and is local to us in the UK.  It has a great flavour that compliments spelt well, but you can use any oil, olive or sunflower etc.

Remember that spelt proves quicker than wheat.  I have proved this loaf twice, but you can easily omit the first prove and go straight for a single 40 minute prove followed by baking.  This is of course quicker and leads to a lighter loaf and ever so slightly crumbly.  Not better or worse really, just different.

This bread can be baked in a loaf tin, this makes it easier to handle as the dough can be quite wet.  If your just starting on your bread journey, go for a 1kg tin here.  Handling a spelt loaf is different from a wheat loaf, it can be quite floppy and needs some gentle encouragement (see below).

Add white flour instead of spelt for a lighter loaf.

Due to the gluten being different in spelt, it does not take as much kneading as wheat.  This can actually break down the gluten in the loaf, as oppose to strengthen it as with wheat.


Seeded Spelt Bread

The Bits – For one large loaf (10-12 slices)

500g spelt flour

1 teas yeast

1 1/3 teas salt

1 tbs malted rice extract (or sweetener of choice)

2 tbs rapeseed oil (plus extra for brushing)

2 handfuls mixed seeds (choose from poppy, sesame, sunflower, pumpkin, hemp etc)

350ml warm water


Do It

In a large mixing bowl add the flour, seeds, salt and yeast.  Stir the sweetener into the water and gradually pour the water into the flour mix. Mixing it in with your hand or a wooden spoon.   Once all of the water is combined and a dough is formed add the oil and brush/ rub all the excess dough on your hands/ spoon back into the bowl and begin to knead the dough.

If your bowl is big enough, its possible to knead it in the bowl.  Otherwise turn out onto a cool surface, ideally lightly oiled.  Knead, it will be quite sticky, don’t worry, just give a good twist and pummel.  A lightly film of oil on your hands helps with the stickiness.  Work it!  Imagine you’re a kid again playing with food.  Its fun!  Give it roughly a couple of minutes kneading.  When the dough is smooth and pliant, you’re ready.

Form a ball and lightly oil it all over, in the bowl, lightly cover with a kitchen cloth and leave in a place that is slightly warmer than room temperature for 45 minutes.  The warmer it is, the more the yeast will come to life, so keep your eye on it.  The key is that the dough doubles in size.

A nicely shaped spelt dough ball, ready for its first prove A nicely shaped spelt dough ball, ready for its first prove

Now knock it back (or knead it again).  Basically knocking the bubbles out of the bread and getting the gluten going even more.  This will all add to the firm and chewy texture of the loaf.  Form a rough and fat ball.  It will spread out, so tall is good.

Sprinkle or roll the dough in seeds if you like.  Grab an oven tray lined with baking parchment and place your dough on it and leave to prove for 35 minutes, until the dough has almost doubled in size (ideally, in a very perfect world, leaving just a little room for expanding in the oven).

Preheat an oven to 200oc and place a baking tray on a lower shelf.

The loaf ready for its final 35 minute prove The loaf ready for its final 35 minute prove

This is spelt so the loaf may now look like a fat pizza base.  This is fine.  Using your hands or a spatula, gently form the loaf back together into the shape you prefer, pushing it and tucking it in.  You don’t want to handle it much at all at this stage.  A bit of gentle persuasion is best.  The loaf will be quite thin, nothing like a sphere but should not resemble a gorgeous, 2D frisbee.

Pour a couple of cups of water into a the now hot oven tray (lots of steam) and pop the loaf into the oven on a middle shelf.

(The tray steaming step is not essential).

Bake for 40-45 minutes.  Tap the base, it should sound nice and hollow with a good crust.  If this is not the case, pop it back in for another five minutes and repeat the process.

Lovely light spelt loaf with a good thick crust Lovely light spelt loaf with a good thick crust

Once baked, leave the loaf on a wire rack (with a few inches of clearance underneath, too close to the surface and you’ll end up with a soggy bottom, which is never pleasant).  I give it at least 30 minutes before tucking in.  If you are in a hurry to cool the loaf down, cut in half or quarters.  This will release the steam making the loaf cool much quicker.

Serve

Makes a brilliant slice of toast and is ideal with soups especially.  I like it best warm with a drizzle of nice rapeseed oil or a little pot of balsamic vinegar and olive oil.  Just a quick dip in that and then………woahhhhhh!  Lovely stuff.

Foodie Fact

Spelt is a good source of protein, dietary fibre, some B vitamins and minerals, especially manganese with good levels of iron.  It makes for a highly nutritious loaf.

Categories: Baking, Healthy Eating, photography, Recipes, Vegan, Wales | Tags: , , , , , , | 4 Comments

Baked Mushrooms with Sun-dried Tomato Pesto and Walnuts

P1270083 Baked Mushrooms with Sun-dried Tomato Pesto and Walnuts

Just such and easy and flavoursome number!  The kind of dish you could serve as a main course or starter  at a dinner party (aka when you’re trying to look a bit flash in the kitchen) and really not go to any great trouble.

One of the main reasons for me popping this recipe on the BHK is the wonderful Vegan Recipe Hour, happening soon over on Twitter.  A great place for vegan cooking inspiration and tonight the theme is……well……MUSHROOMS!

They look lovely and pack some intense flavours; mushrooms, sun-dried tomatoes, roasted nuts, pesto, these are some of the bedrocks of richness and savoury flavours in a vegan cooks locker.  Combined……POW!  I’d also like to mention that this is most definitely healthy.

UMAMI!

One of the five basic tastes and a word that sounds like something Vic and Bob would exclaim (with loads of reverb) mid ‘Shooting Stars’.  If you are not British, this may take some explaining…..this clip might help.

Umami is a savoury taste in things like mushrooms, nuts, fermented foods like miso and tamari, yeast extract, seaweed and sun dried tomatoes, they’re packed with that mysterious and delicious flavour that acts like catnip to our tastebuds.  We know we love it!

The history of umami can be found here and it is of course the source of MSG.  Its natures MSG, which means all the crazy good flavour without the unpleasant side effects.  Many rich and flavourful plant based meals use something umami as a base.

I have started to make these mushrooms for lunch regularly and they always go down a treat.  This is a dish I choose when I’m giving myself a bit of a break.  It’s so easy!

Now.  Lets make something delicious.

Recipe Notes

The mushrooms will shrink quite a bit during cooking.  Make sure you get big ones, or double up per person.  I have found that most folk like a second mushroom after they’ve tasted the first.

Portobellos are full of flavour and texture but field mushrooms are also fine (and a little cheaper).

I always try to make my own pesto, but at this time of year, fresh leafy herbs are not exactly sprouting from the earth.  You could use a good jar of vegan pesto, you’ll find this in most supermarkets and especially health food shops or similar.

The Bits – For 4

4 large mushrooms (peeled and the end of stalks trimmed off)

Pesto

2 big handfuls sun dried tomatoes (roughly chopped)

2 big handfuls basil leaves

1/2 lemon (zest)

3 large cloves garlic (peeled and crushed)

1 handful cashews (best when soaked in warm water for an hour before)

50ml+ olive oil

2 tbs nutritional yeast flakes

Sea Salt (to taste)

OR

10-12 tbs green pesto (of your choice)

Mixing in the sun dried tomatoes and lemon (zest) – same quantities as above


2 handfuls walnuts (roughly chopped)


Topping

Fresh green herbs – parsley, thyme, basil

P1270079 Fresh out of the oven

Do It

Preheat an oven 180oc.

Peel the mushrooms, lightly oil a baking tray, sprinkle the mushrooms with salt and pepper.  Bake the mushrooms for 15-20 minutes.  They should be soft but still nice and succulent.

Place all of the pesto ingredients into a food processor (except the olive oil) and pulse until a chunky pesto is formed whilst drizzling in the oil.  Or, just mix the tomatoes and lemon zest into your shop bought pesto.  Taste and season with salt if needed.  Adding more nooch (nutritional yeast flakes) will up the cheesiness. A good thing.

Spoon roughly 2-3 tbs of the pesto over each mushroom and sprinkle with walnuts.  Pop back into the oven for 10 minutes to warm them through.  Thats it!

Sprinkle over some herbs and serve soon after.

P1270073


Categories: Dinner, gluten-free, Healthy Eating, Recipes, Vegan | Tags: , , , , , , , | 4 Comments

Blog at WordPress.com.